
The card machine, step by step.
Each flow shows the card machine screens in the order they appear. The data on screen is sample data.
Login
Sign in with the store email and password to open the sale screen.
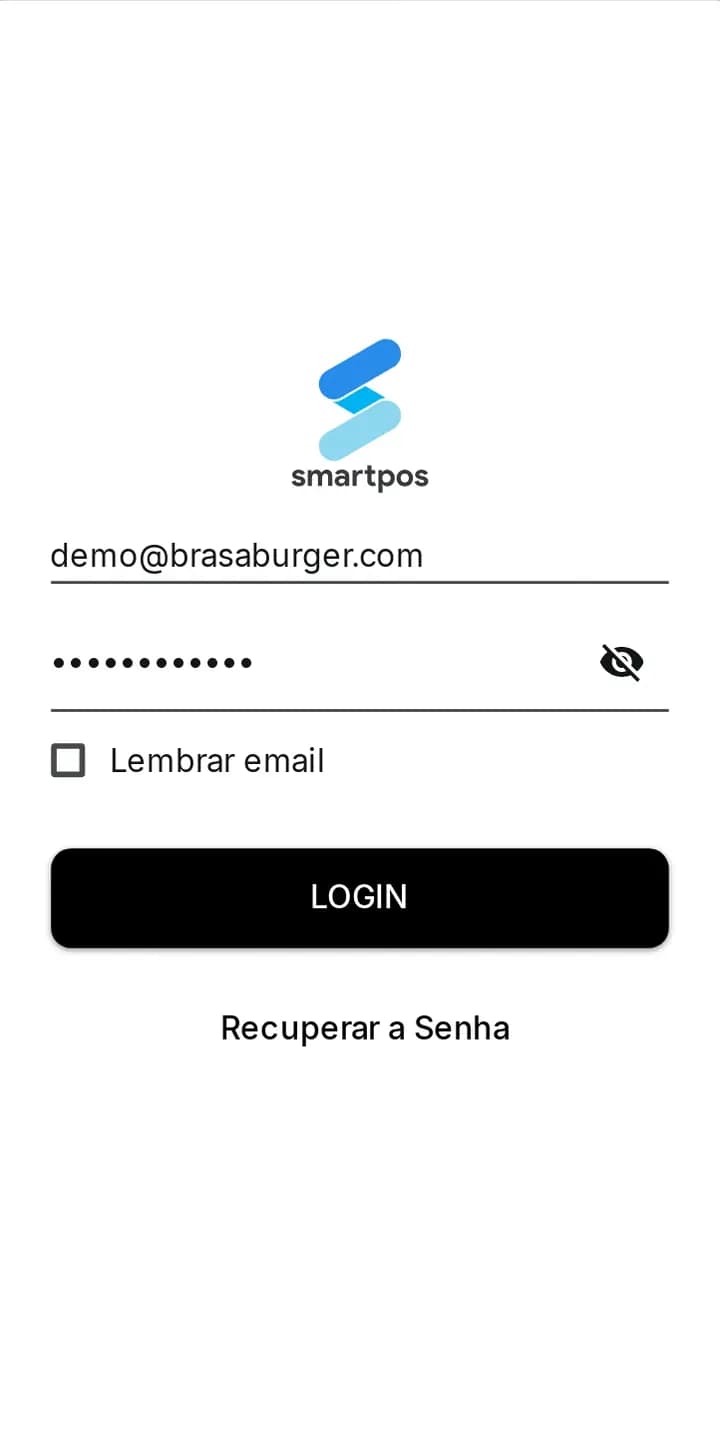
Step 1Card machine login screen: email, password and the LOGIN button.
Sale
Tap products to build the order. Products with add-ons open their details before going into the cart.
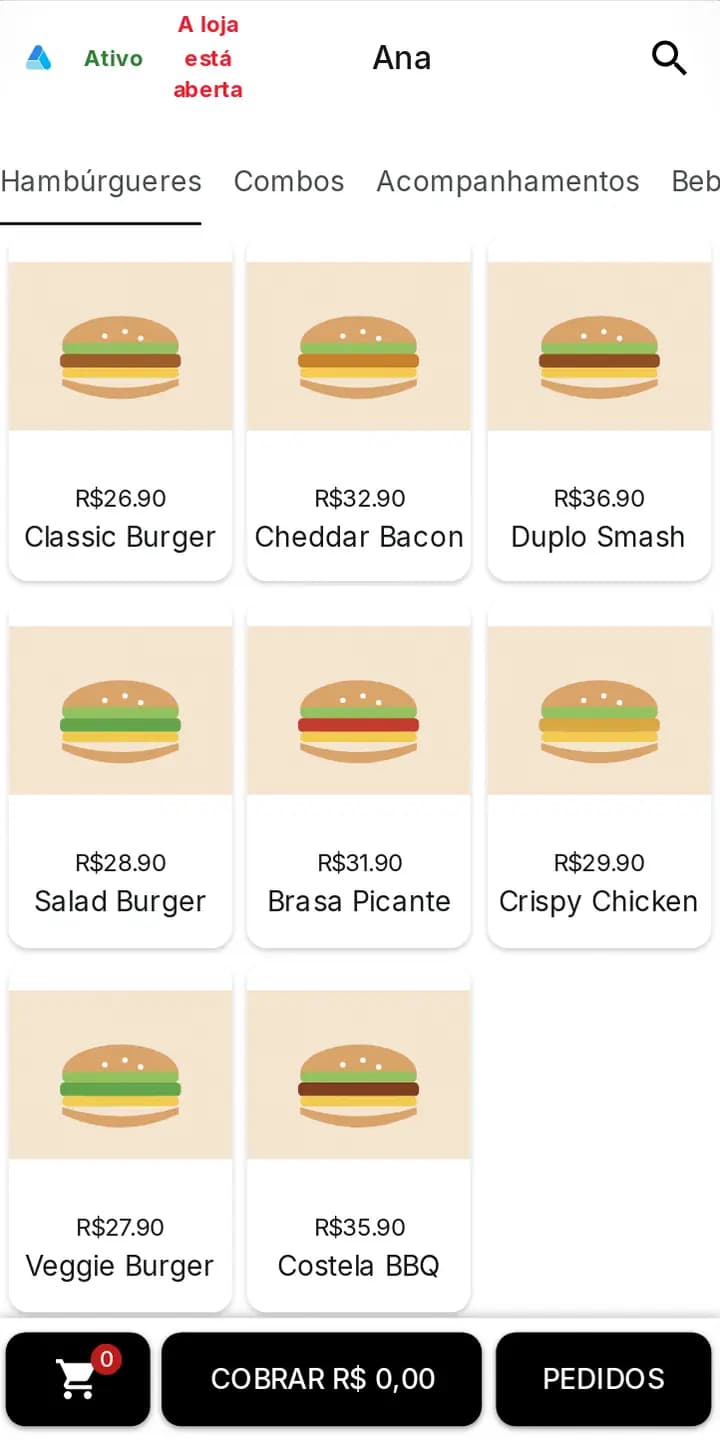
Step 1Sale screen after login, with section tabs and products. 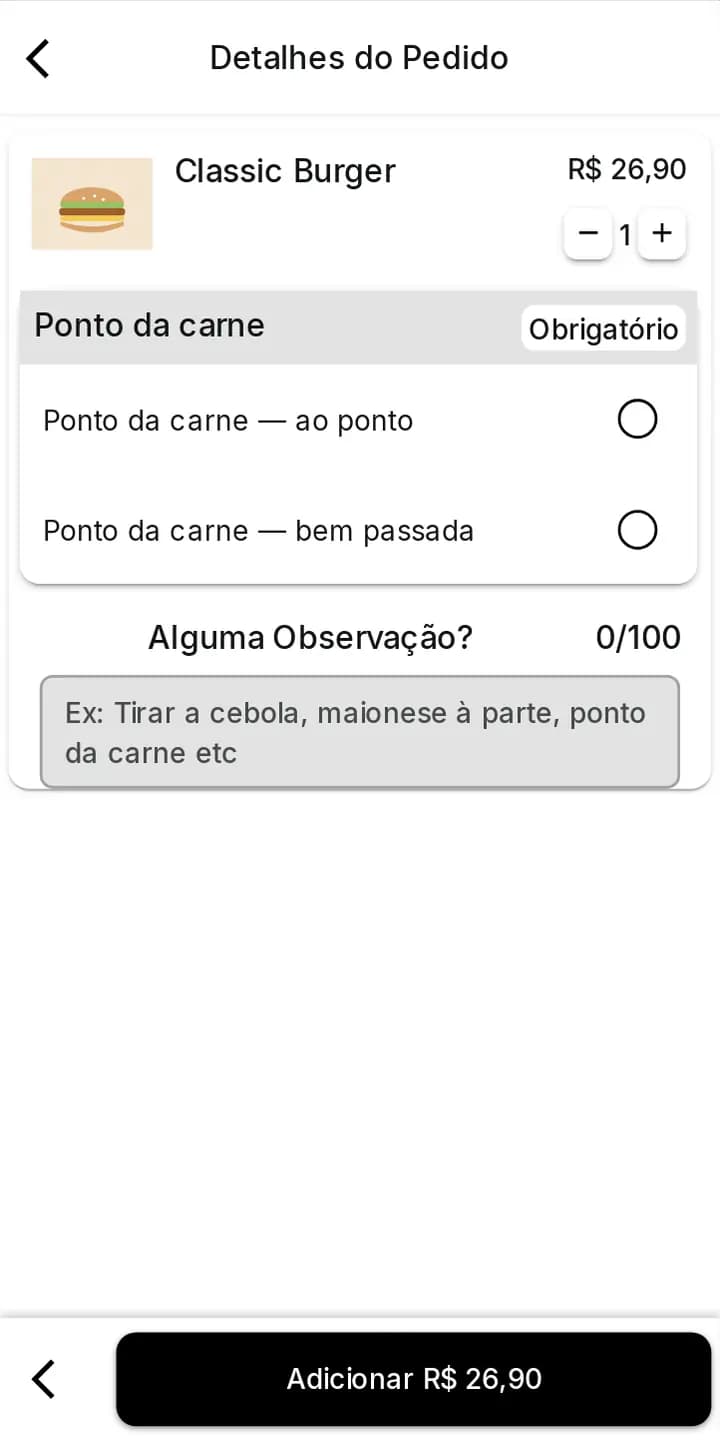
Step 2Burger details: choosing how the patty is cooked is required. 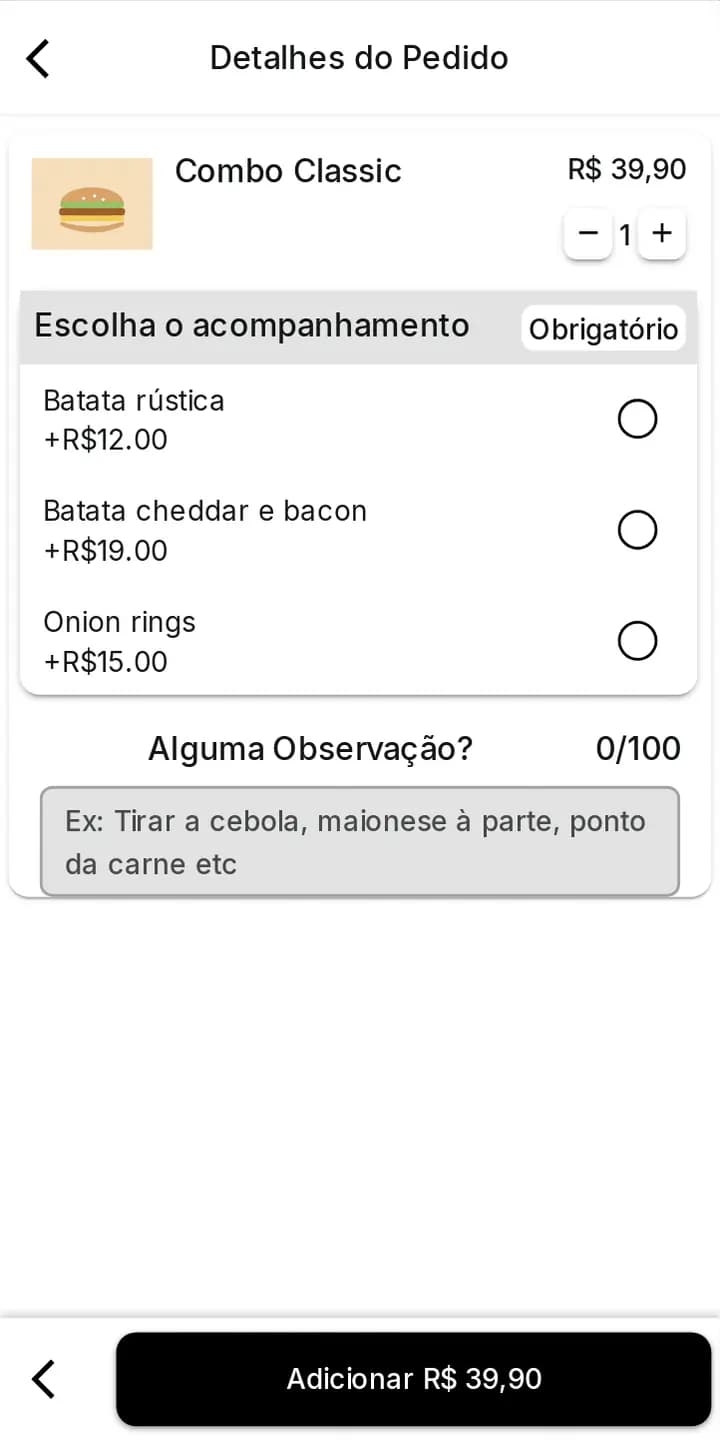
Step 3Combo details: choose the side. 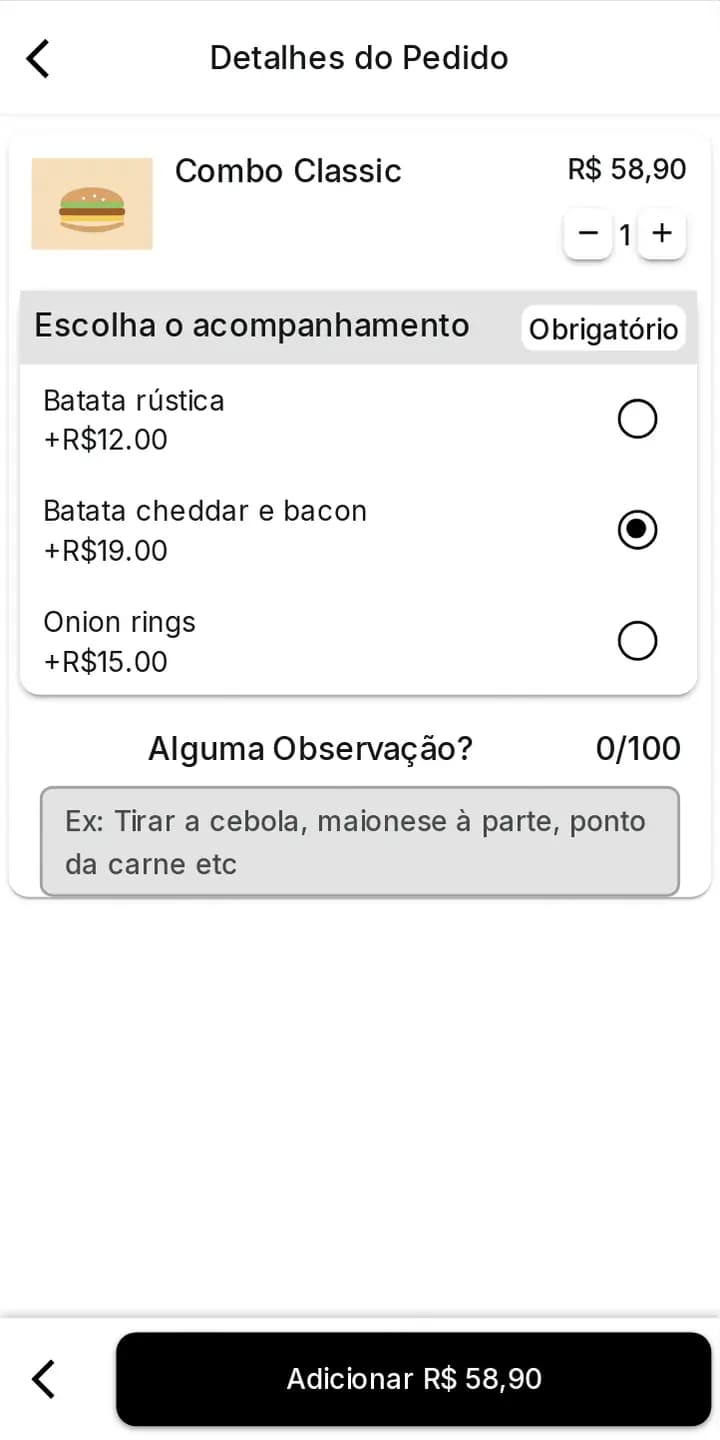
Step 4Side chosen; the price updates. 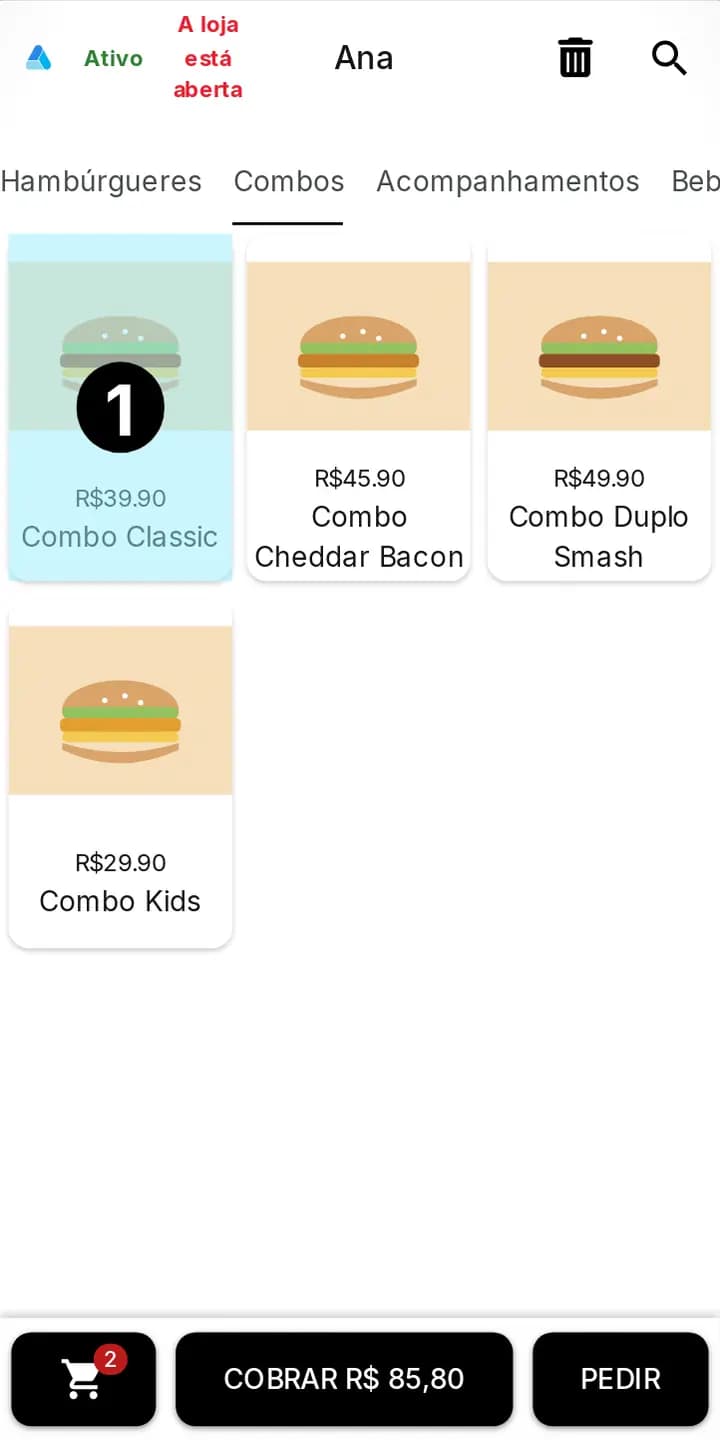
Step 5Sale with items: the cart badge shows the quantity. 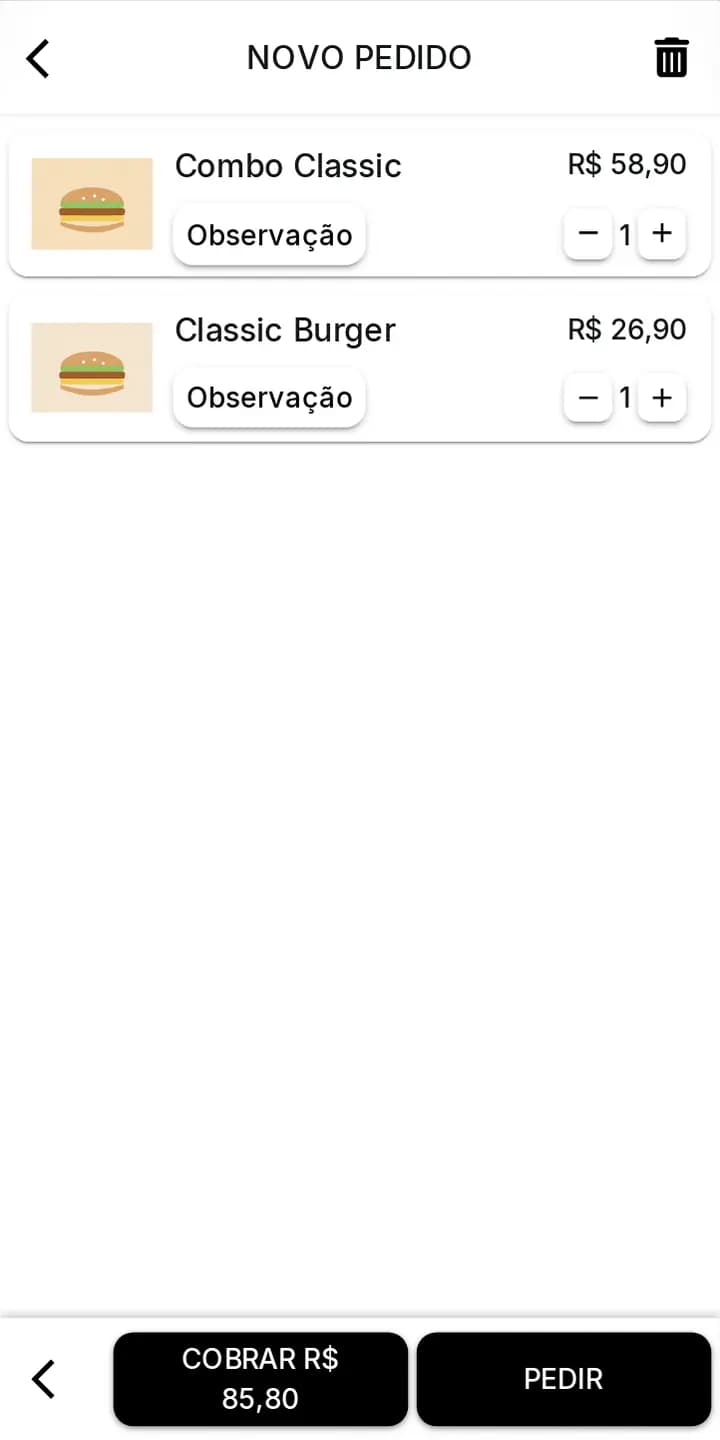
Step 6Cart with the items, notes and total. 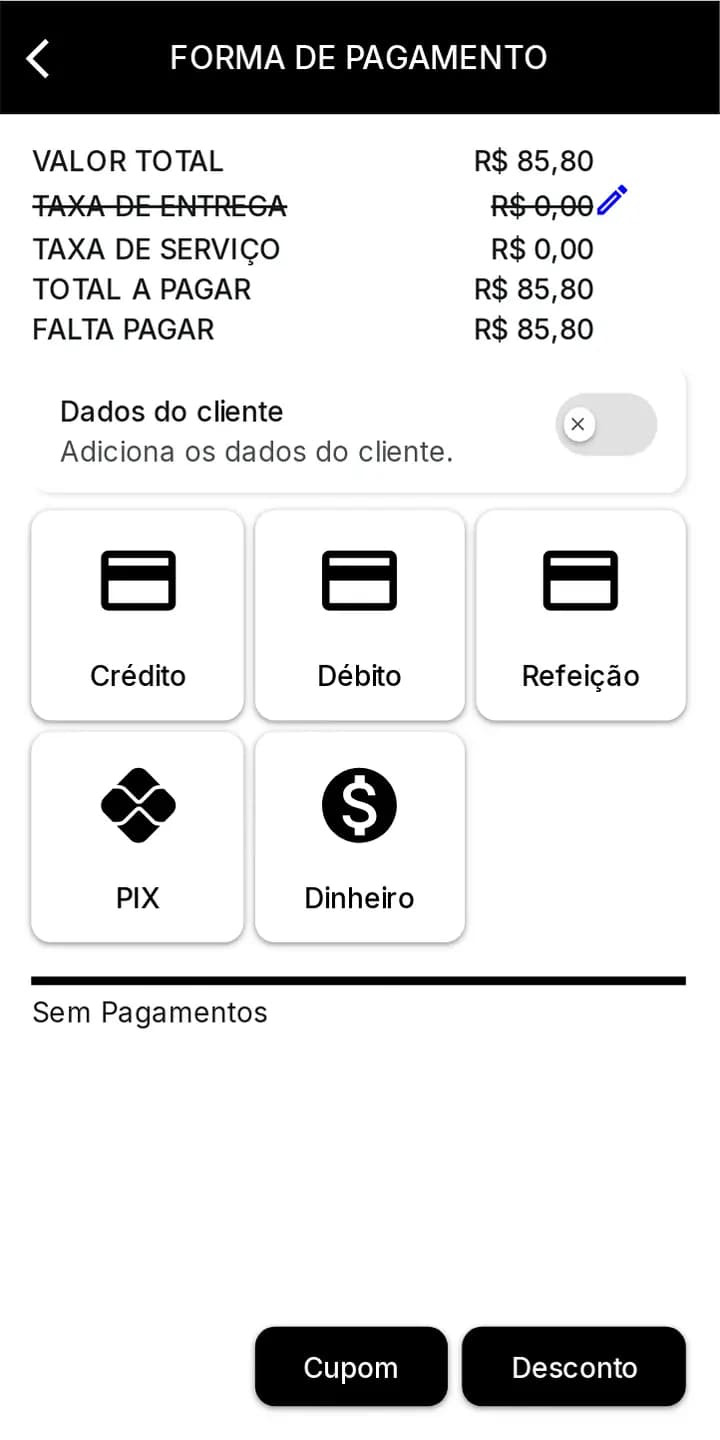
Step 7Payment method: total, fee and the Credit, Debit, Meal voucher, PIX and Cash buttons.
Delivery
With Delivery on, the sale screen gets a button to place the order with the delivery details.
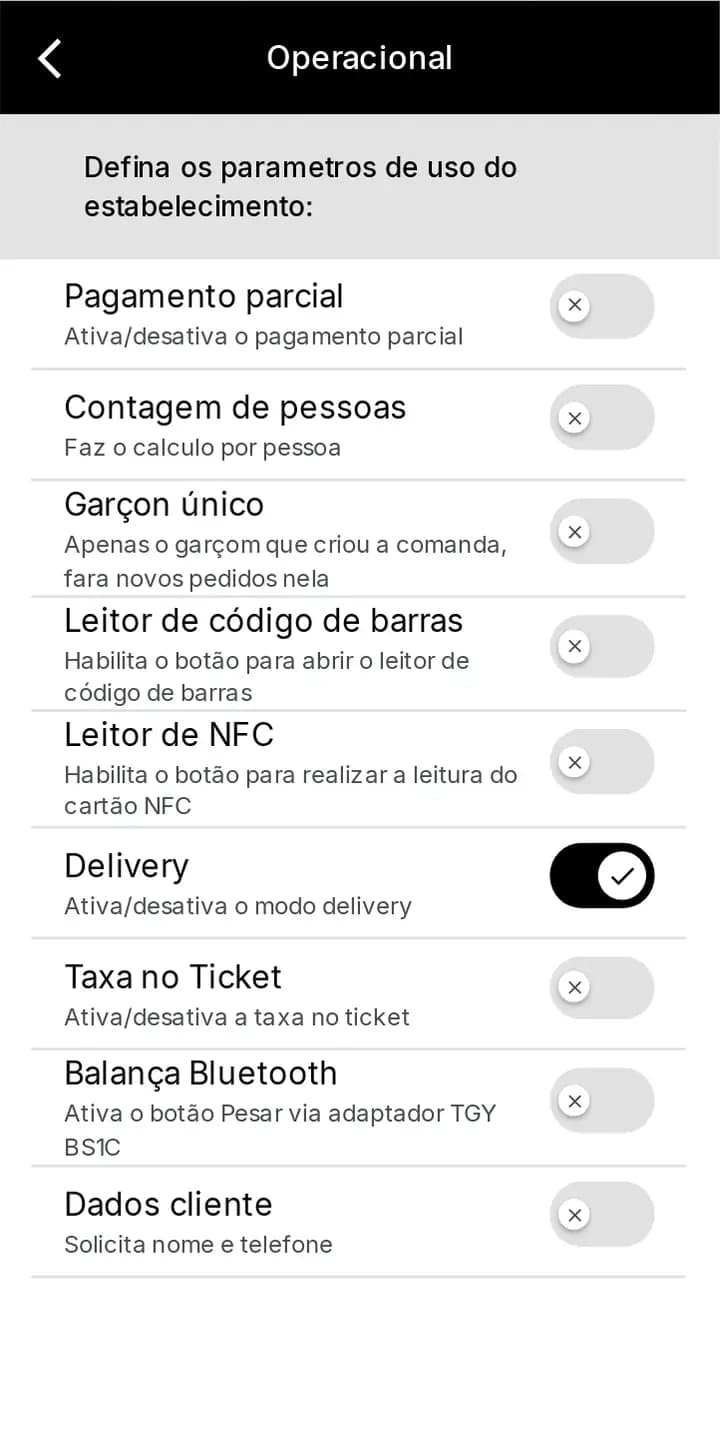
Step 1Turn on Delivery in Settings > Operational. 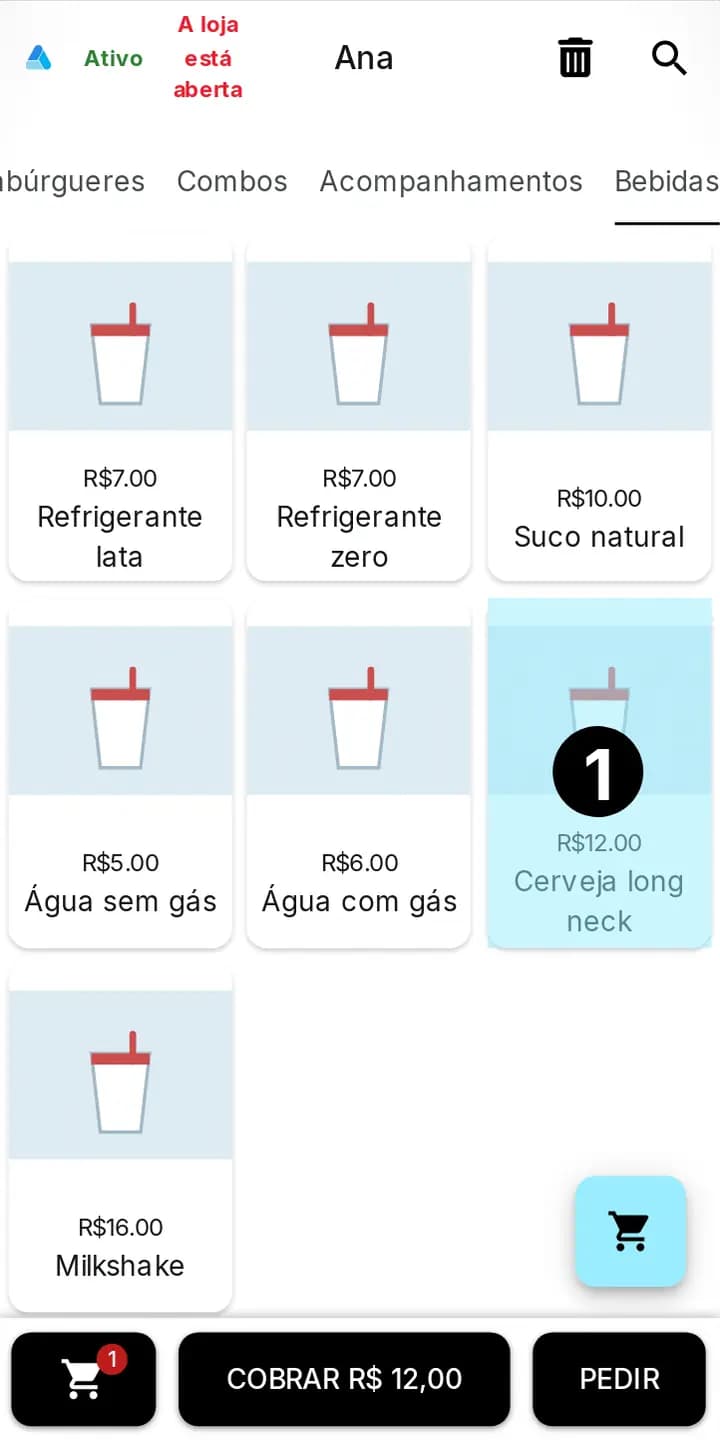
Step 2The delivery button shows up on the sale screen. 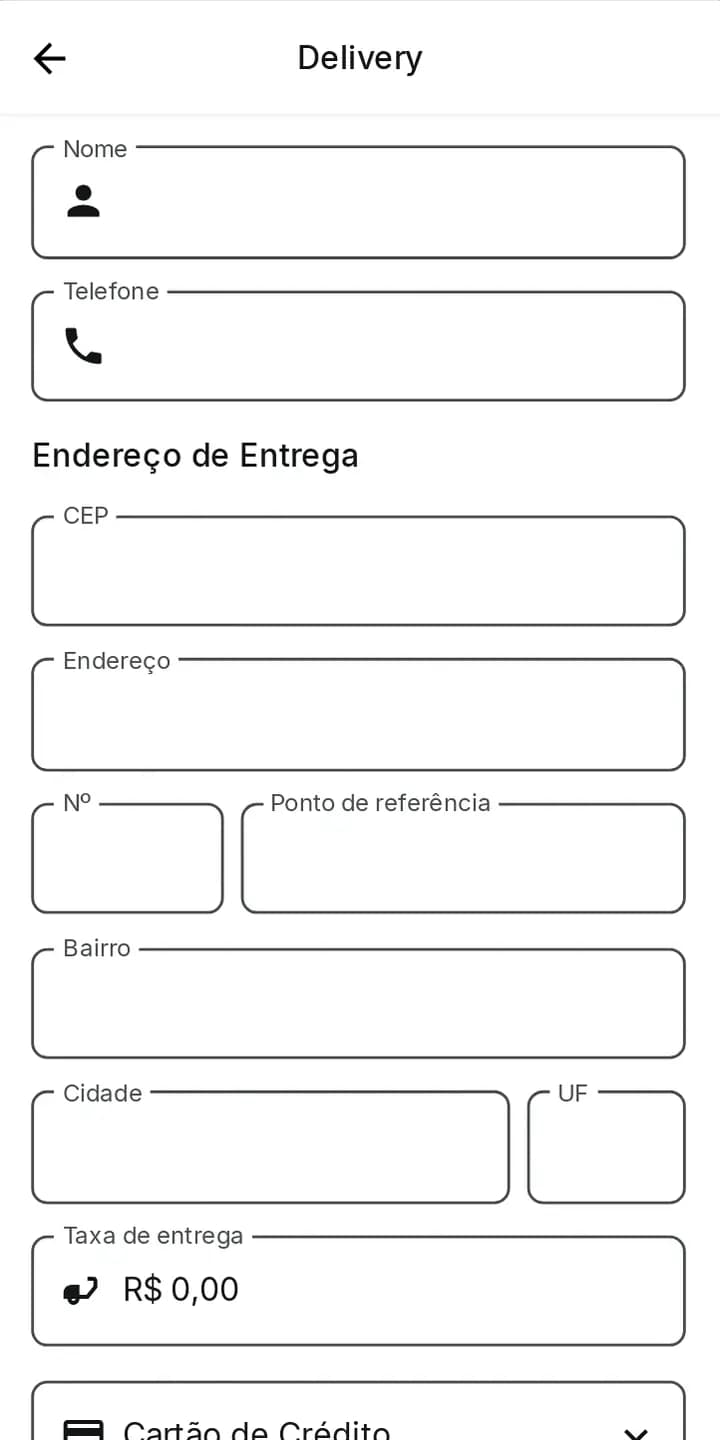
Step 3Delivery form: customer, phone and address. 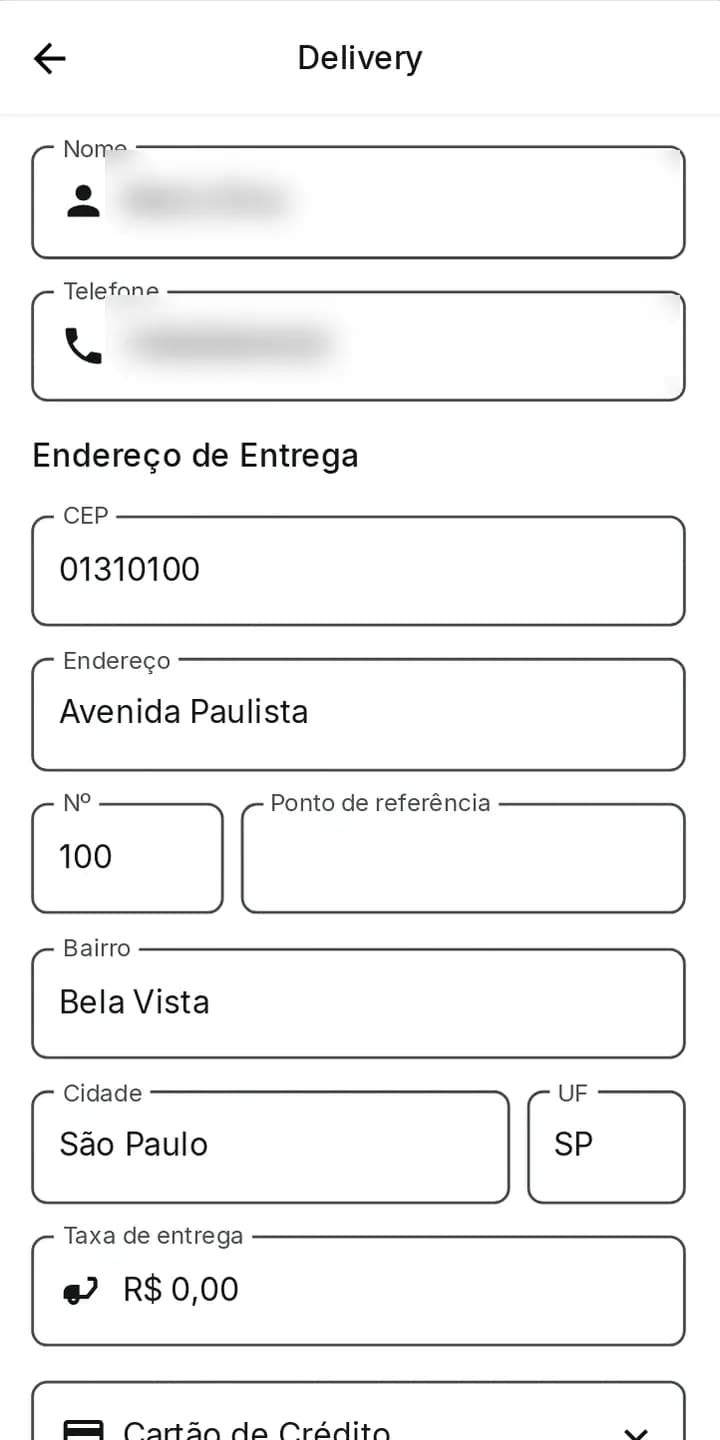
Step 4Filled-in form (name and phone blurred). 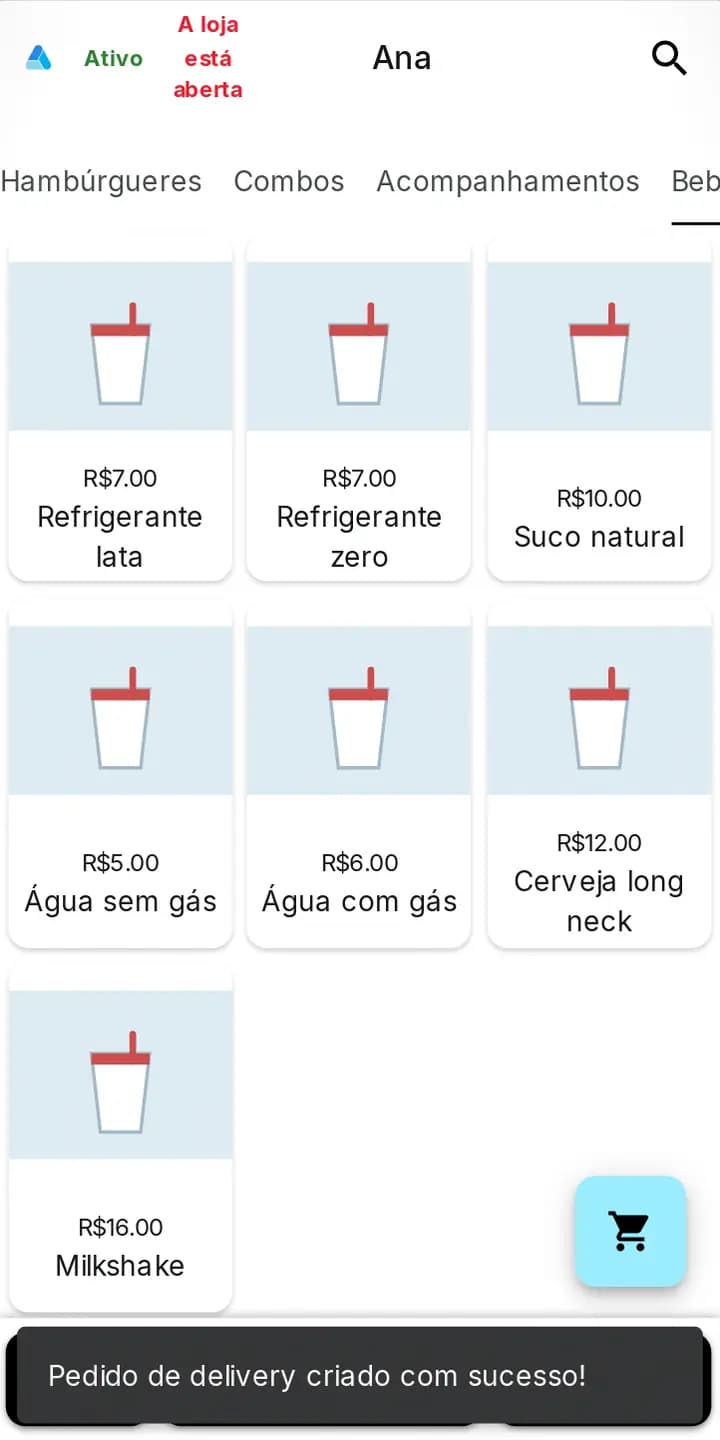
Step 5Delivery order placed.
Commands and tables
PEDIR puts the cart on a table or command. In PEDIDOS you see, charge, reprint and open each one.
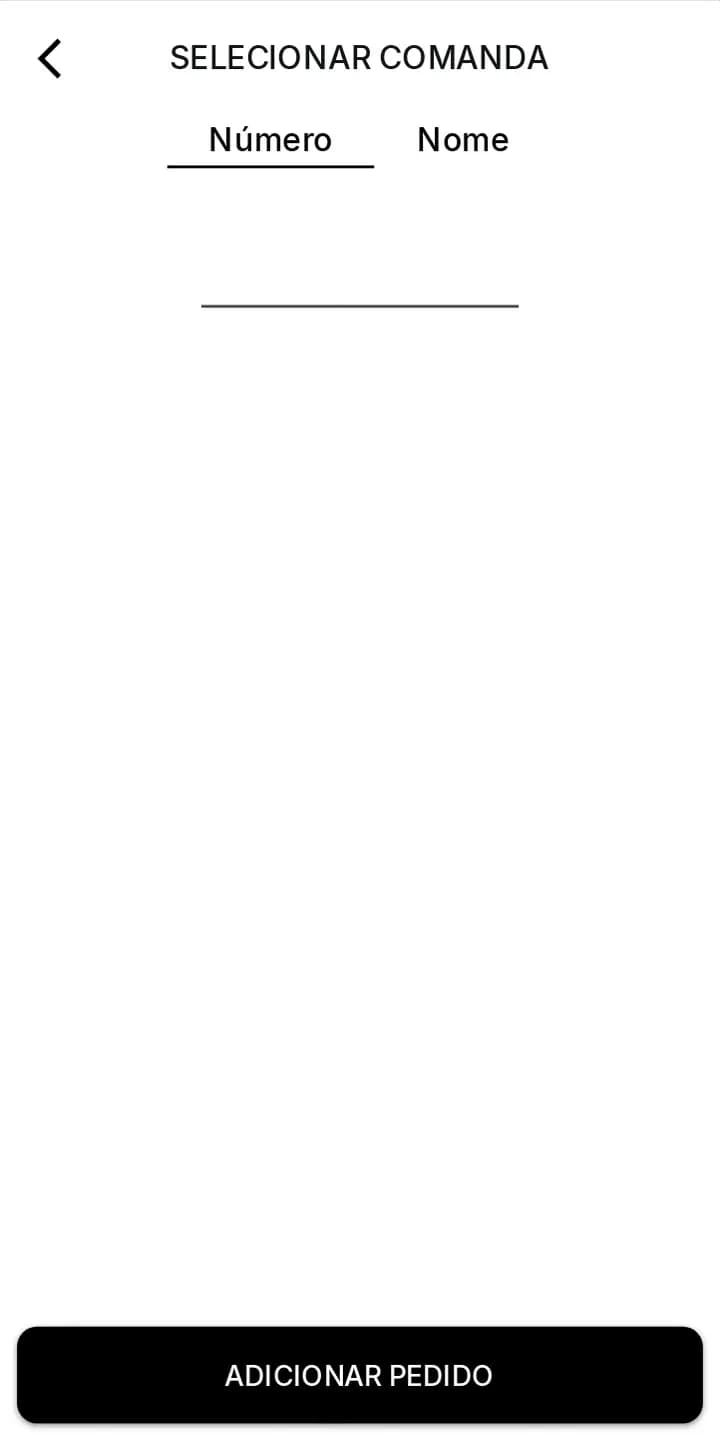
Step 1PEDIR opens Select command (Number or Name). 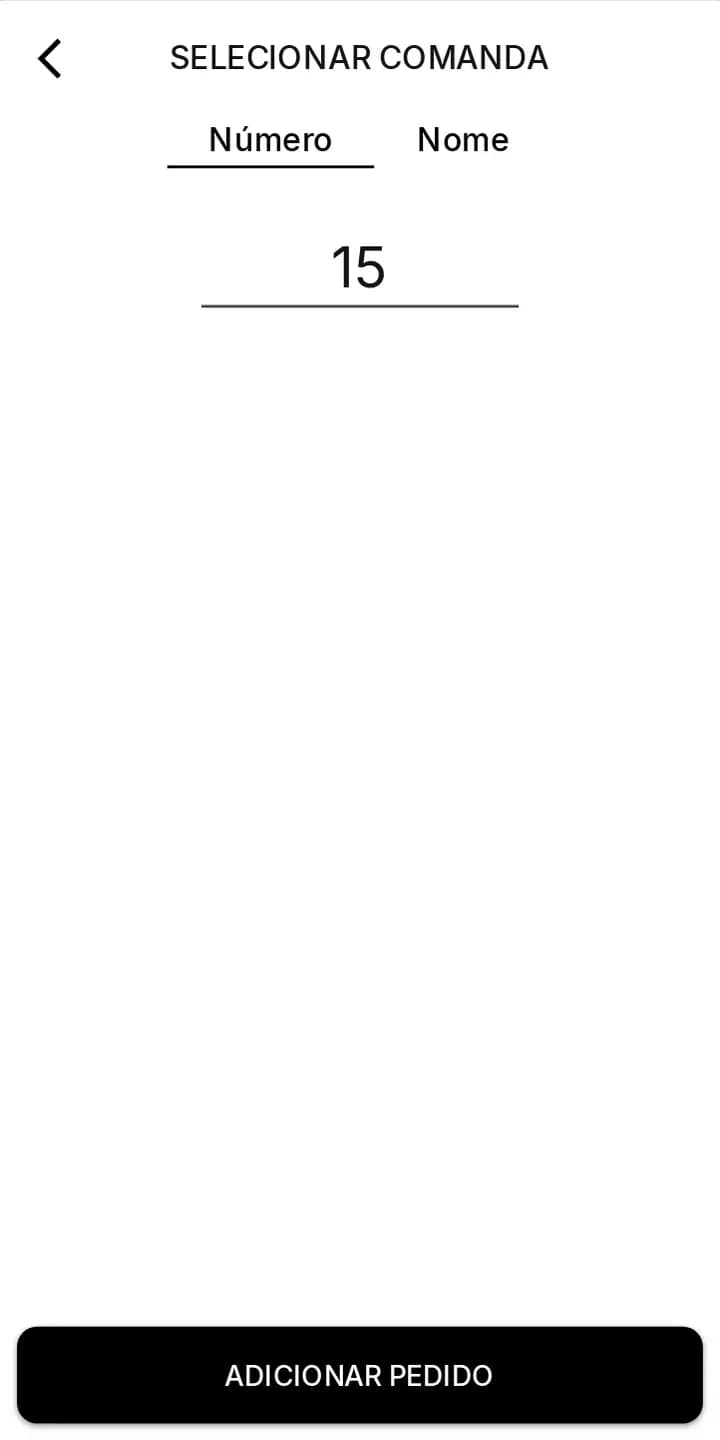
Step 2Table number typed (15). 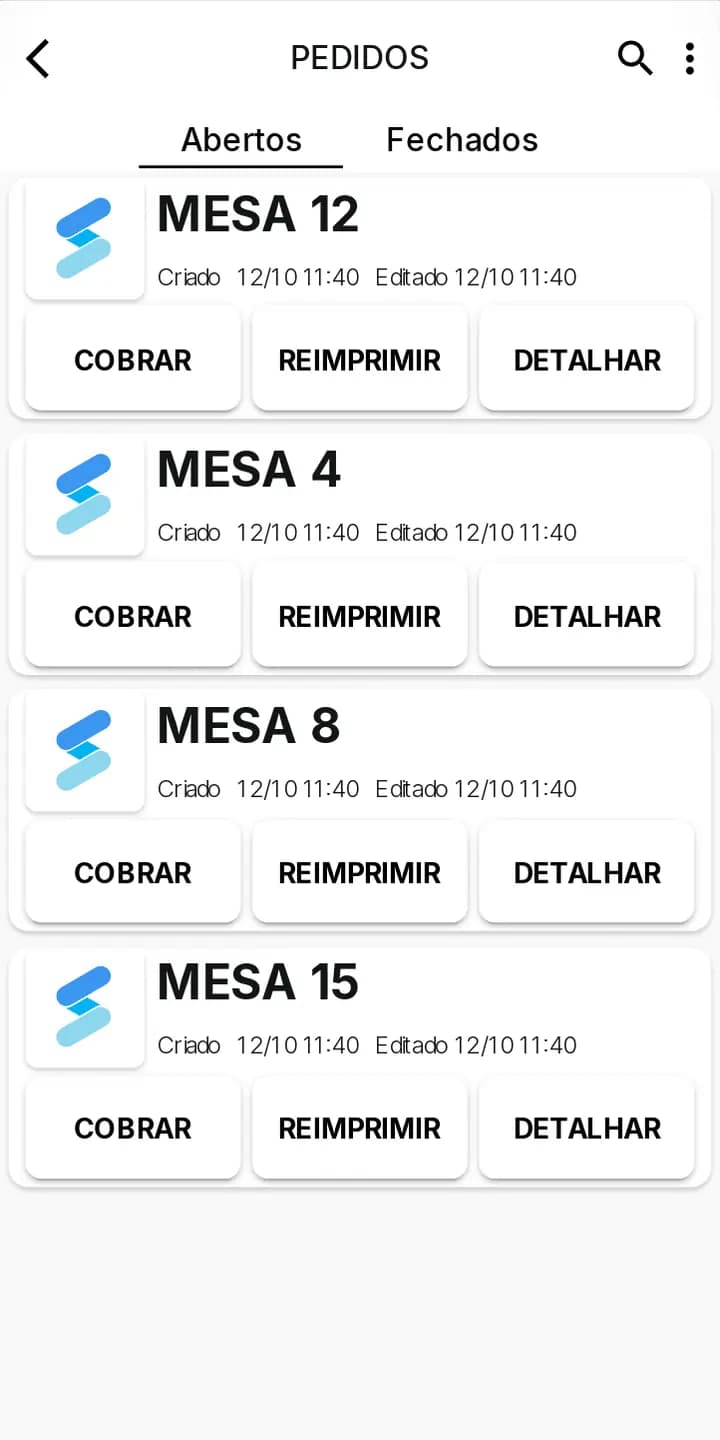
Step 3PEDIDOS: open tables with COBRAR, REIMPRIMIR and DETALHAR. 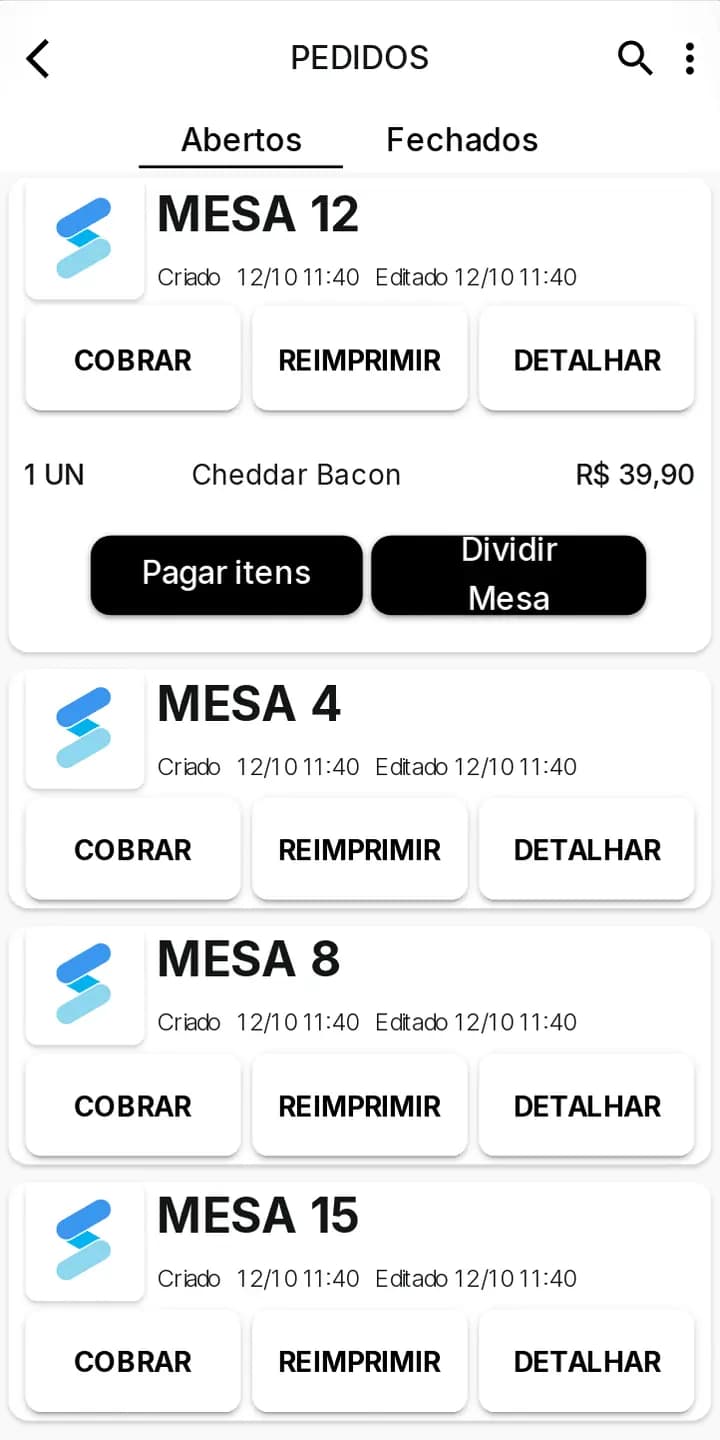
Step 4Table details with items, Pay items and Split table.
Card
Pick Credit, Debit or Meal voucher, check the amount and present the card.
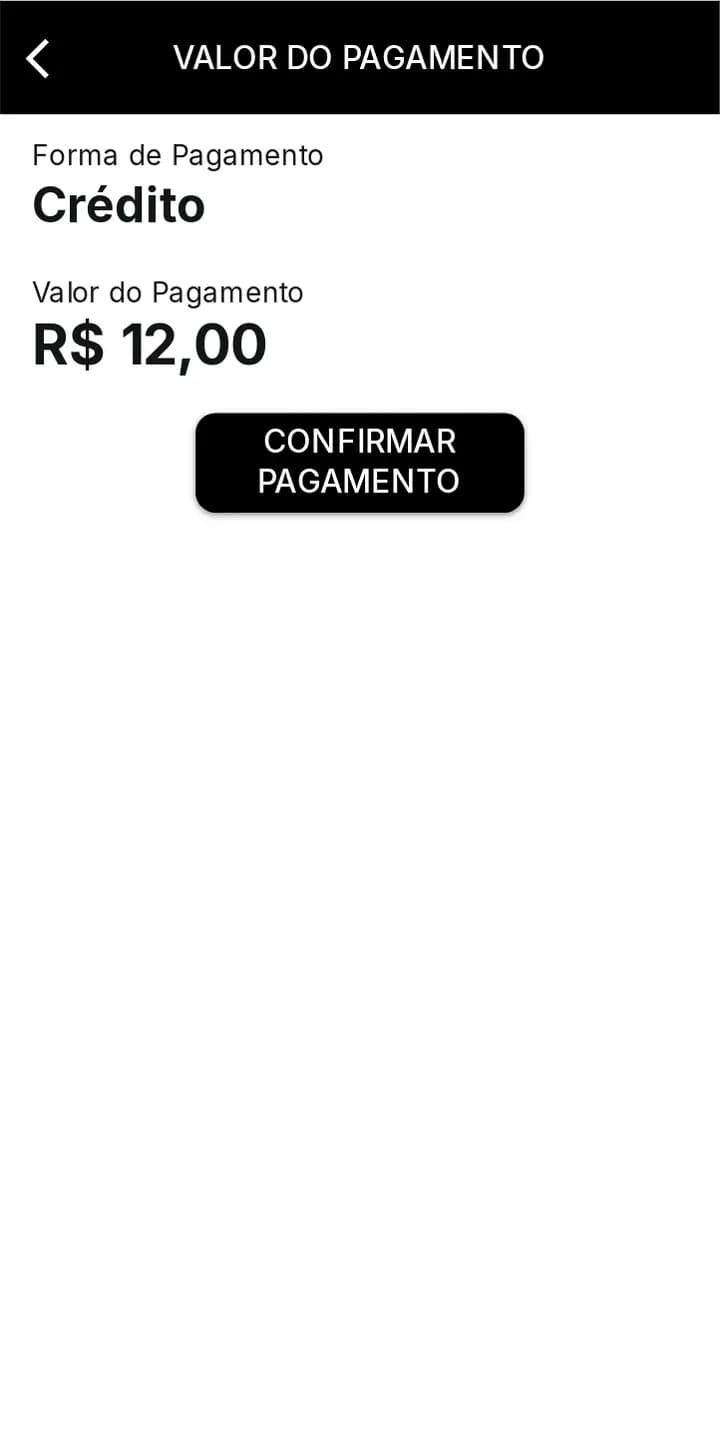
Step 1Credit: check the amount and confirm. 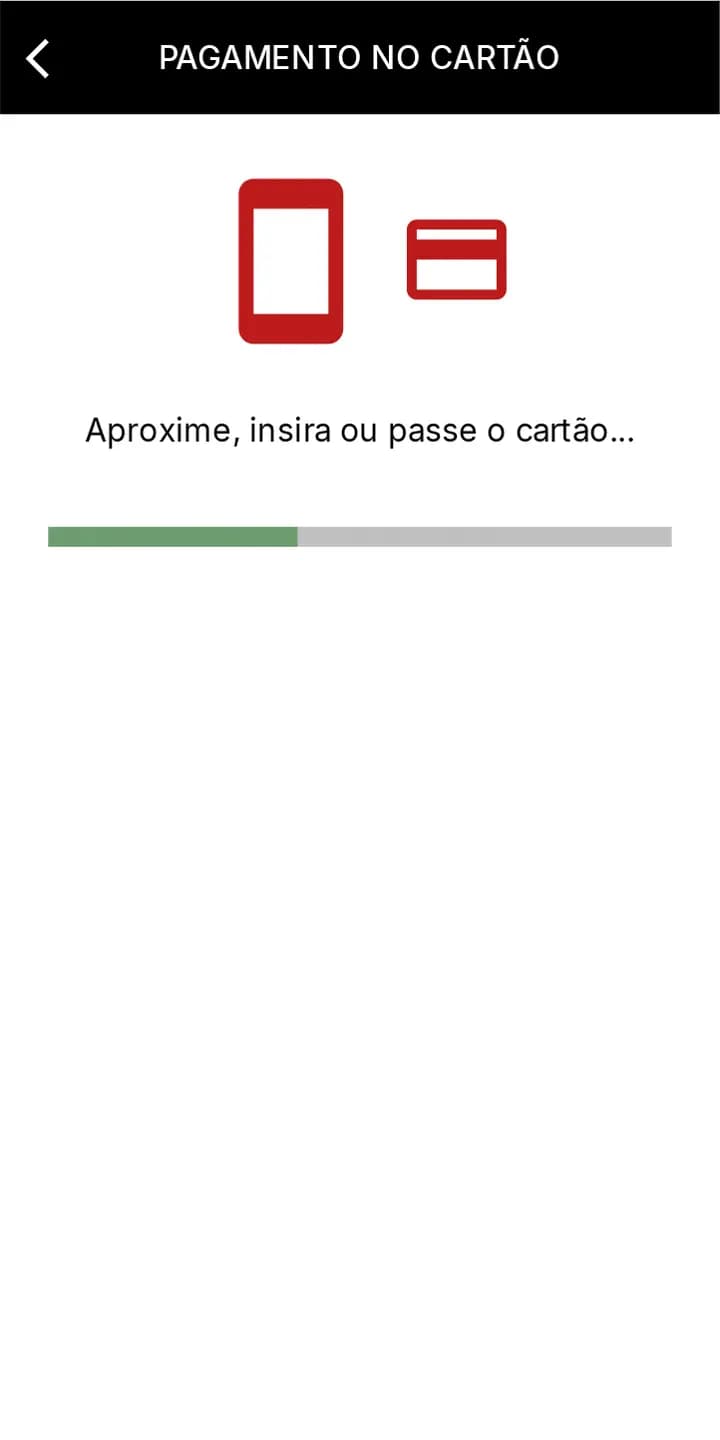
Step 2Tap, insert or swipe the card. 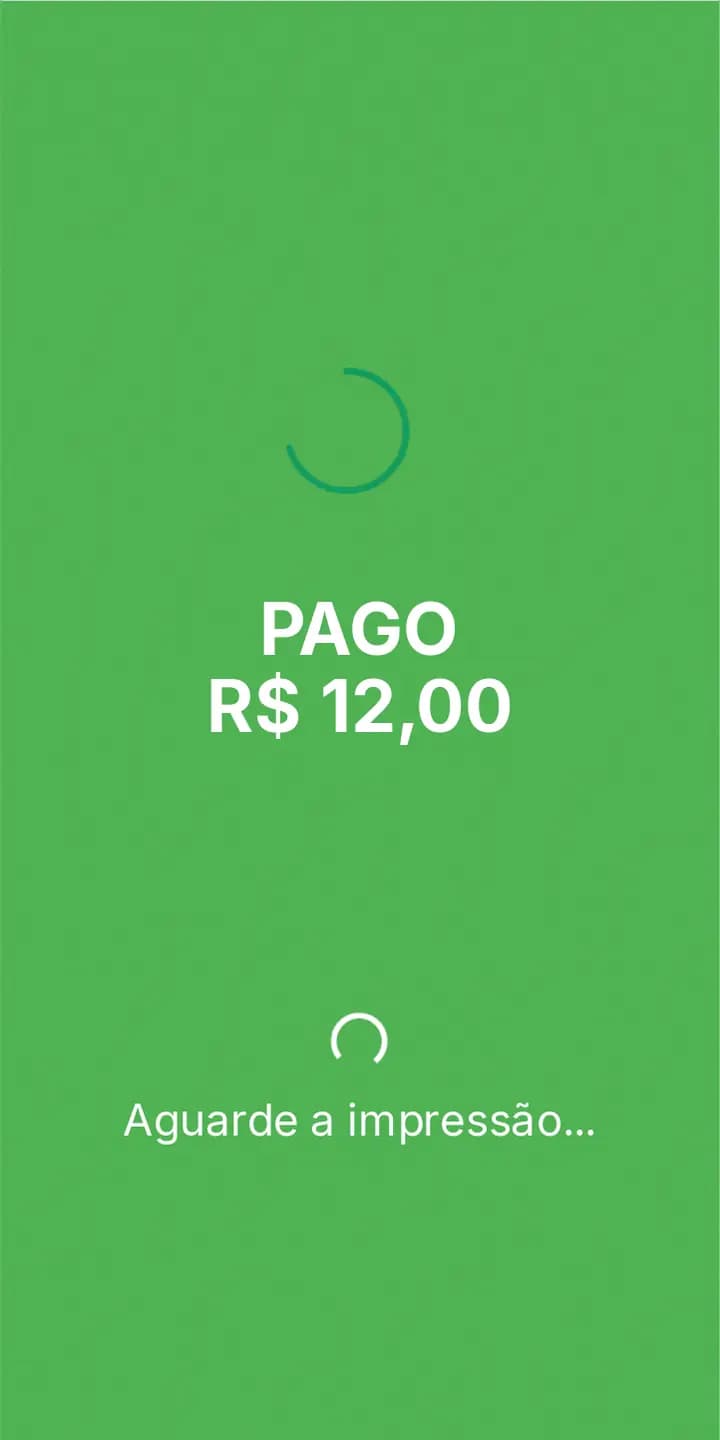
Step 3Payment approved, waiting for the receipt.
Pix
Pix shows a QR code on screen. Once the customer pays, the machine confirms it on its own.
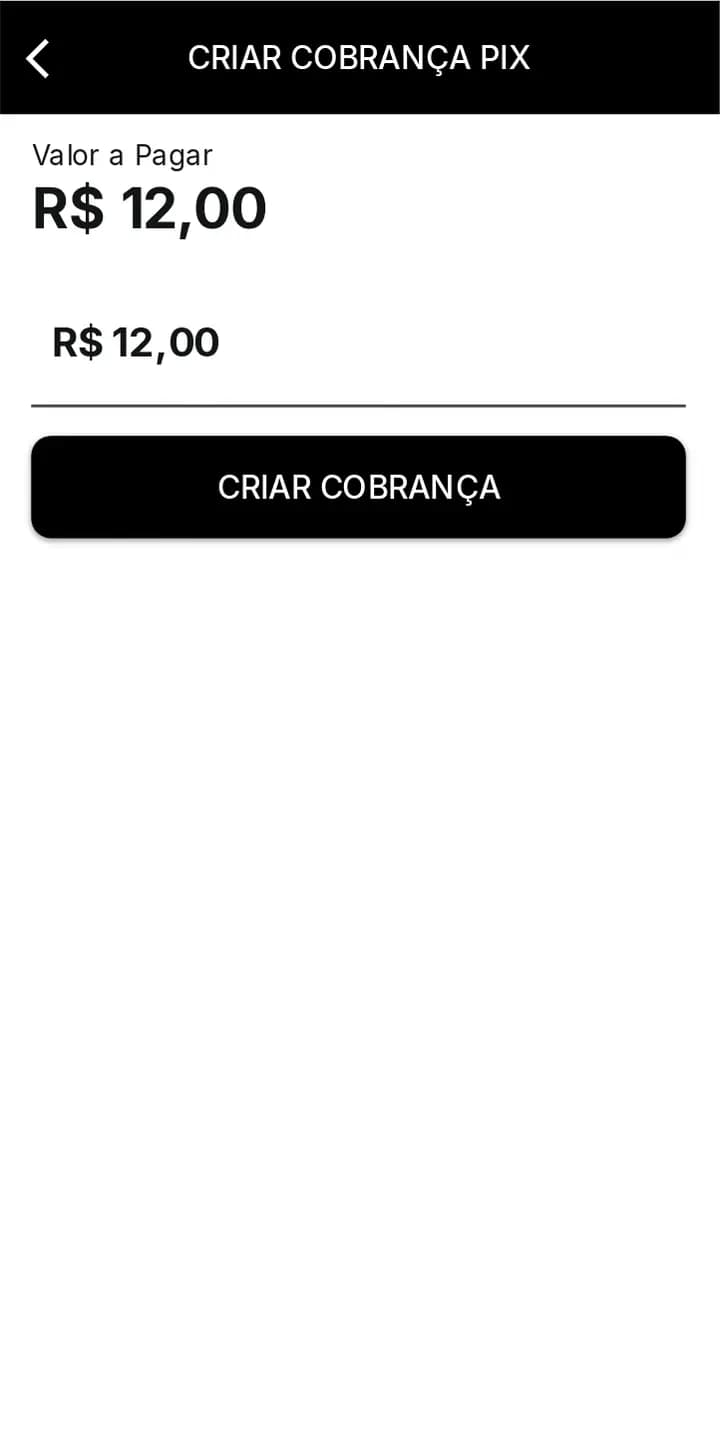
Step 1PIX: check the amount and create the charge. 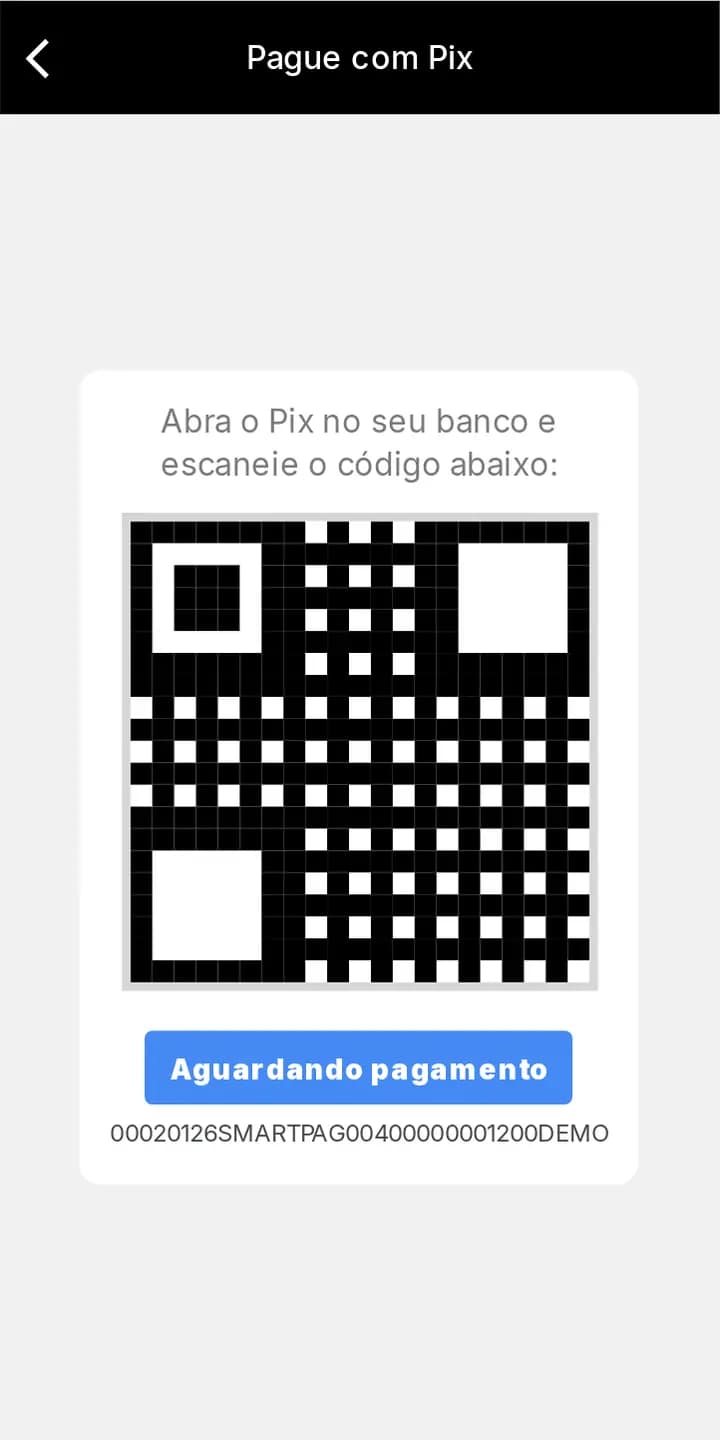
Step 2Pix QR code for the customer to pay. 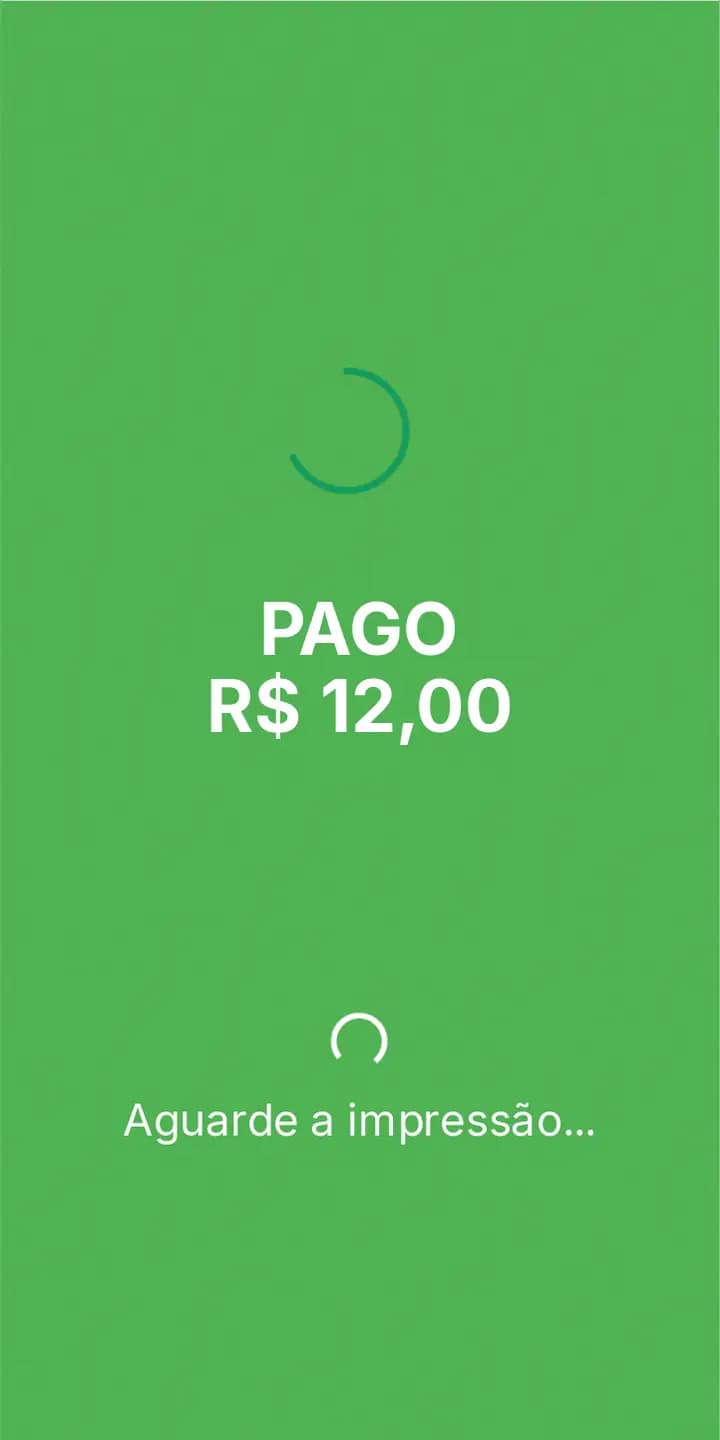
Step 3Pix paid.
Cash
Type how much the customer handed over and the machine works out the change.
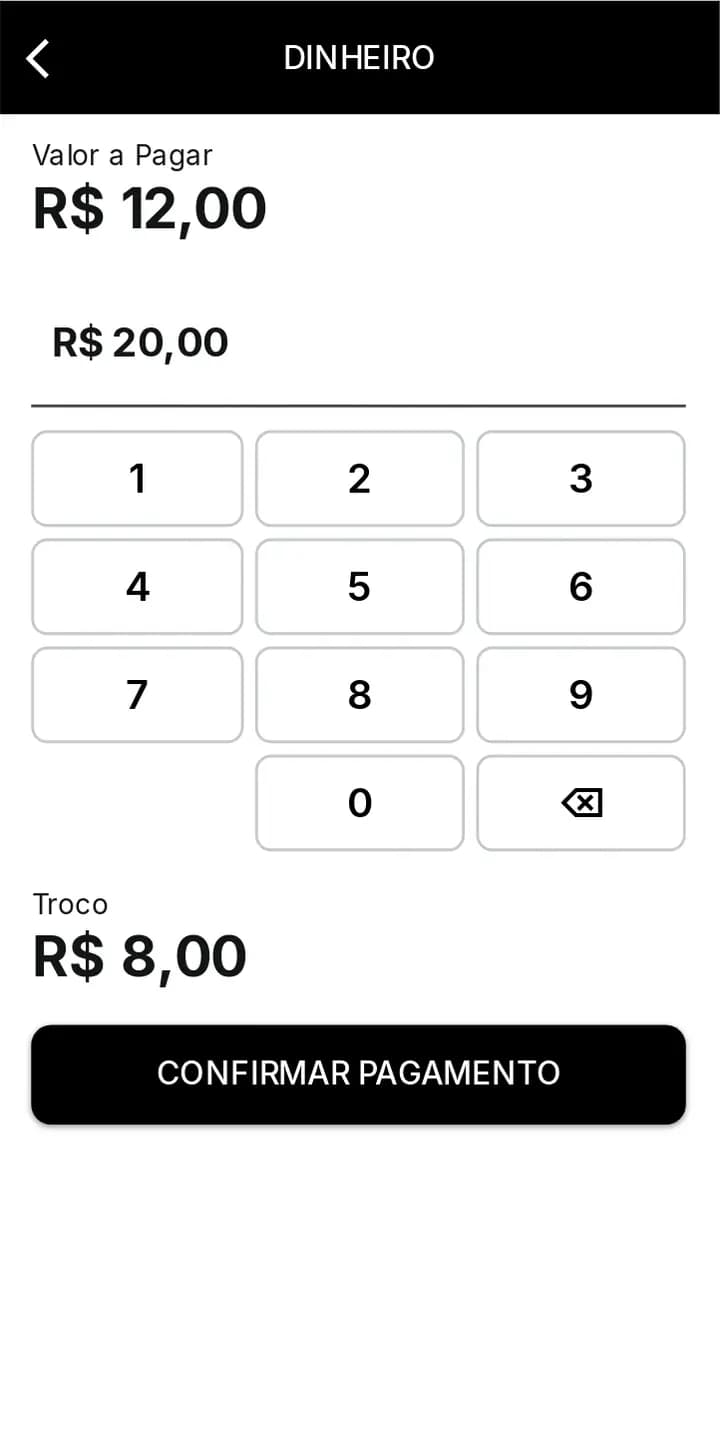
Step 1Cash: type the amount received; the change is calculated. 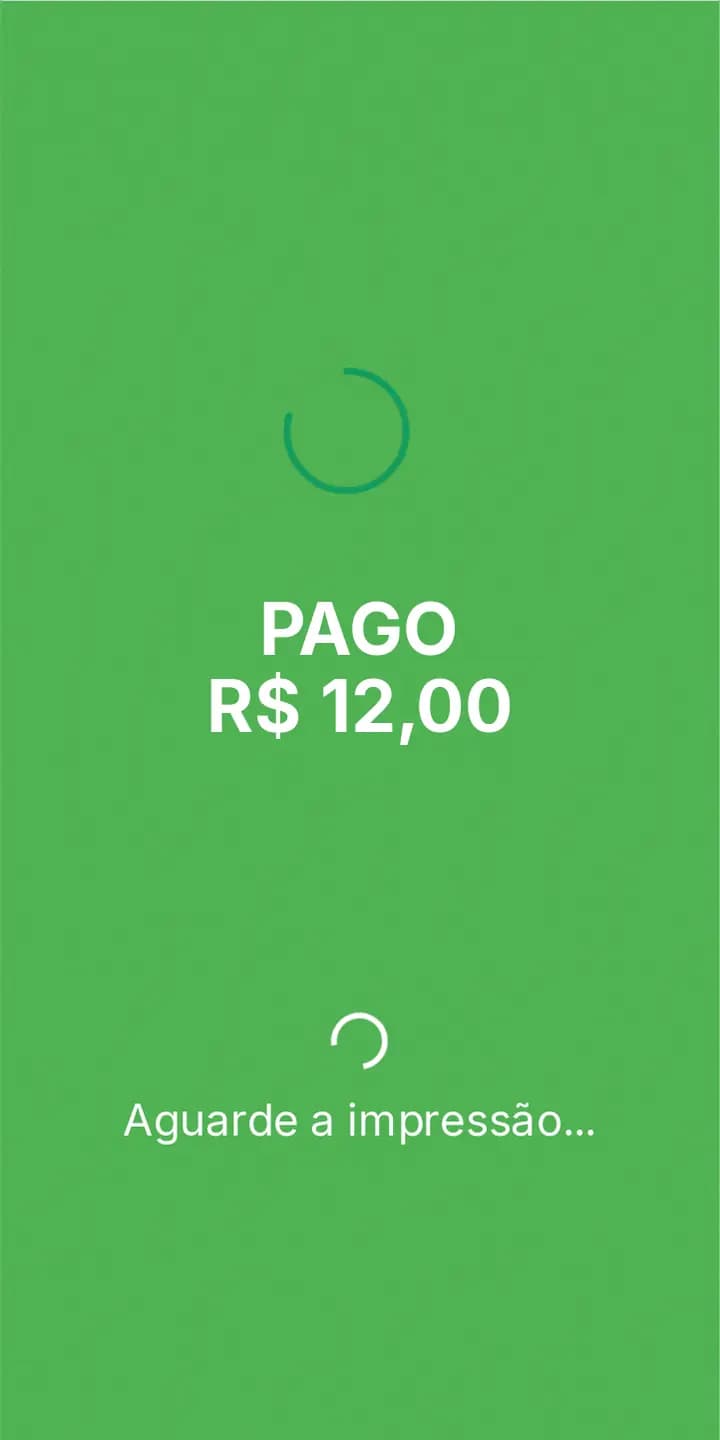
Step 2Cash payment done.
Partial payment
With partial payment on, the bill can be paid in parts and with different methods.
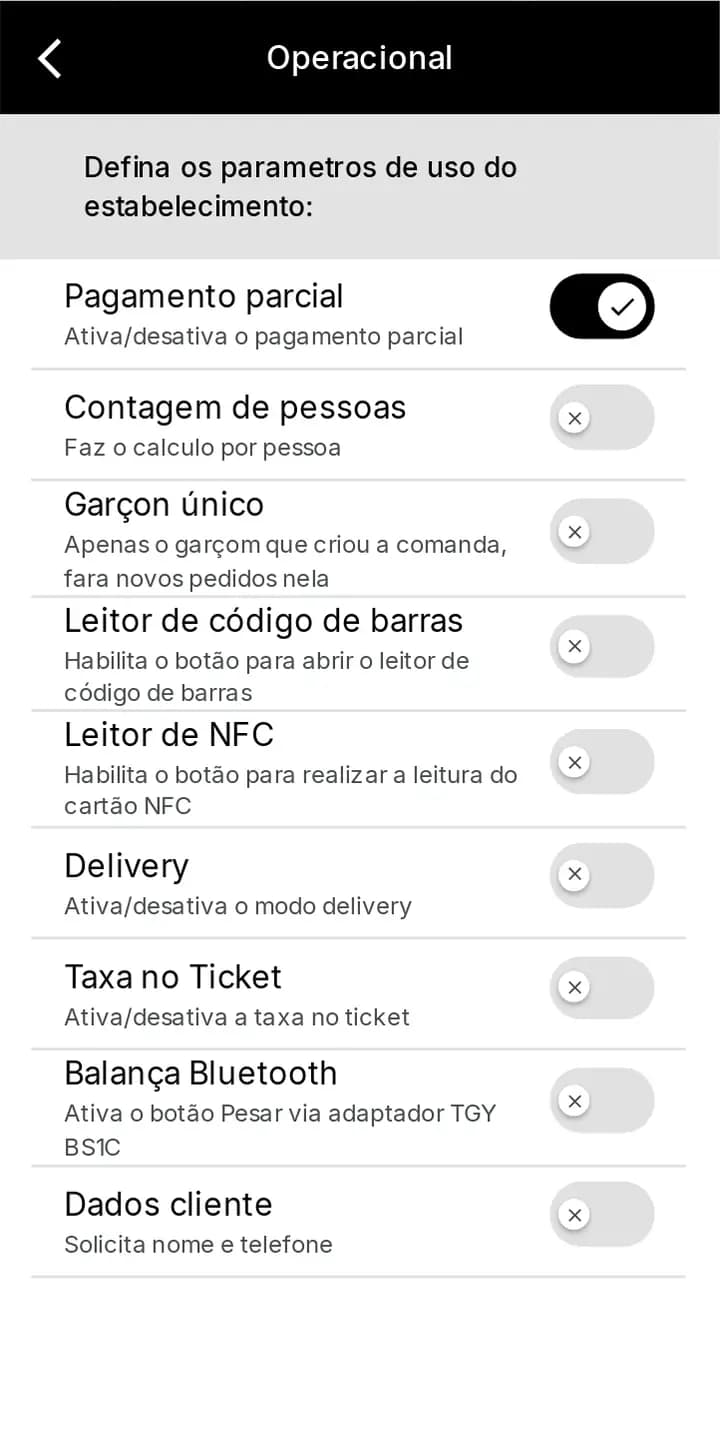
Step 1Turn on Partial payment in Settings > Operational. 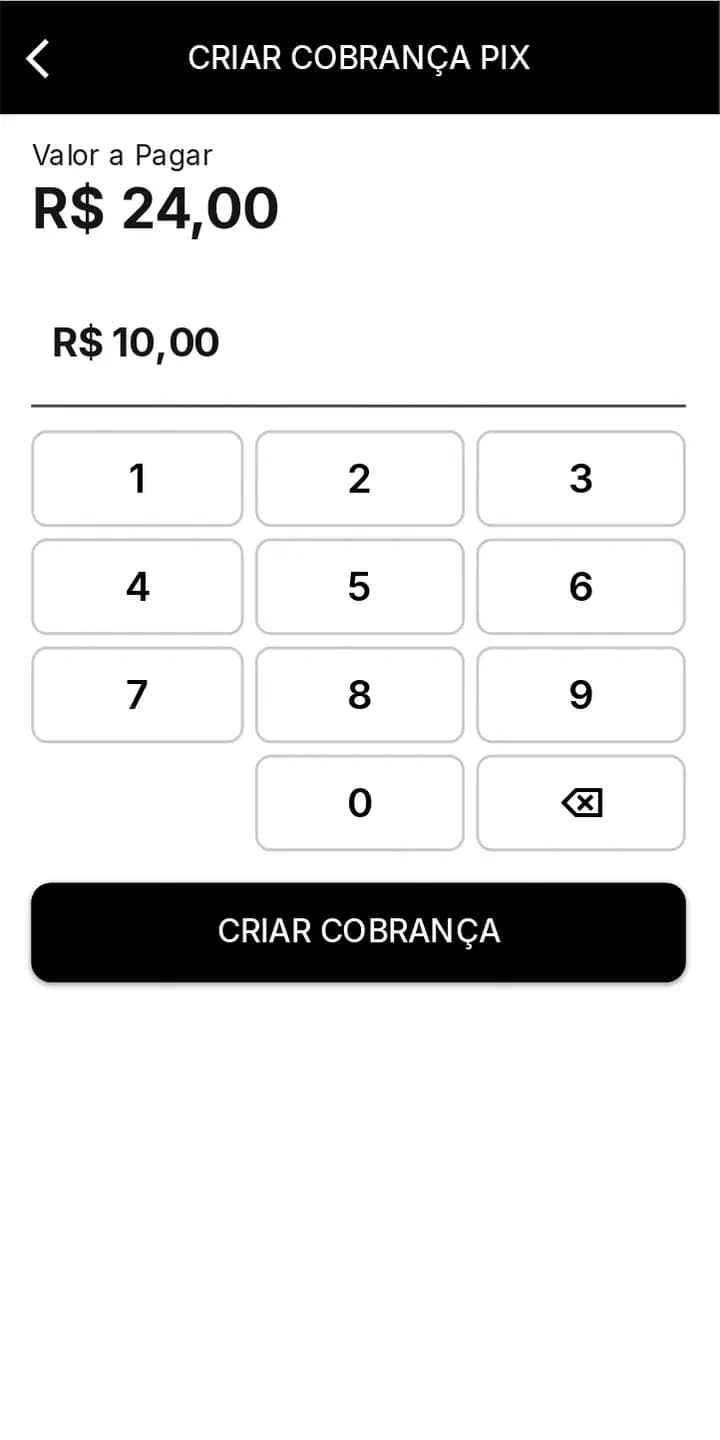
Step 2Set the partial amount to charge. 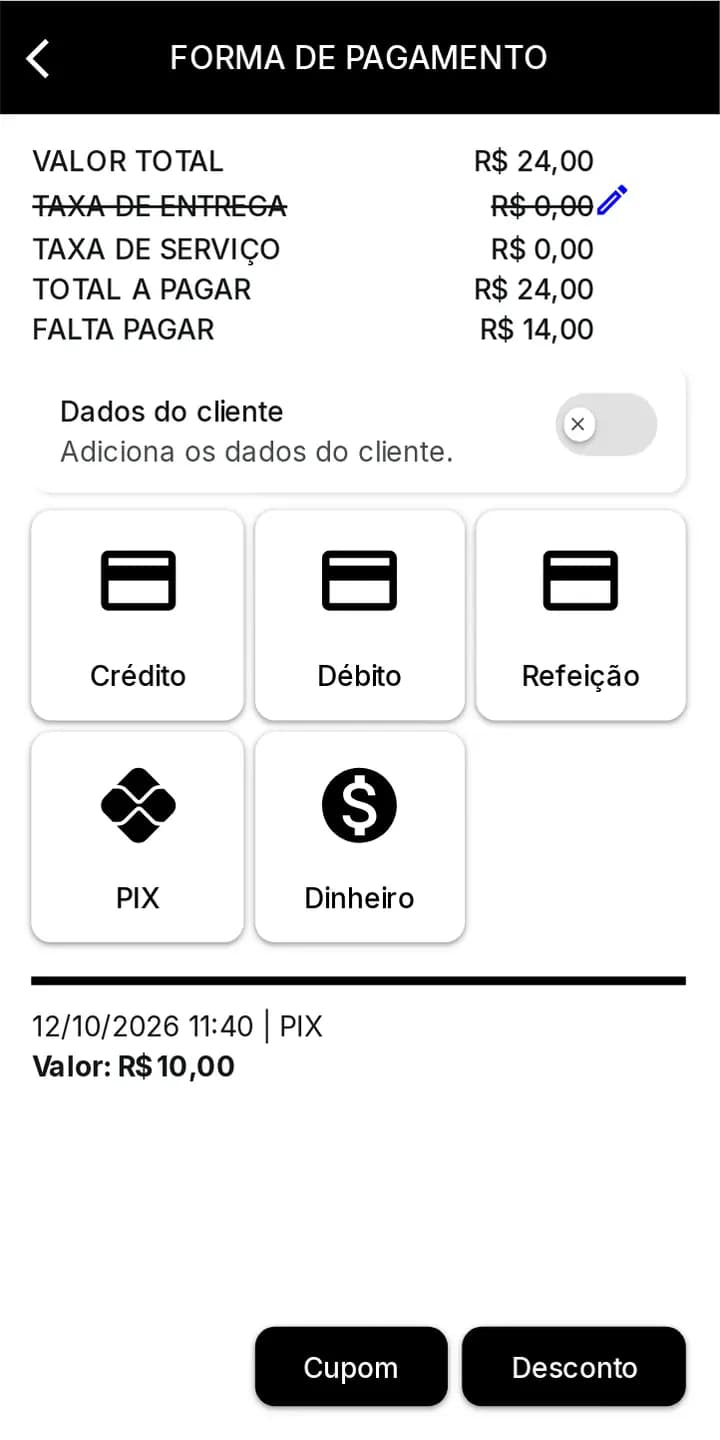
Step 3After paying part of it, the screen shows FALTA PAGAR and the payment made.
Coupon and discount
Apply a coupon by its code or give a manual discount with the employee code.
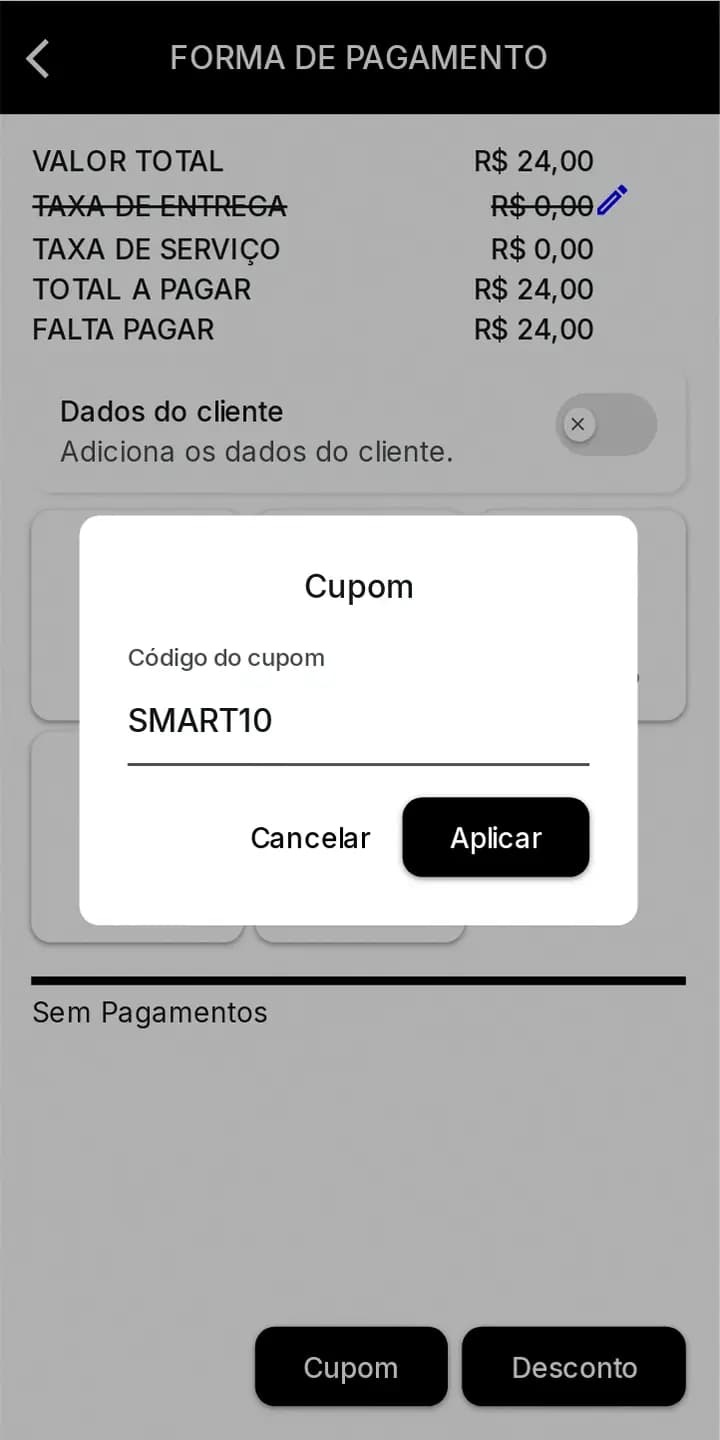
Step 1Coupon button: type the code (e.g. SMART10) and tap Apply. 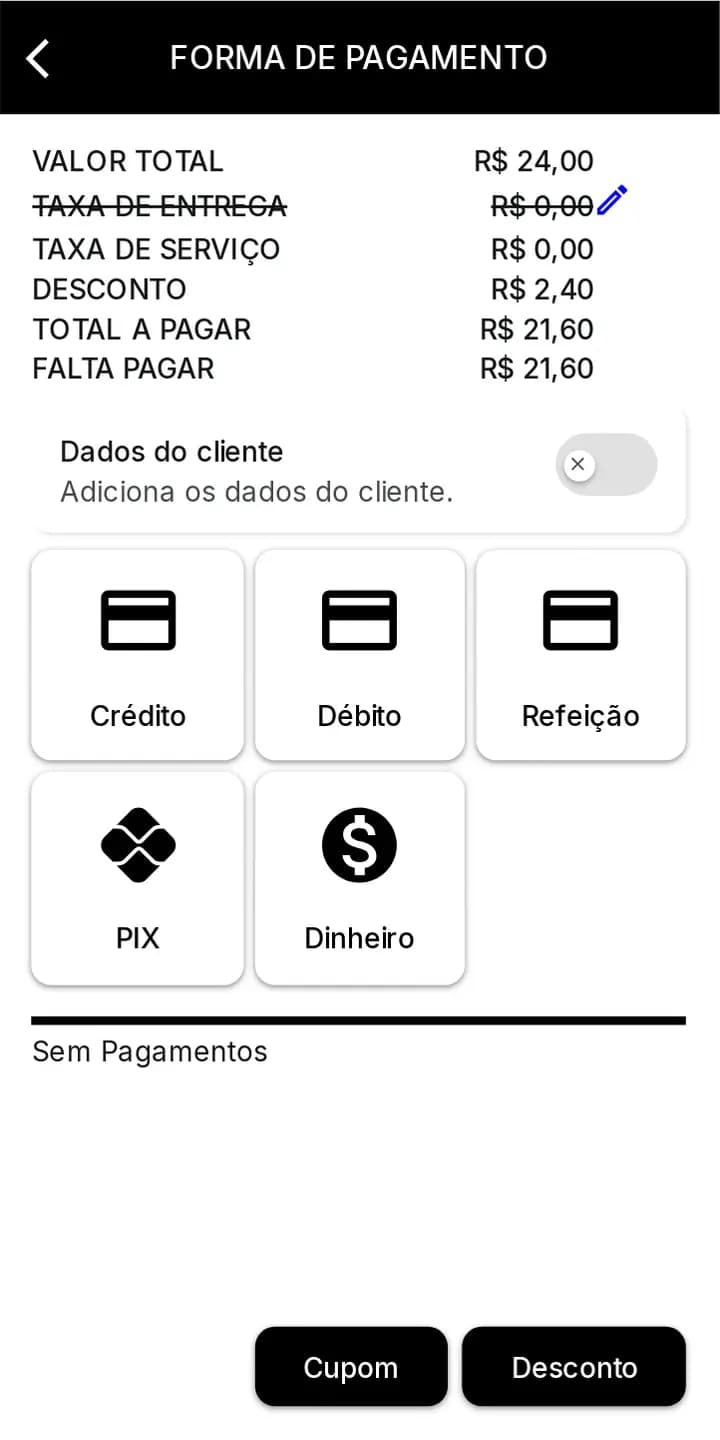
Step 2Coupon applied to the total. 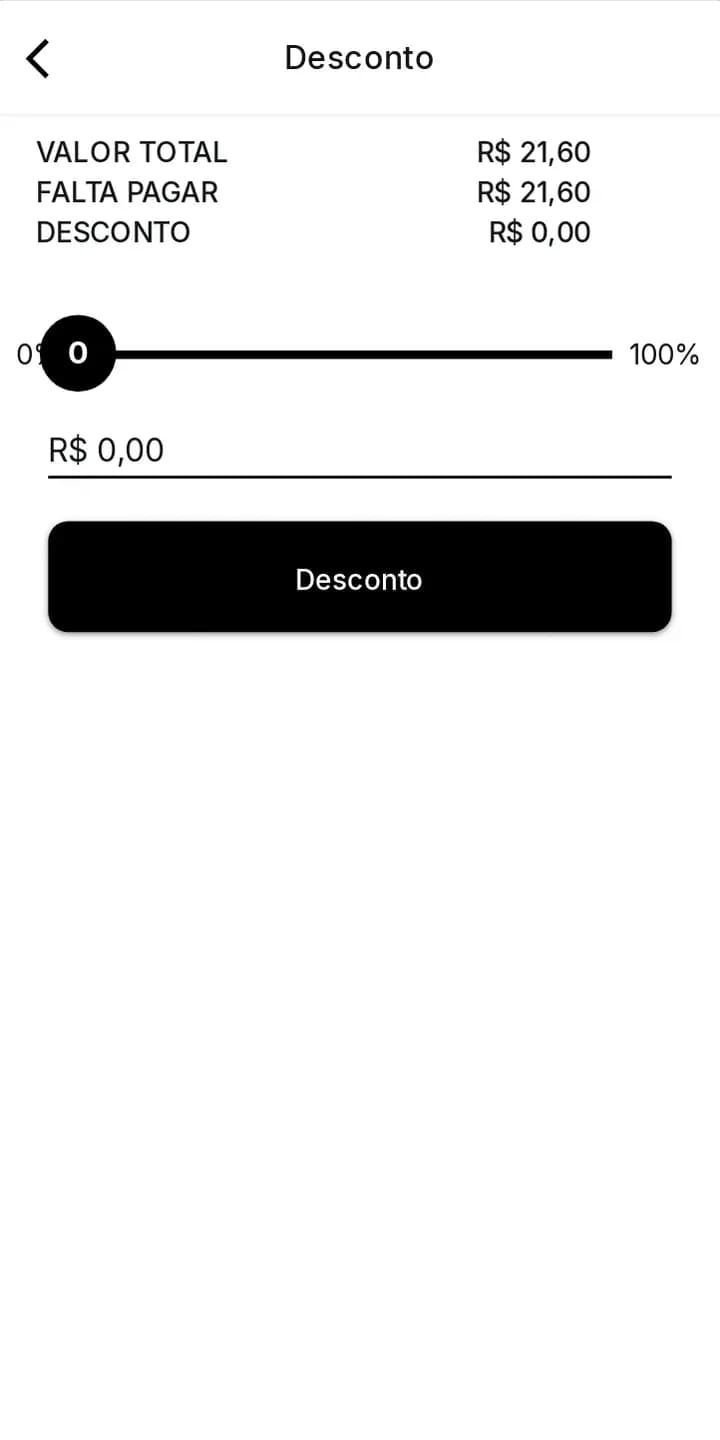
Step 3Manual discount screen (percentage or amount).
NFC command
With the NFC reader on, the order goes to the command of the wristband or card you hold near the machine.
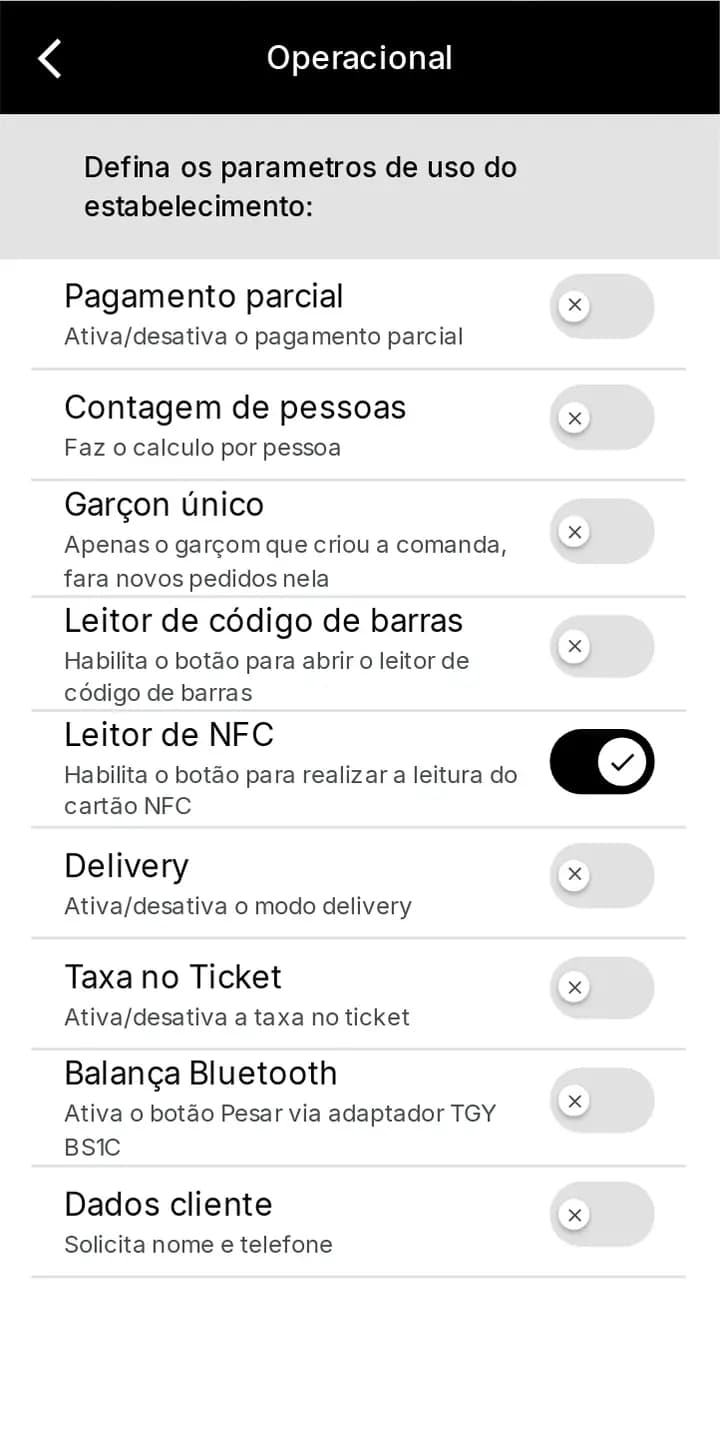
Step 1Turn on NFC reader in Settings > Operational. 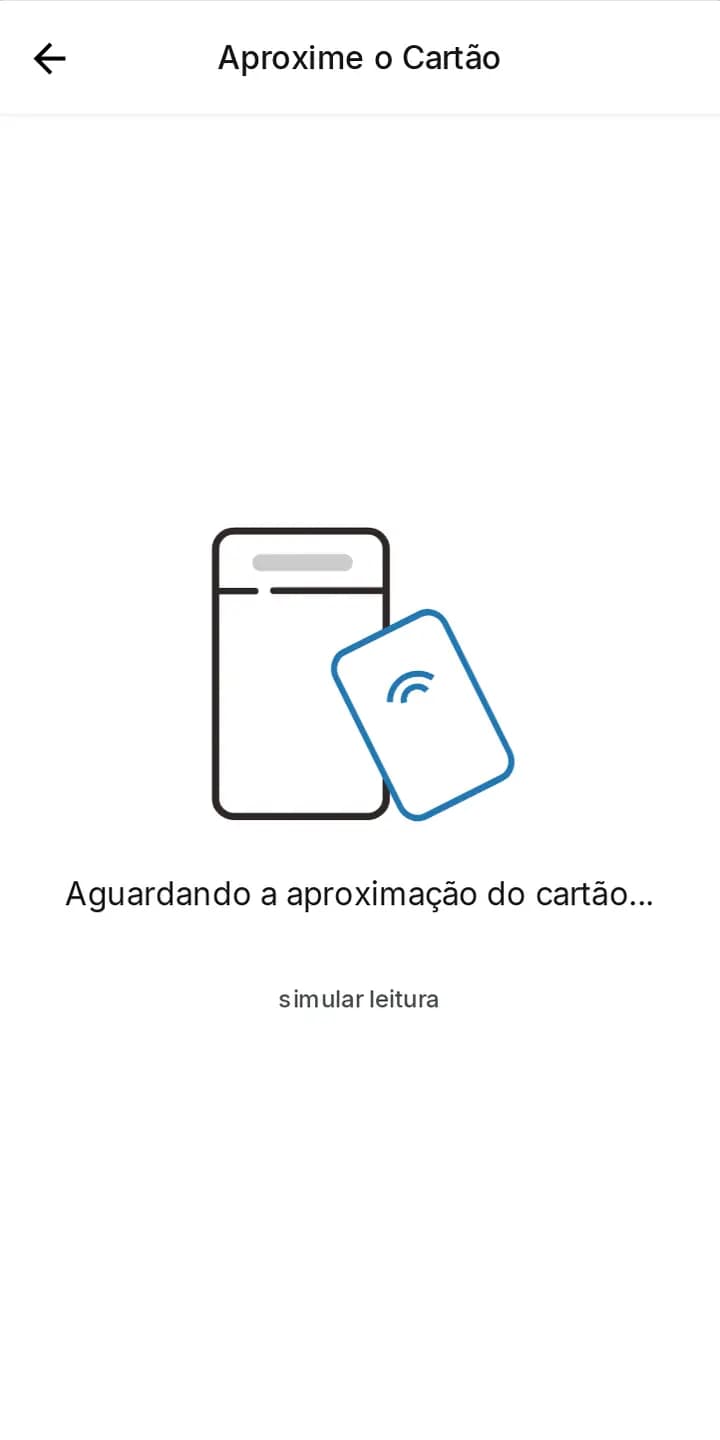
Step 2Order by NFC: hold the wristband/card near the machine. 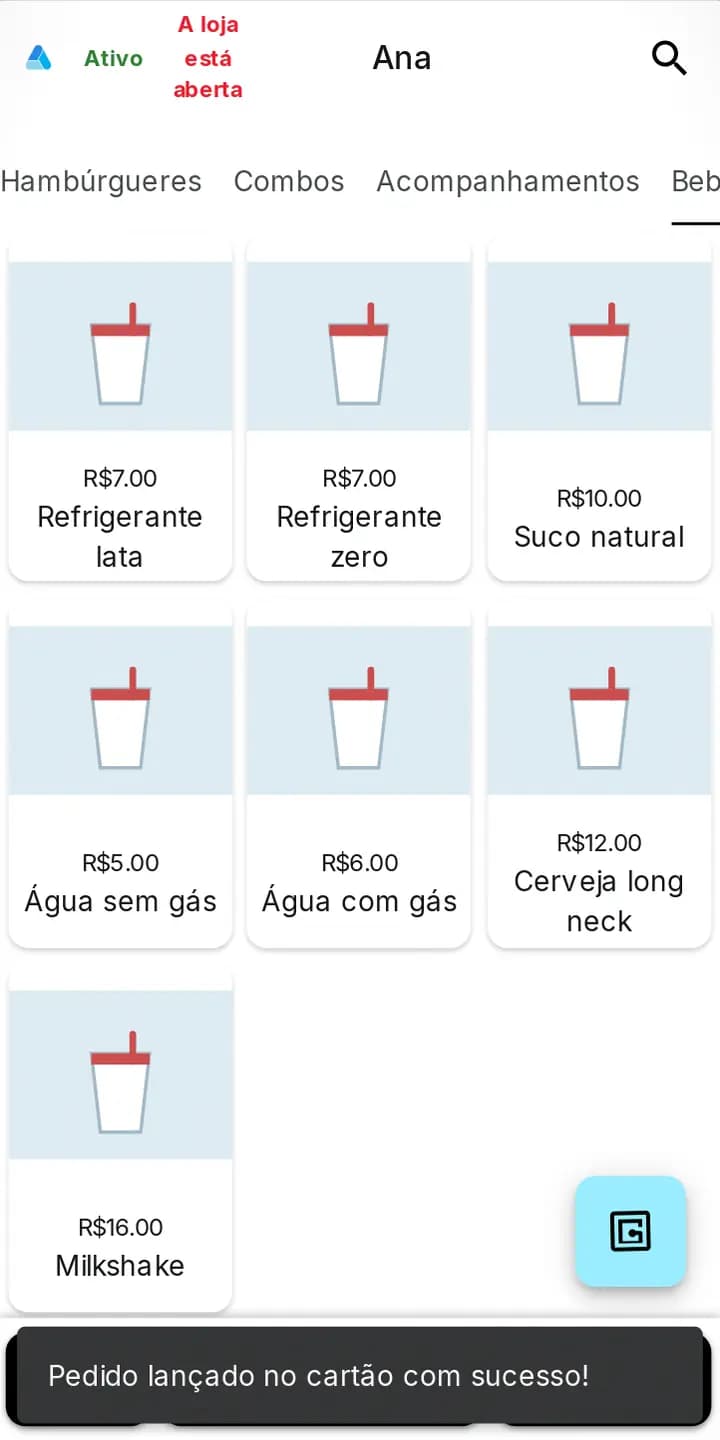
Step 3Reading the NFC command. 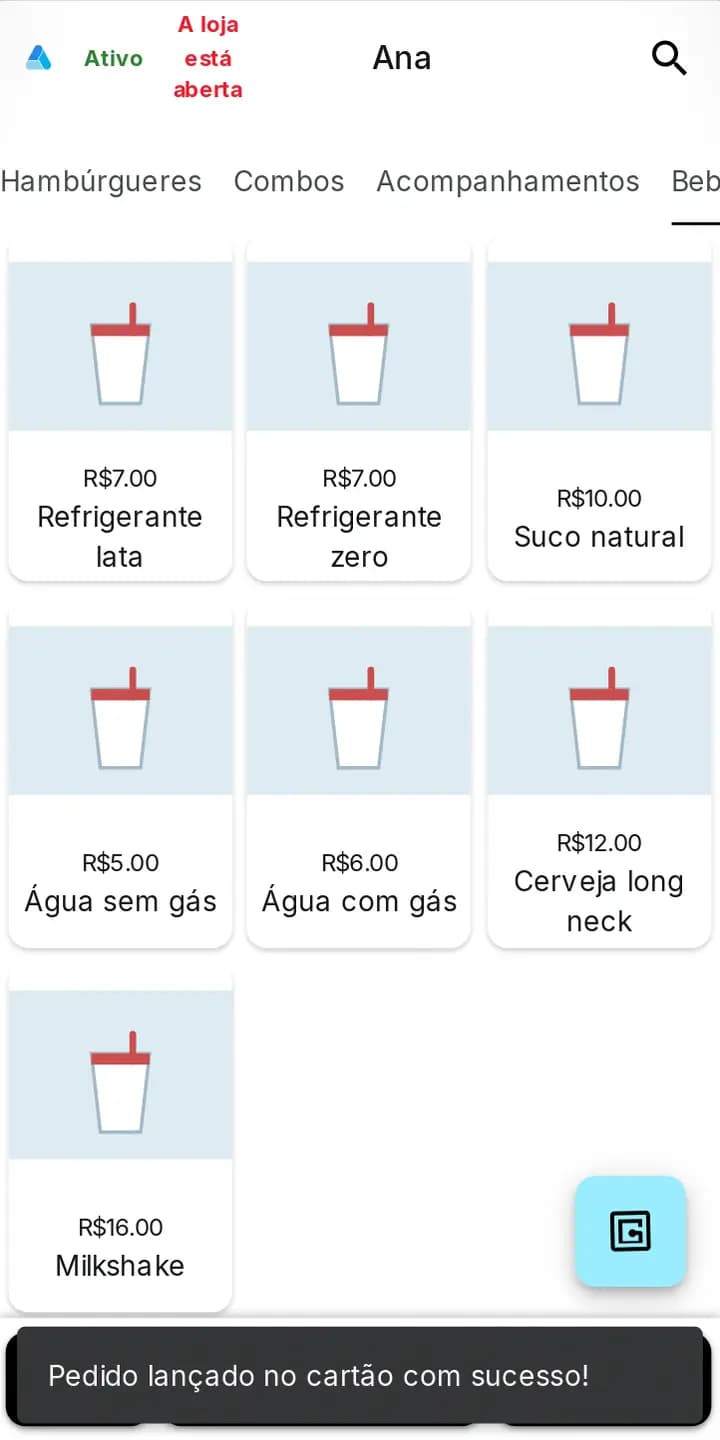
Step 4Order placed on the NFC command.
Cashless checkout
In Cashless checkout mode, the machine reads one or more cards and charges what they all consumed at once.
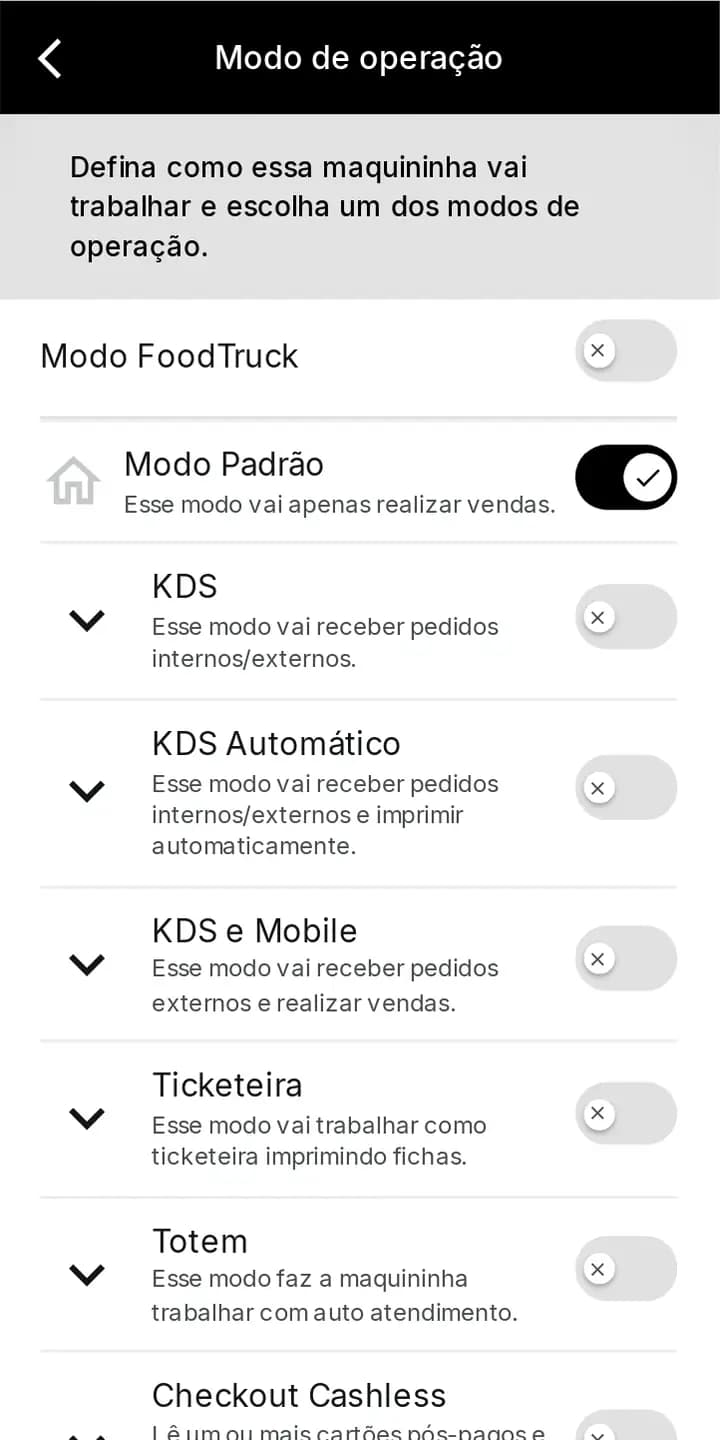
Step 1Operation modes: pick Checkout Cashless. 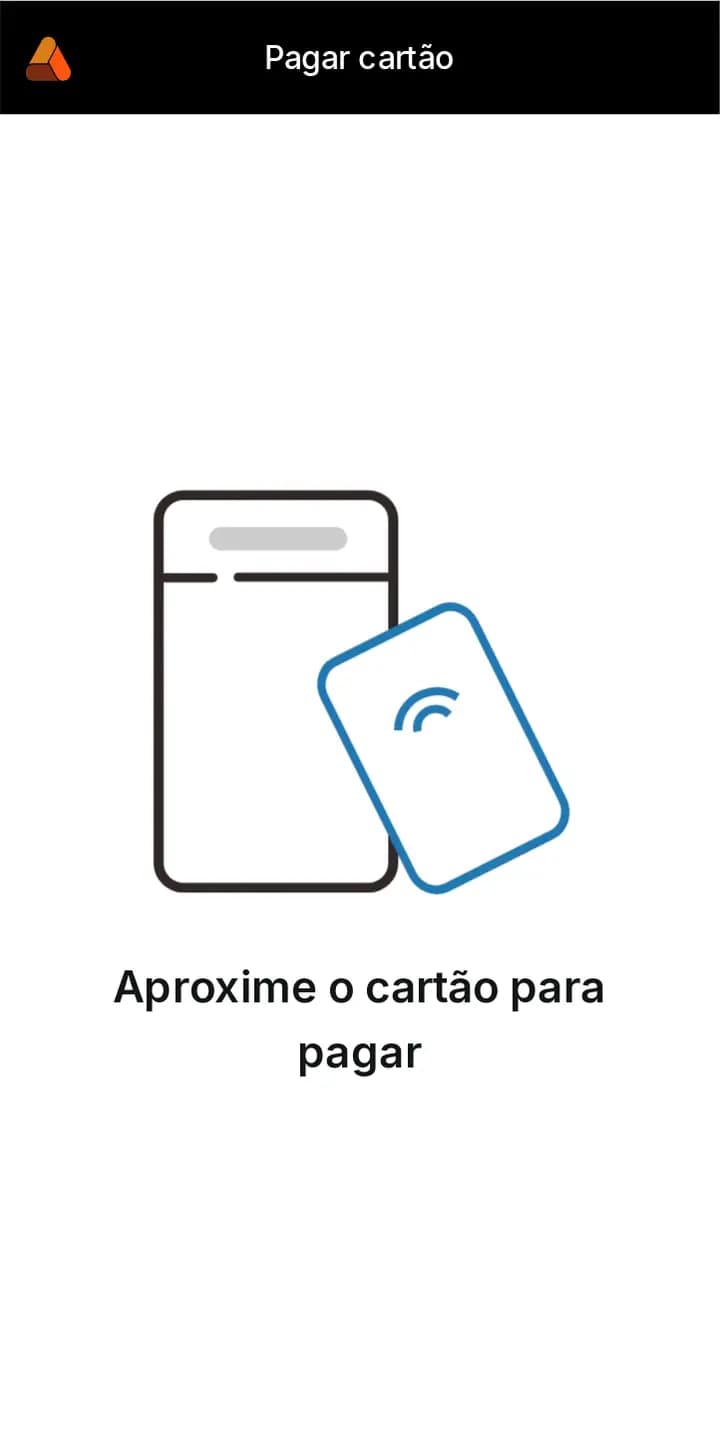
Step 2Checkout Cashless: hold the card near the machine to pay. 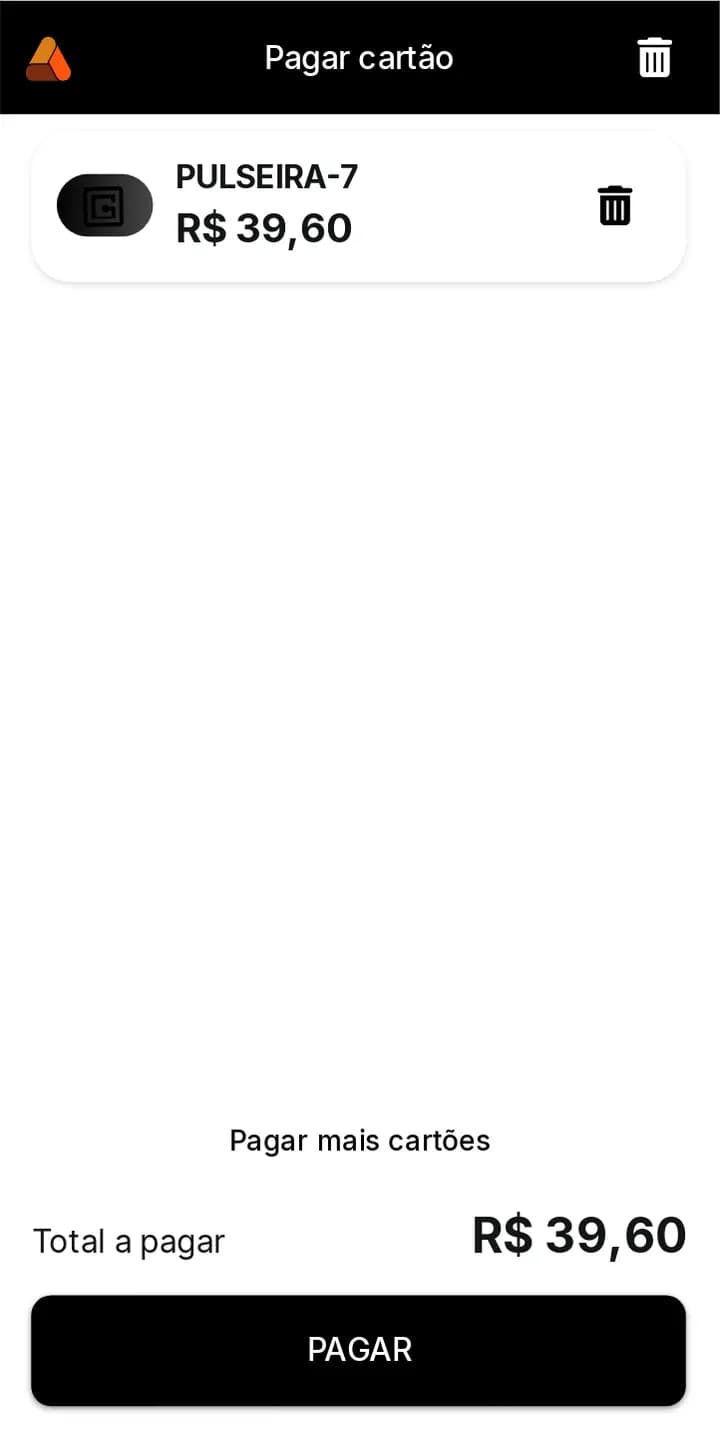
Step 3Card read: list with the amount due and Remove card. 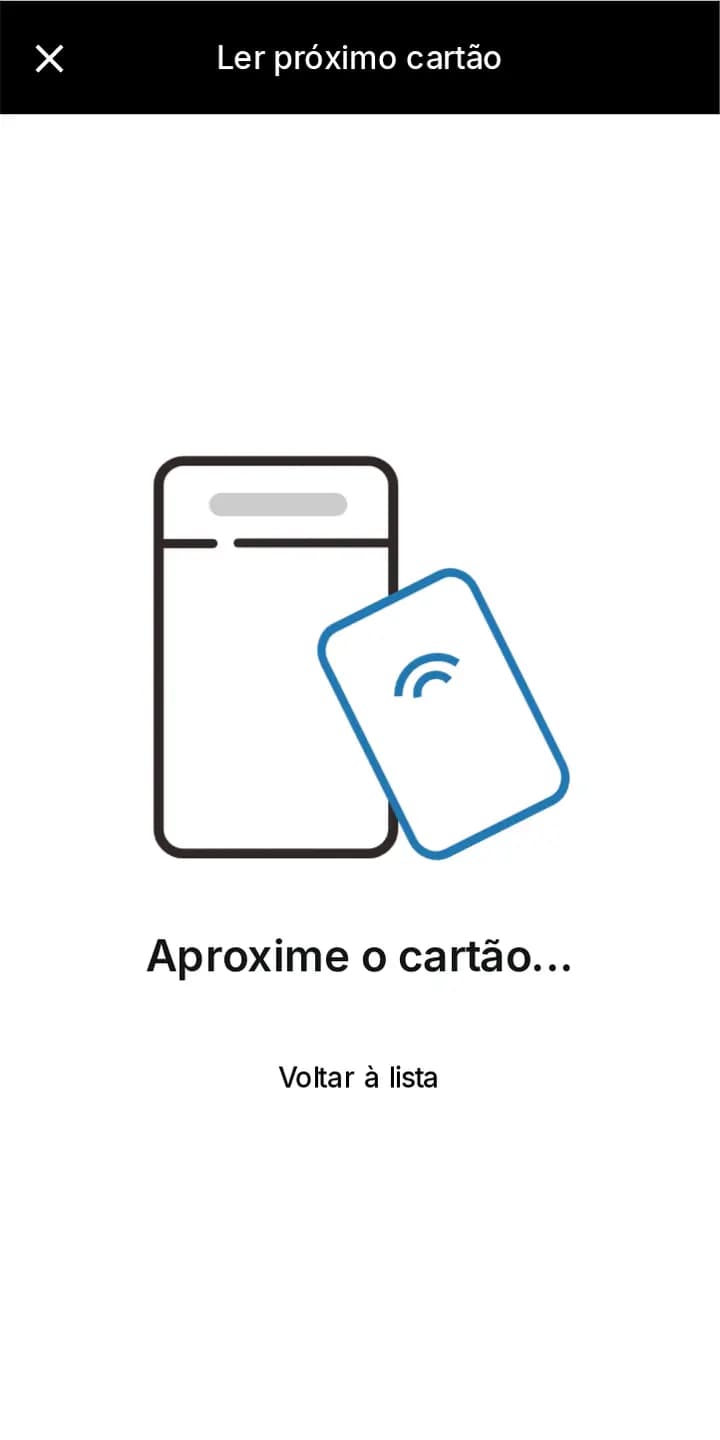
Step 4Read the next card to add it up. 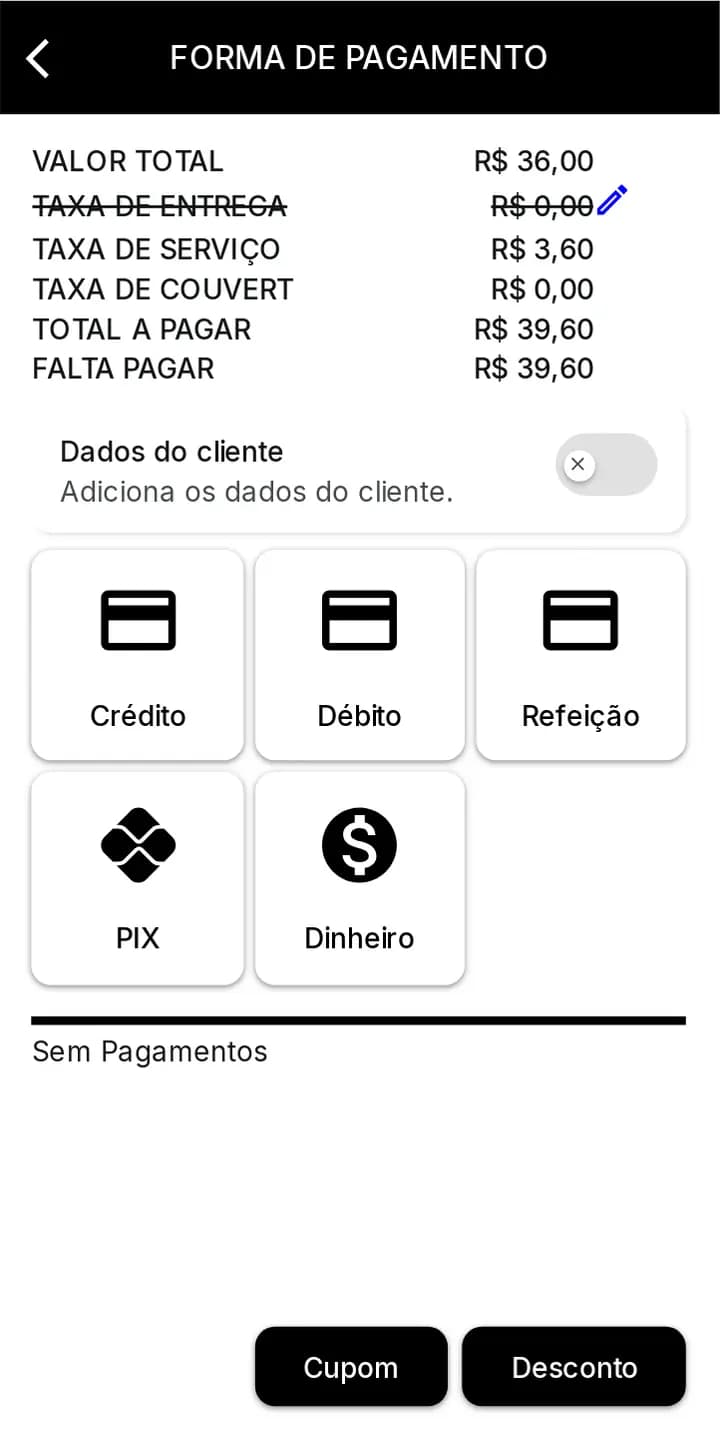
Step 5Payment of the cards total. 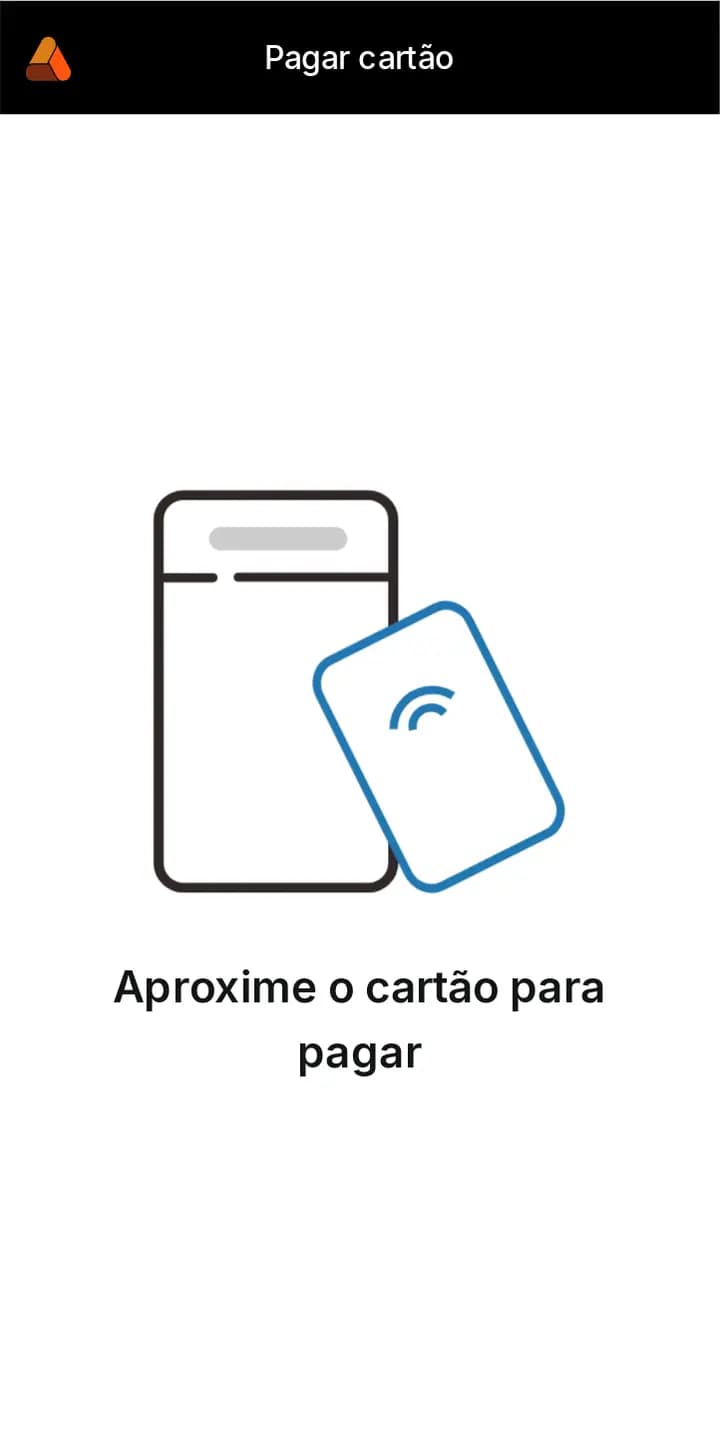
Step 6Cashless paid.
KDS (kitchen)
KDS mode turns the machine into the kitchen screen: pick the sectors and dispatch the orders.
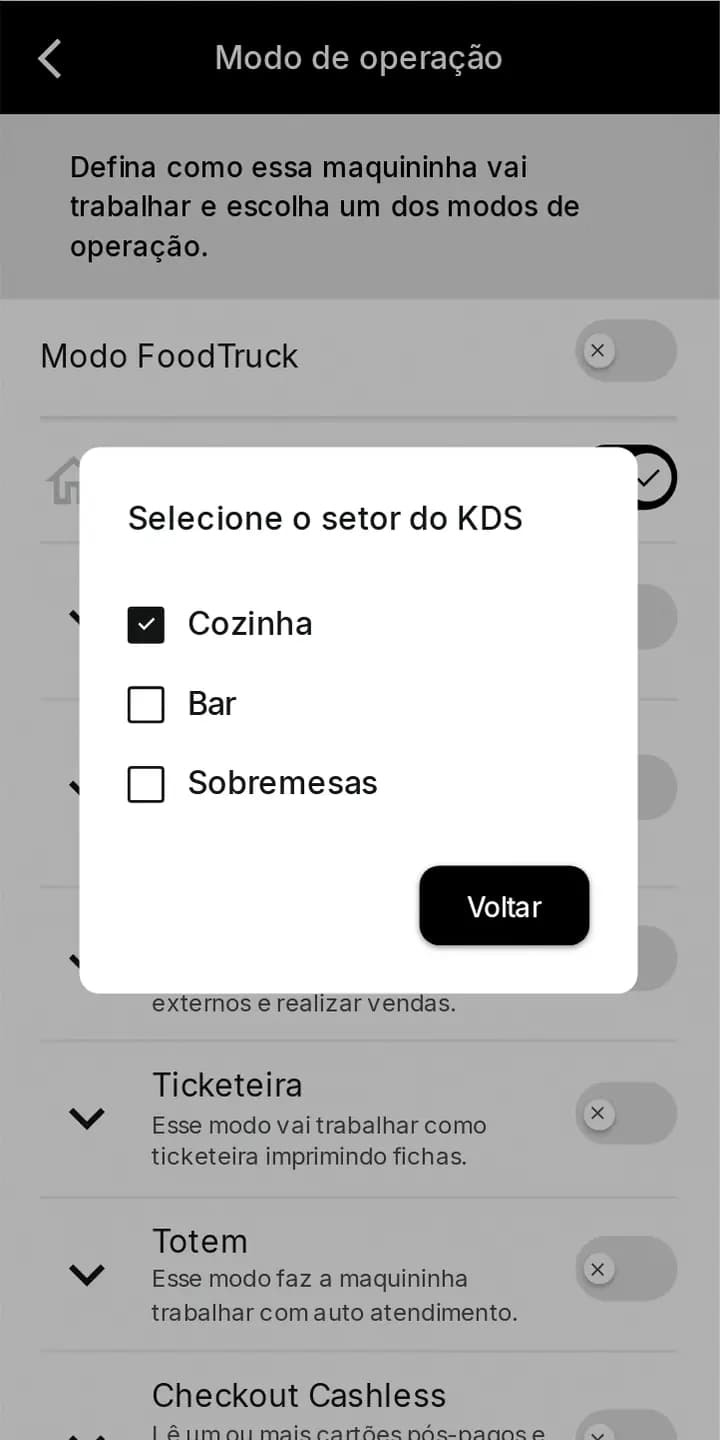
Step 1KDS mode: pop-up to pick the sectors. 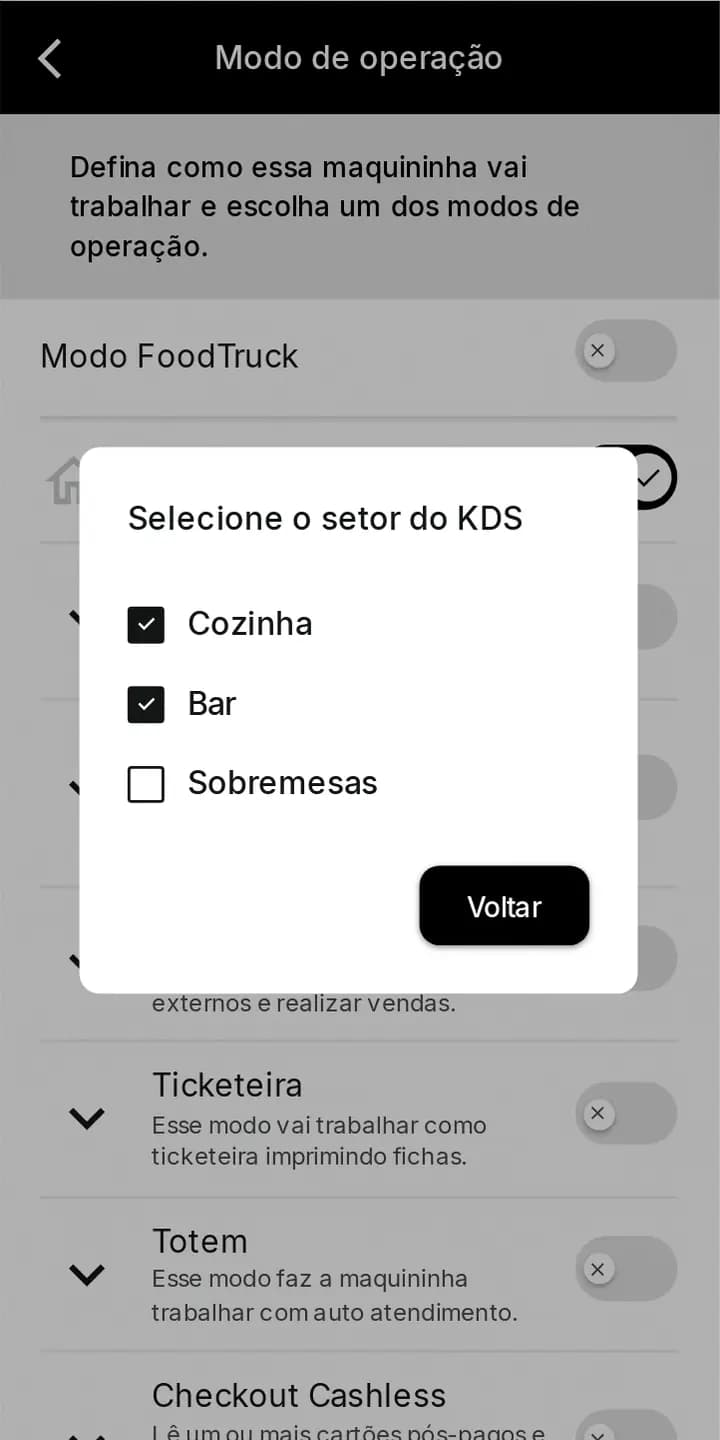
Step 2Sectors checked (Kitchen and Bar). 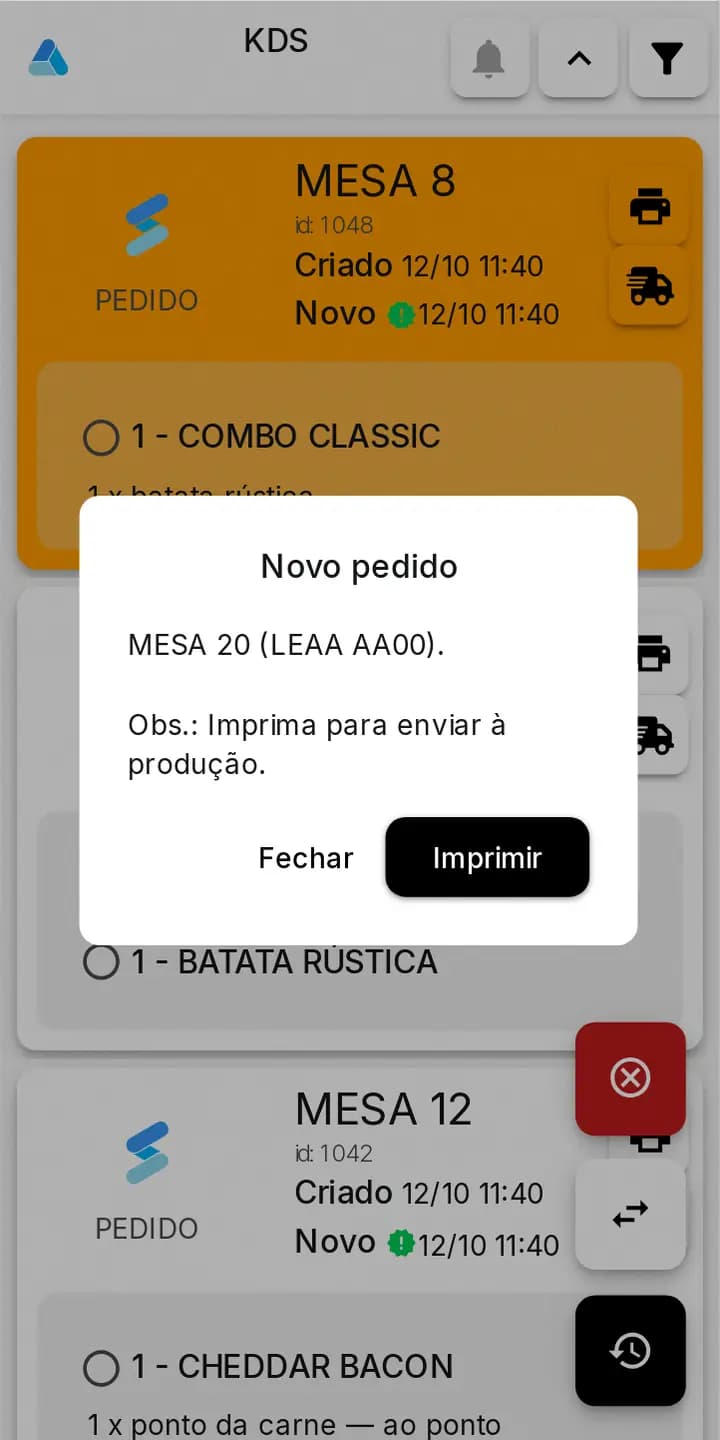
Step 3New order alert on the KDS (Close/Print). 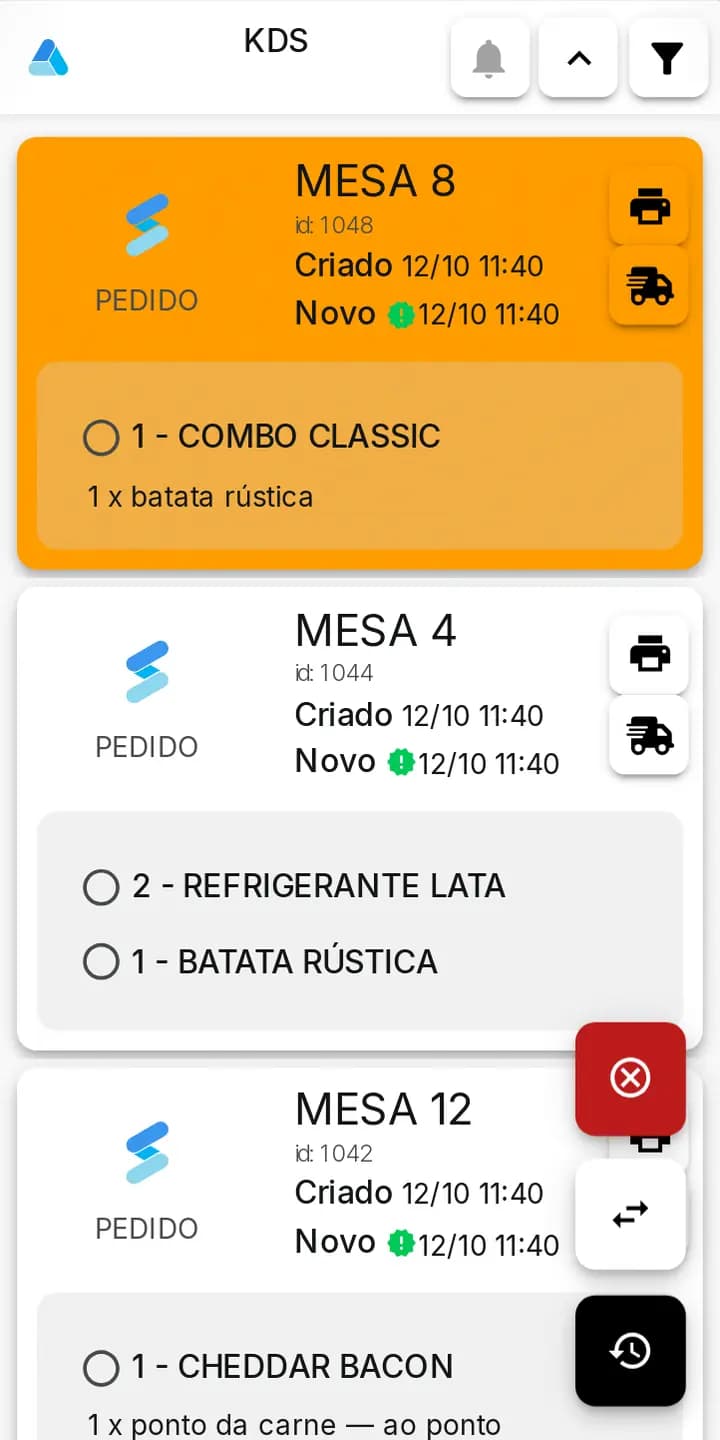
Step 4KDS screen with the orders as cards. 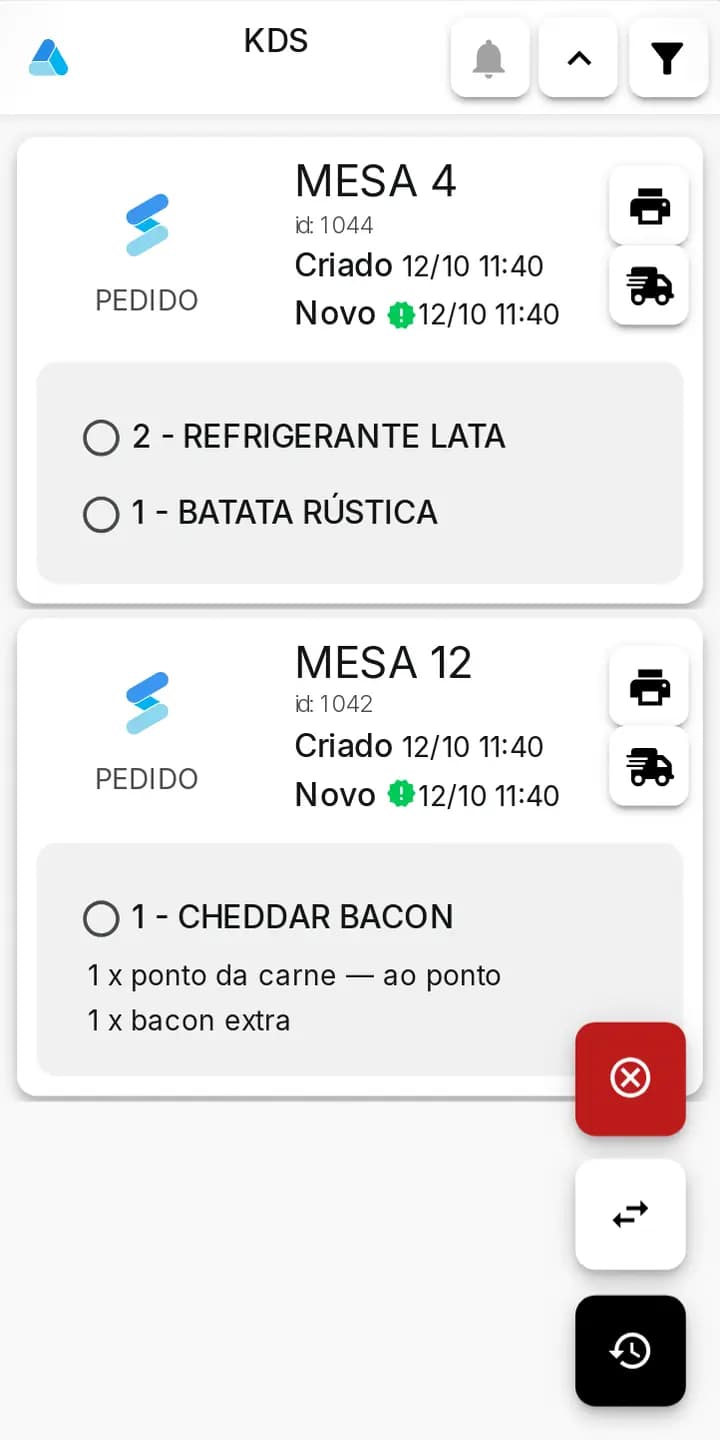
Step 5Order dispatched. 
Step 6Cancellations list. 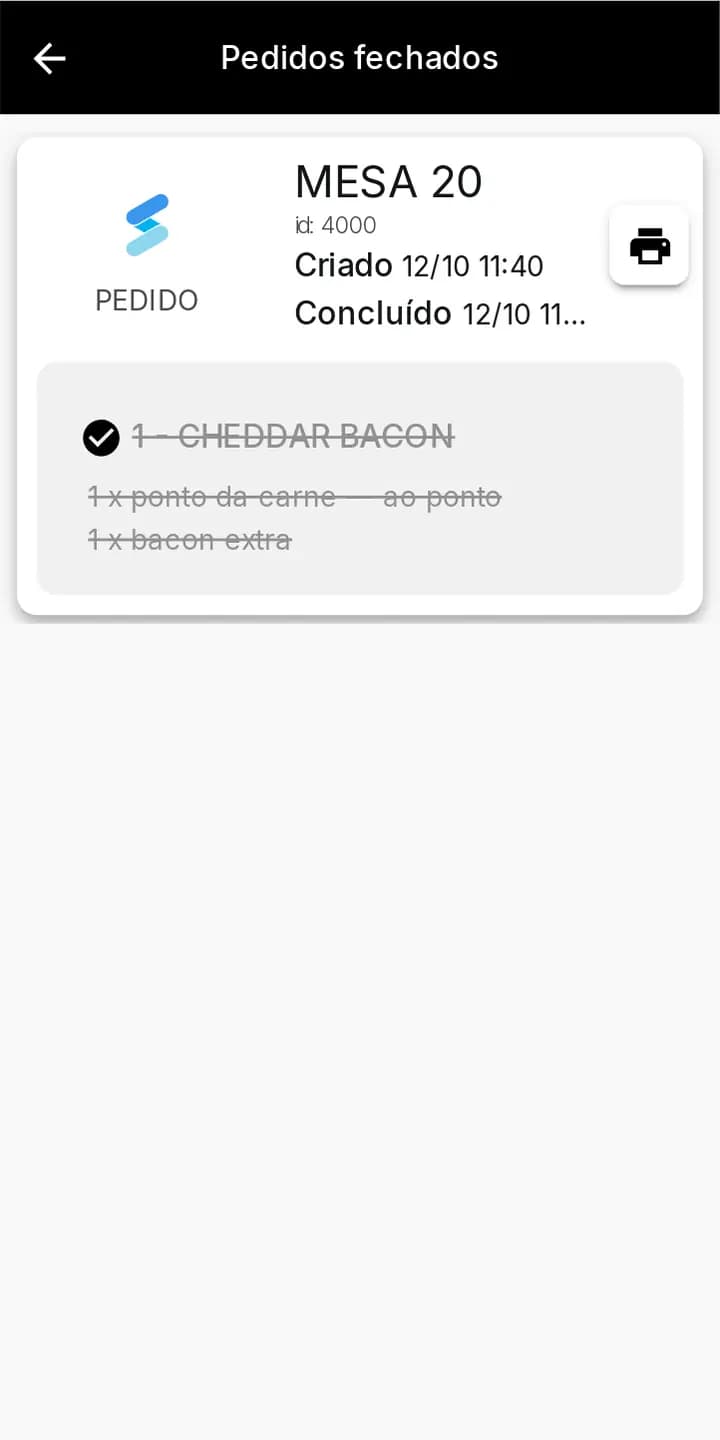
Step 7Closed orders.
Closing the cashier
In PEDIDOS > Closed, close the cashier: check the summary, record withdrawals and print.
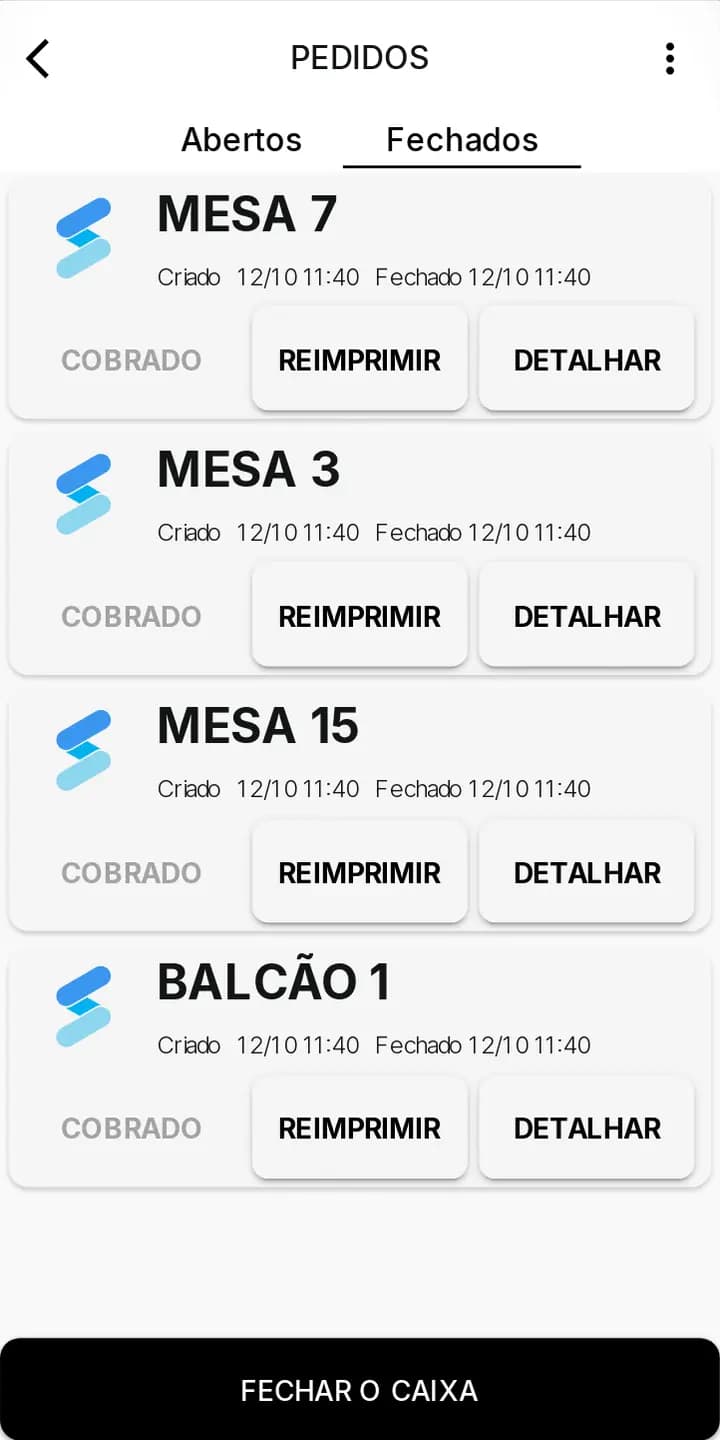
Step 1PEDIDOS > Closed, with the FECHAR O CAIXA button. 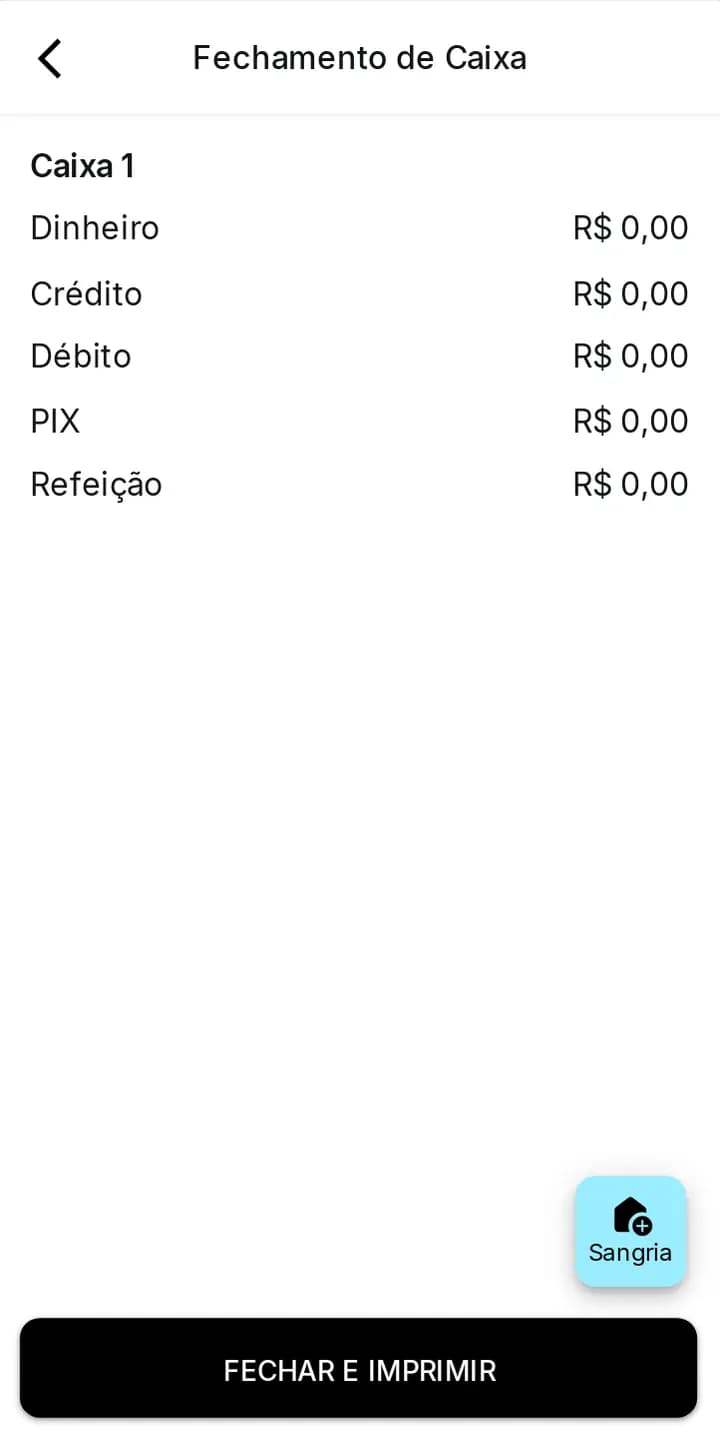
Step 2Cashier closing: summary by payment method. 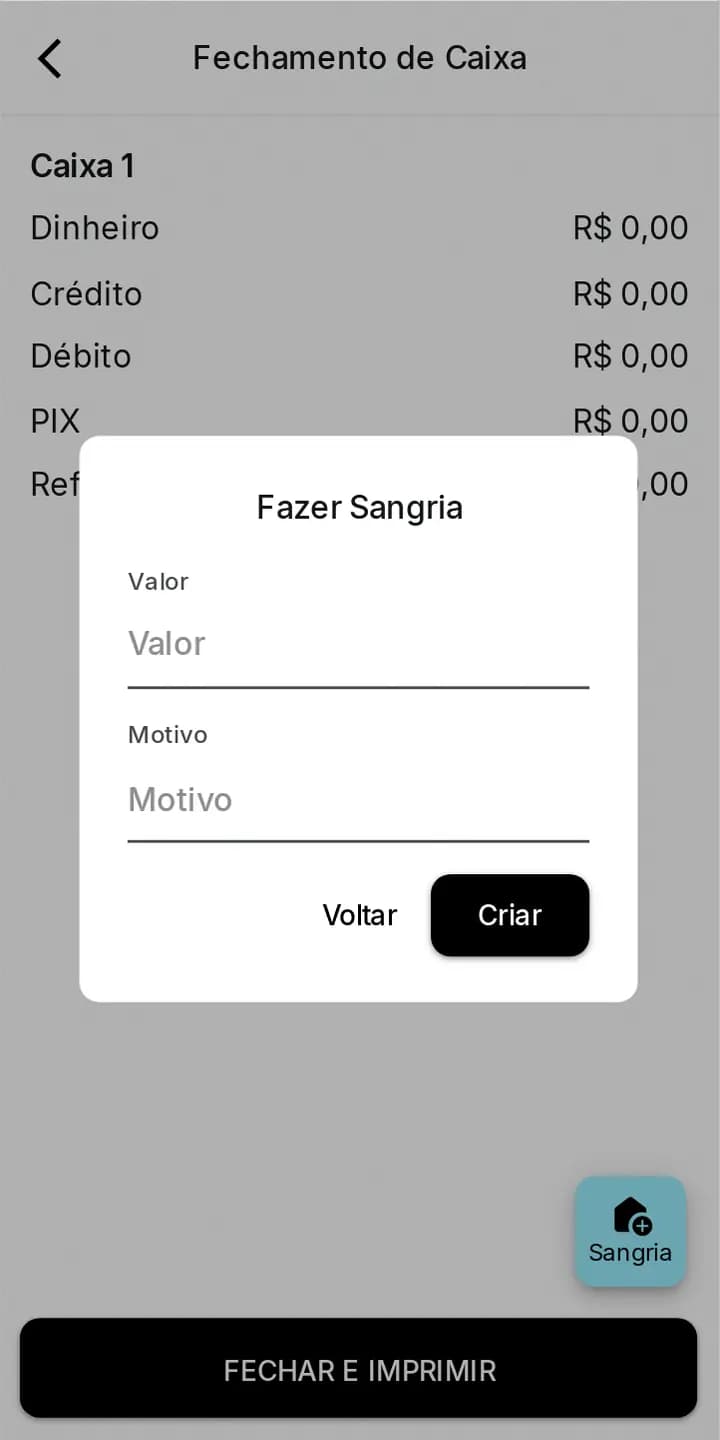
Step 3Cash withdrawal (sangria): amount and reason. 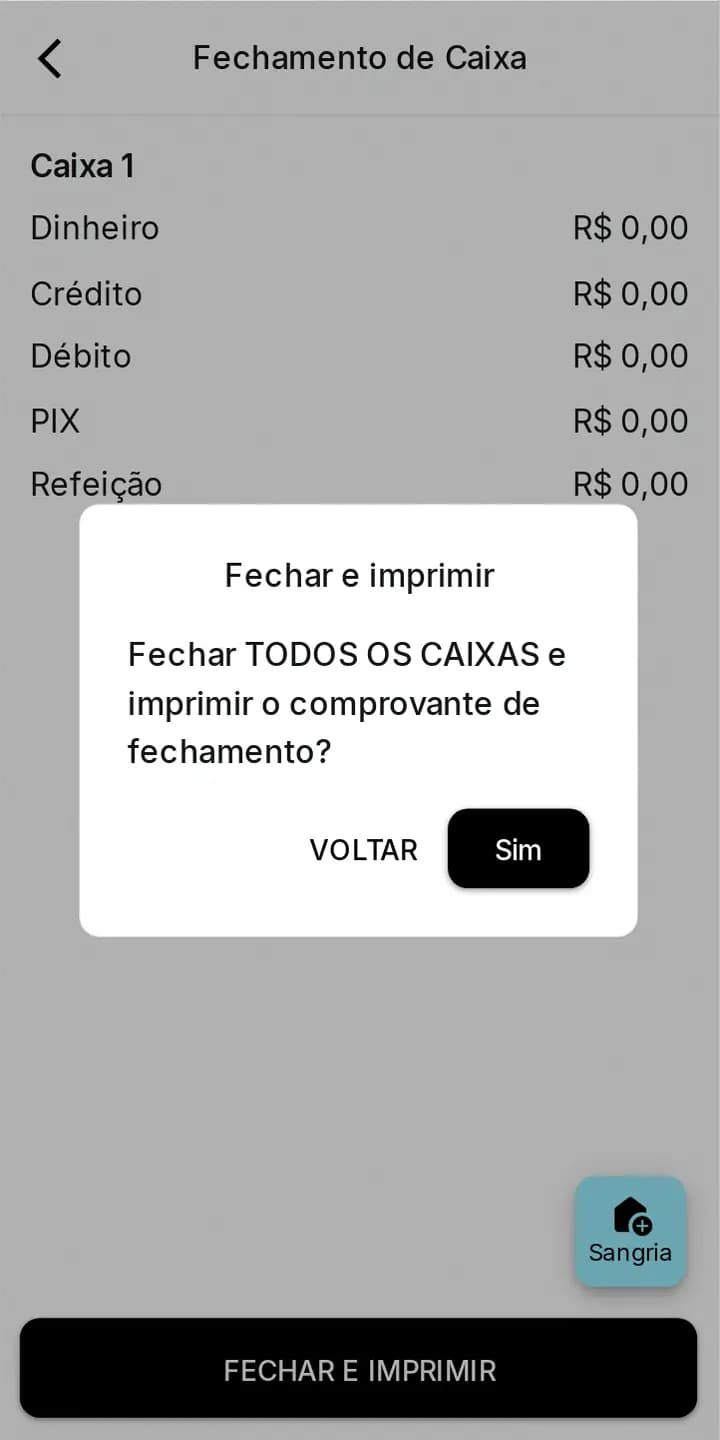
Step 4Confirmation: close all cashiers and print. 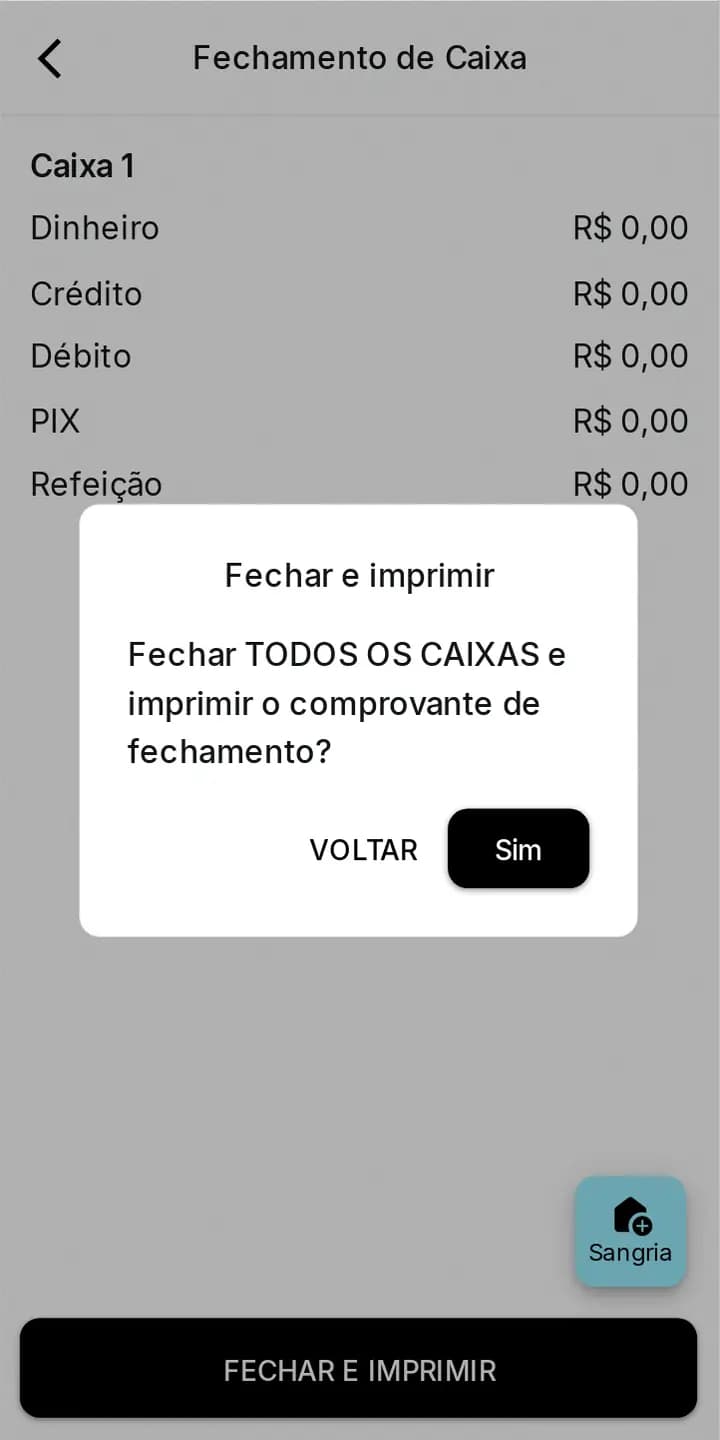
Step 5Cashier closed.
Settings
Settings ask for the employee code and hold the store options.
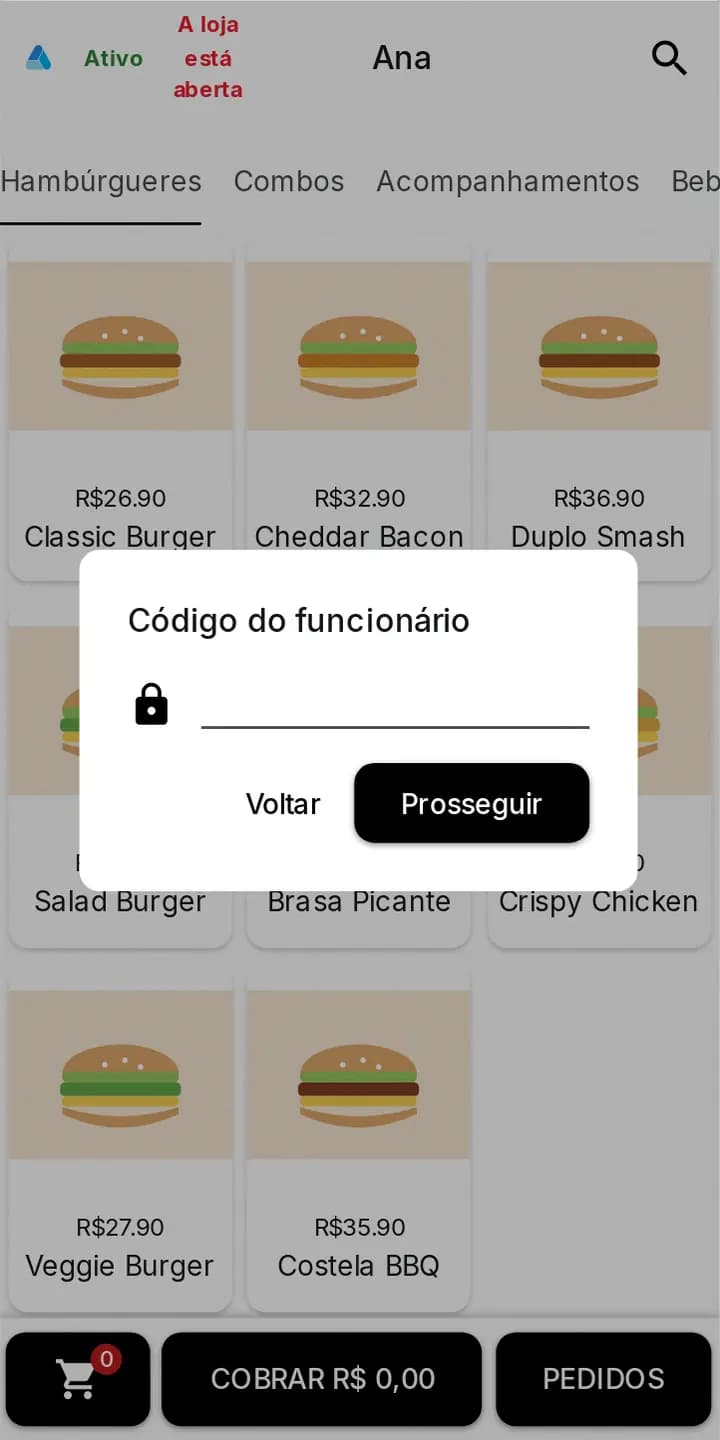
Step 1Settings ask for the employee code. 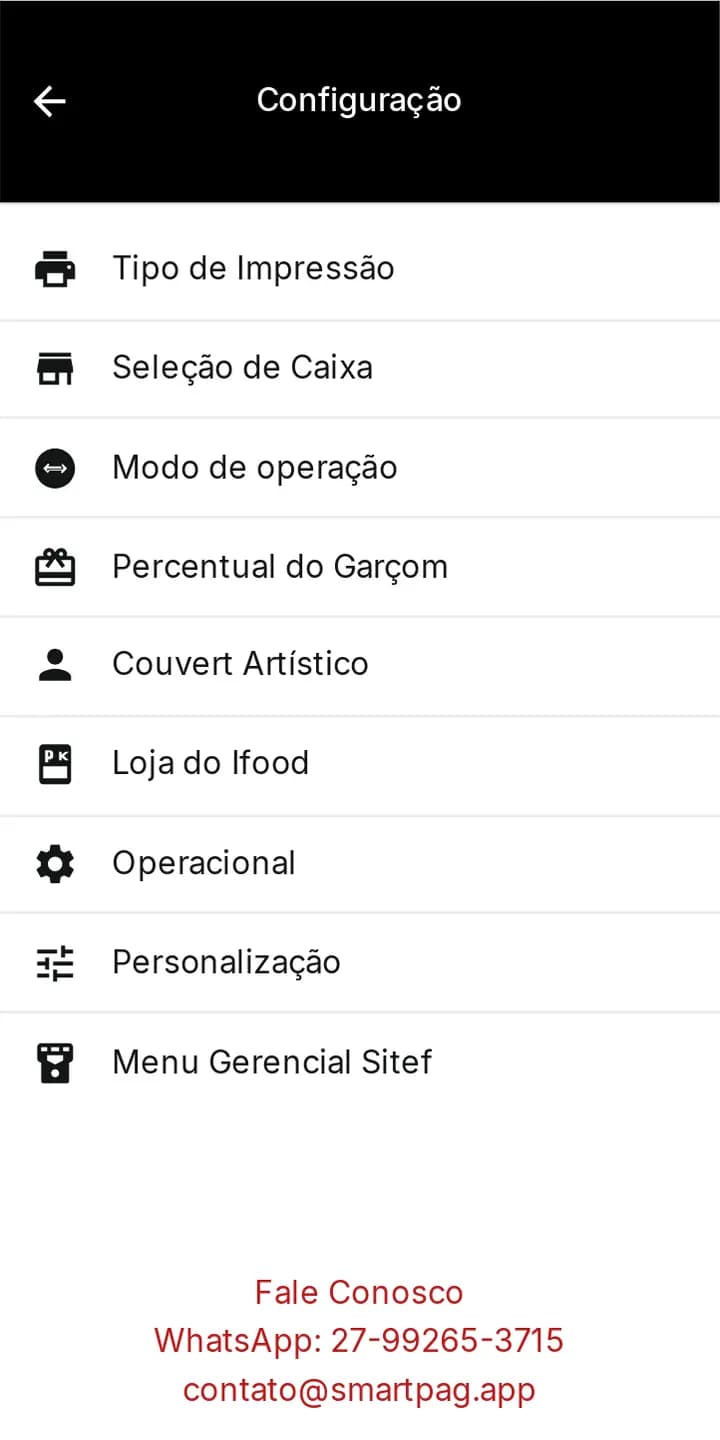
Step 2Settings menu. 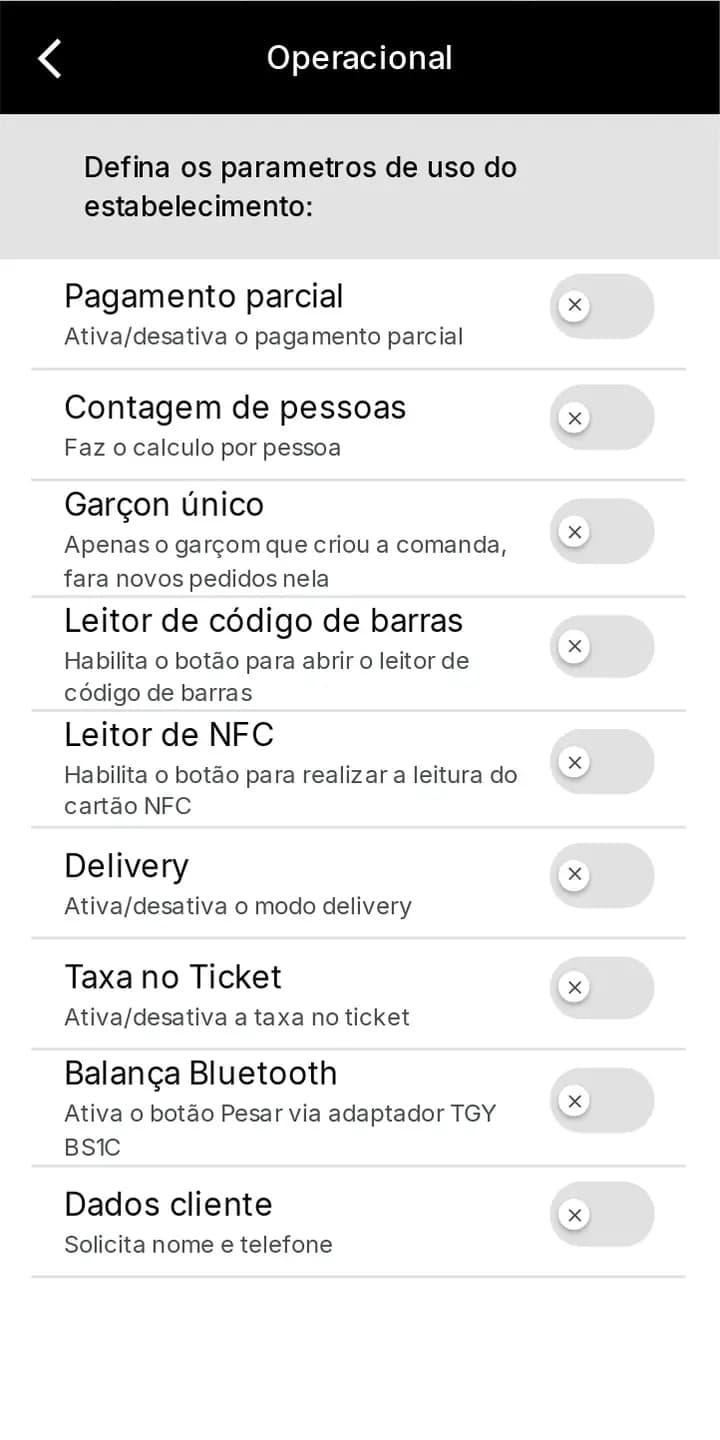
Step 3Operational: partial payment, NFC, delivery and more. 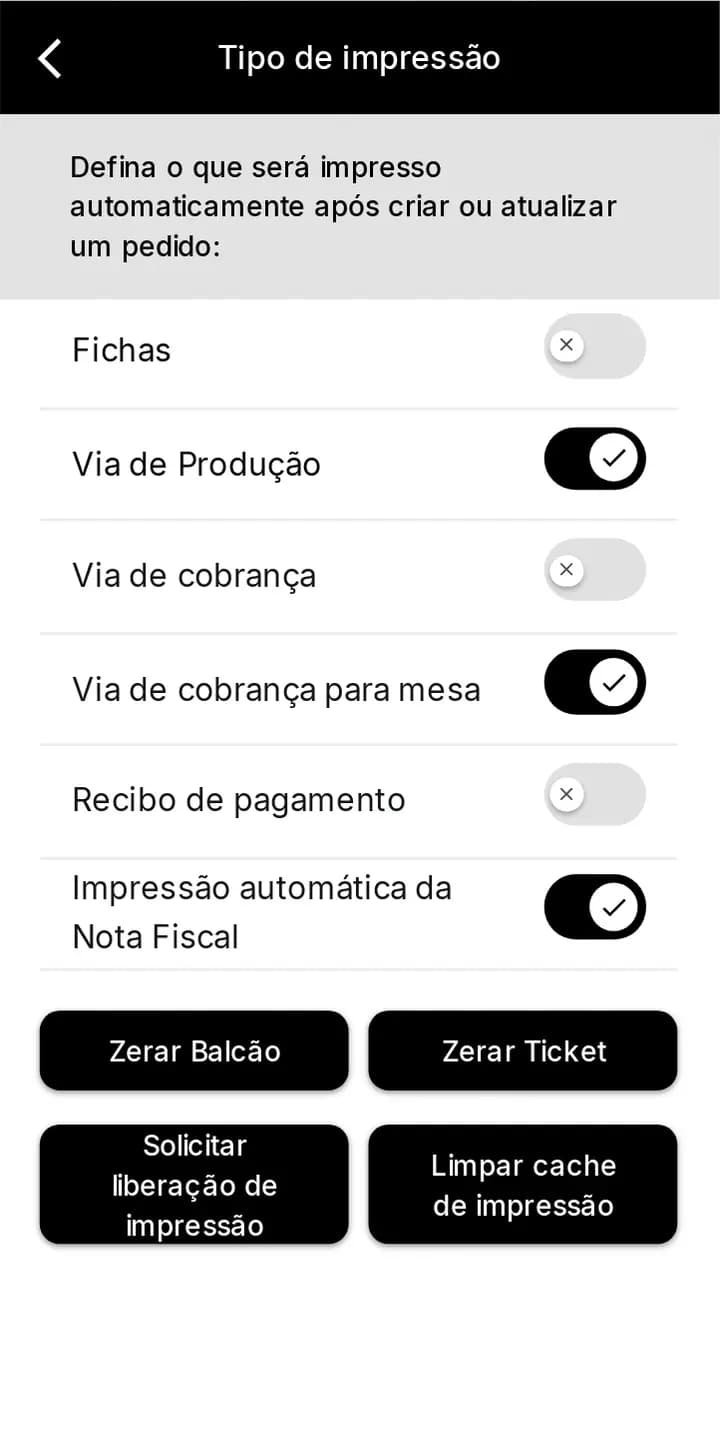
Step 4Print type. 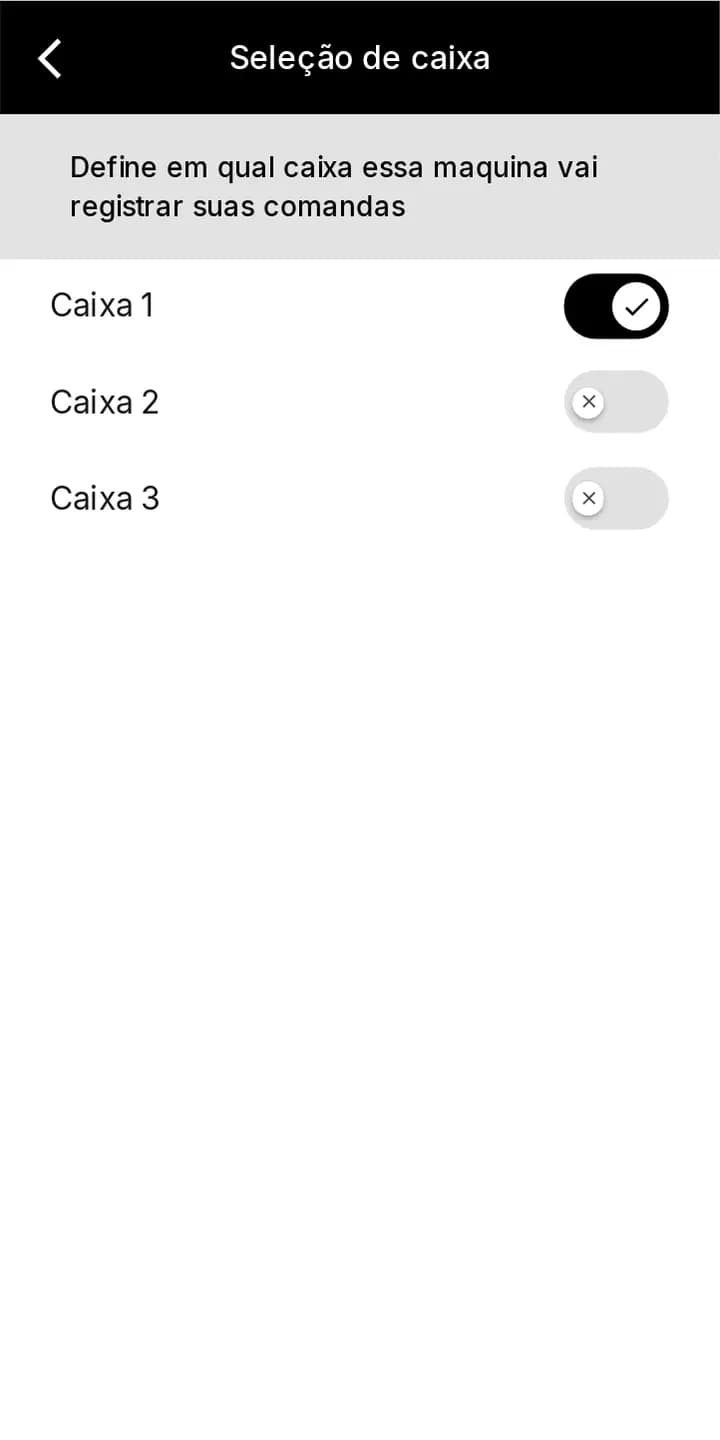
Step 5Cashier selection. 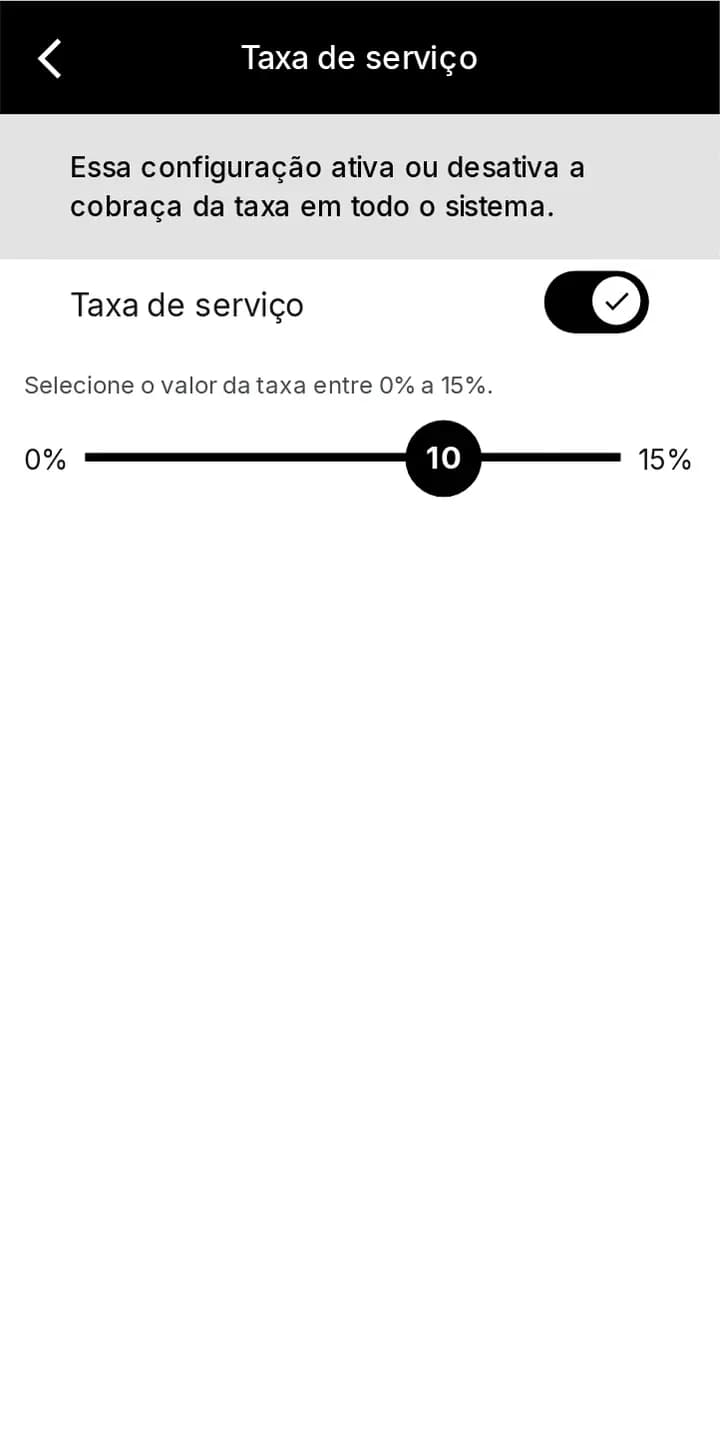
Step 6Waiter percentage (service fee). 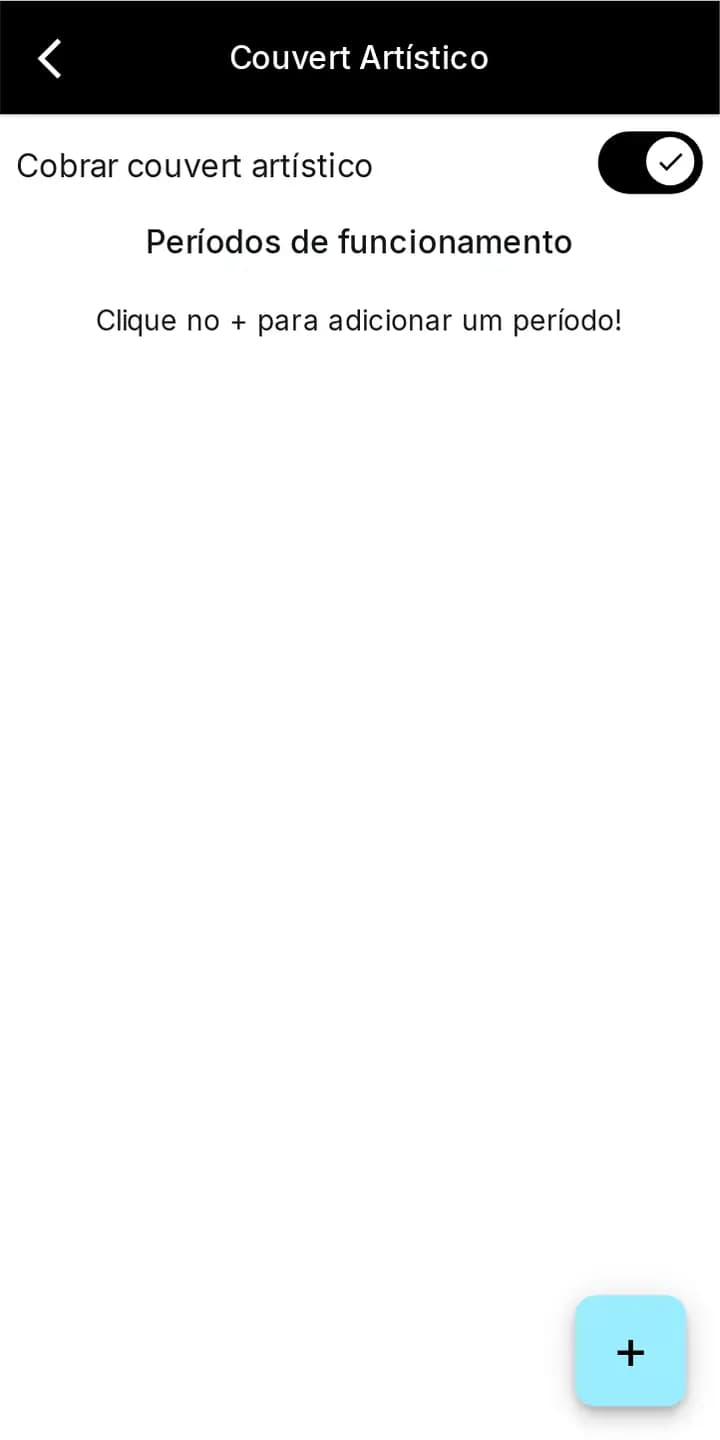
Step 7Live music cover charge. 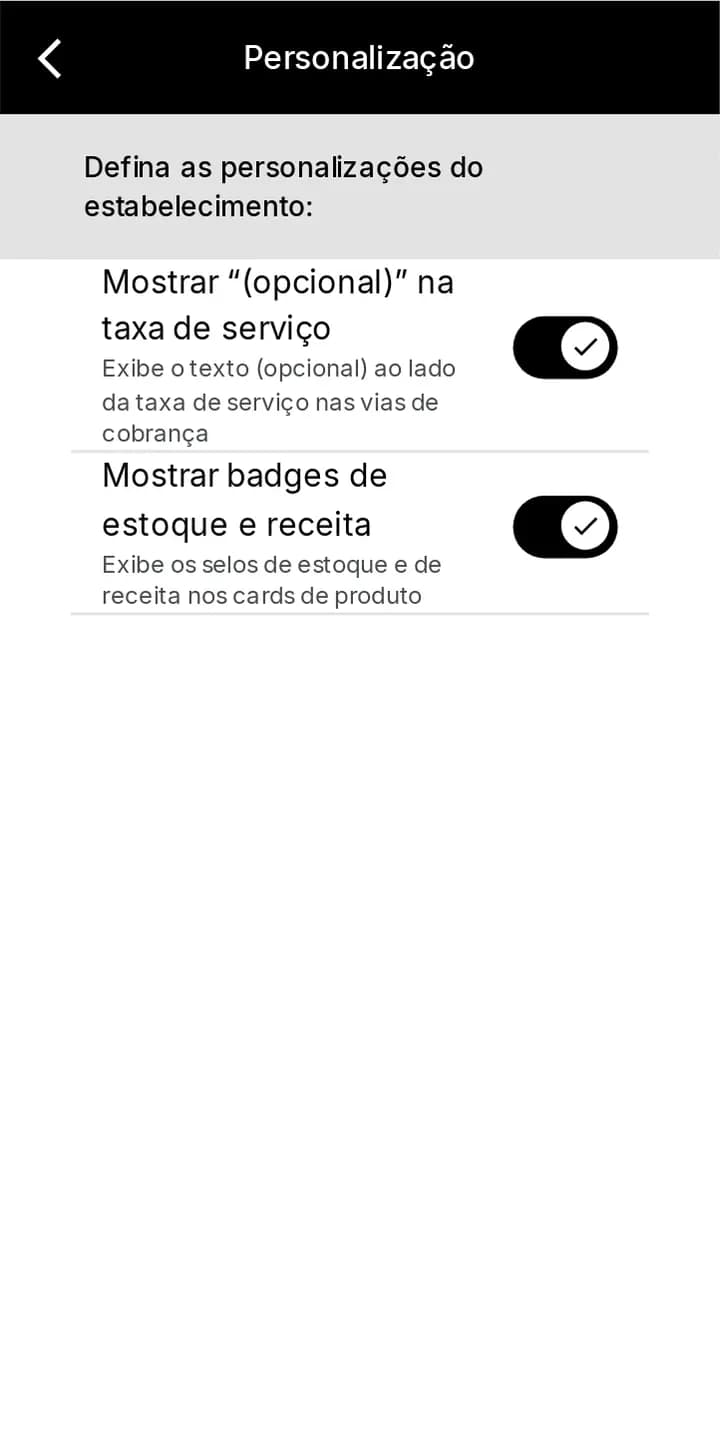
Step 8Customization. 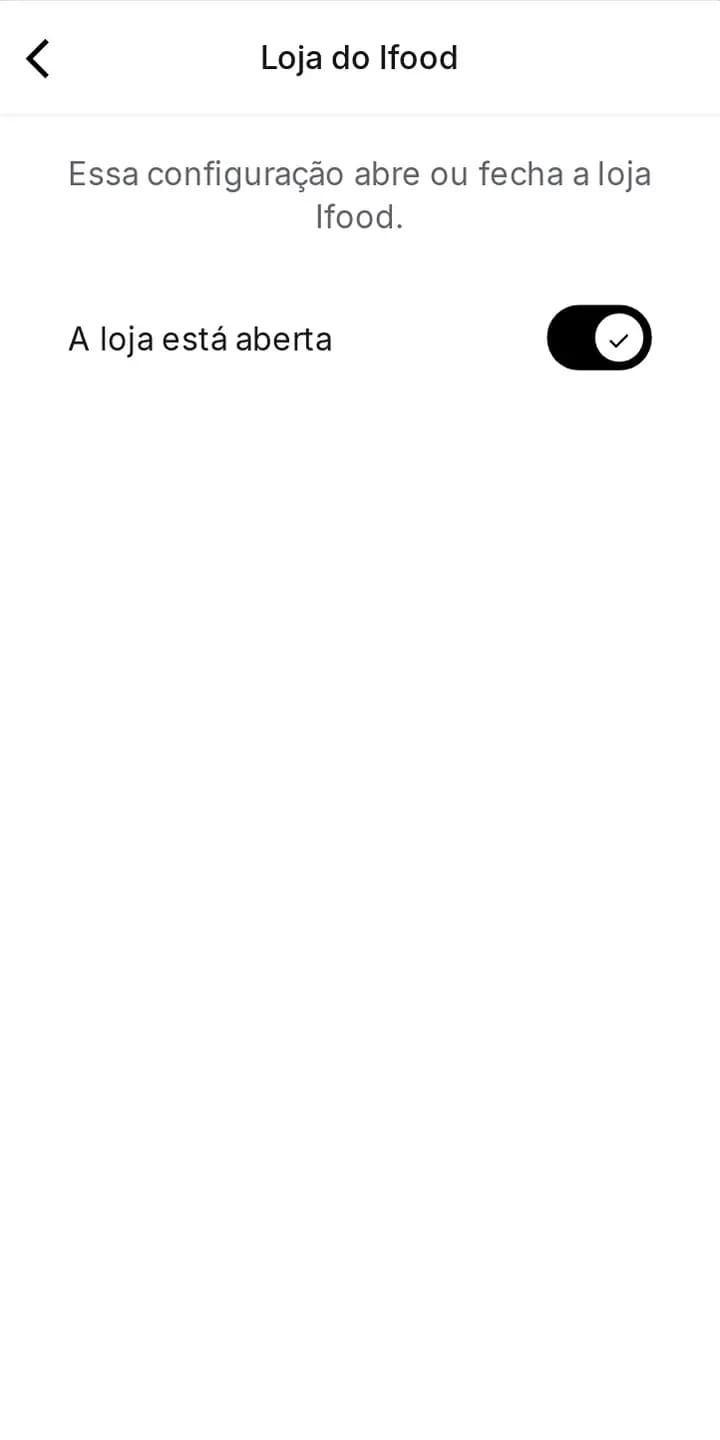
Step 9iFood store: open/close the store. 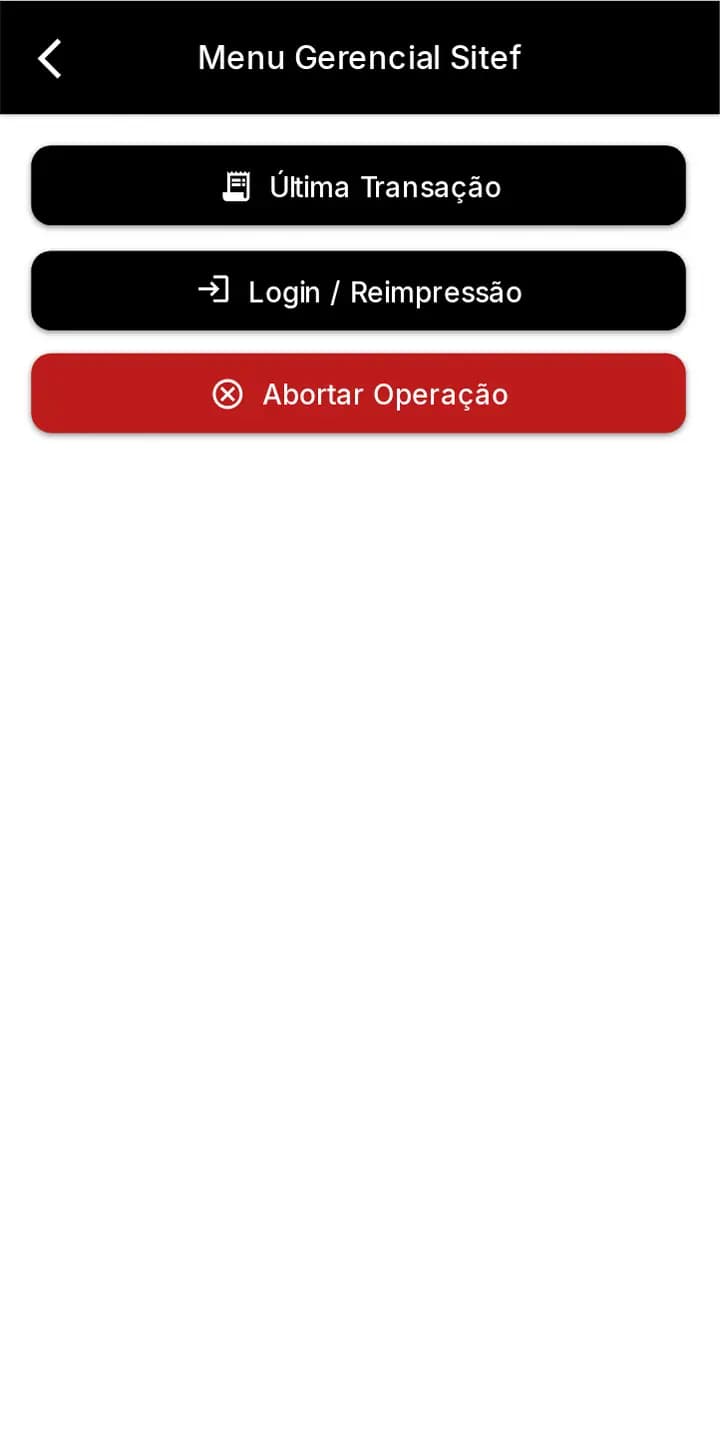
Step 10Sitef management menu.