The digital menu, step by step.
Each article explains what the customer does on the phone and shows the digital menu screens. Personal data is blurred.
Open the store and order
From the store's link or QR Code, the customer opens the menu in the phone's browser, with nothing to install.
How to
- Open the menu link the store sent you or scan the store's QR Code with your phone camera.
- The store page shows its name, whether it is open (Loja Aberta or Loja Fechada), the address, contacts and Tempo de preparo (preparation time).
- Tap Loja Aberta to see the Horário de funcionamento (opening hours). Tap the address to open the map.
- Tap Faça seu pedido (place your order) to go to the menu. The bottom bar has Lojas, Produtos, Pedidos and Perfil.
Screens
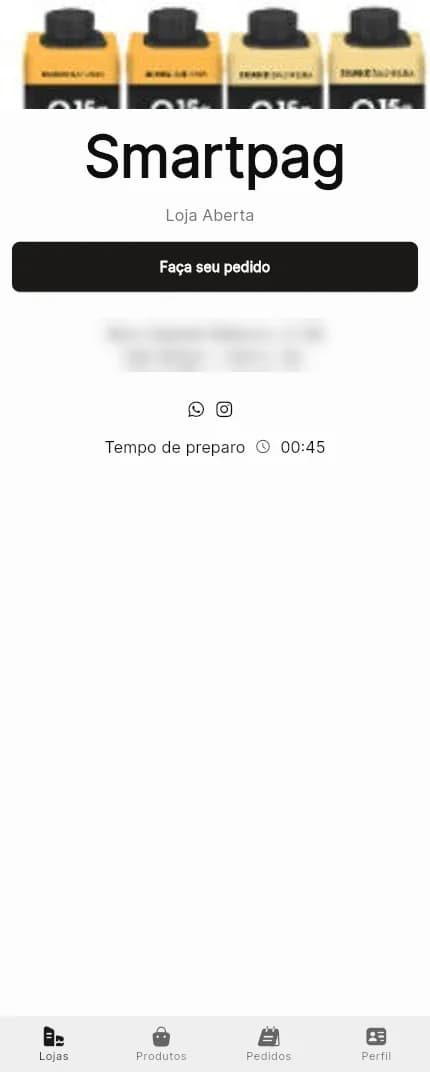
Step 1Store page: Loja Aberta, Faça seu pedido, address (blurred), contacts and Tempo de preparo.
Browse the menu and search
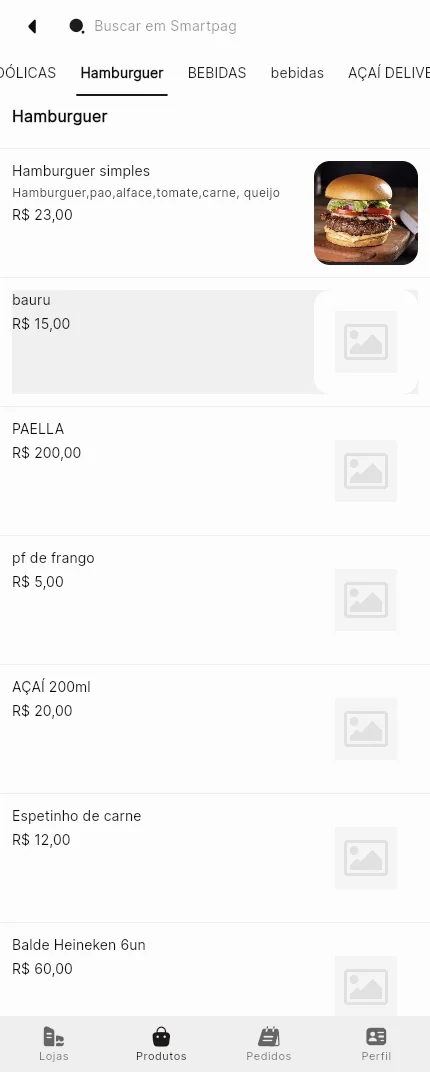
In Produtos, the menu is split into categories, with each product's name, description, price and photo.
How to
- Tap a category in the top bar to jump straight to it. Swipe the bar sideways to see the others.
- To look for a product, tap the magnifier and type in the Buscar (search) field. The X clears it.
- Pull the screen down to refresh the menu.
- Tap a product to see its details and add it to the bag.
Screens
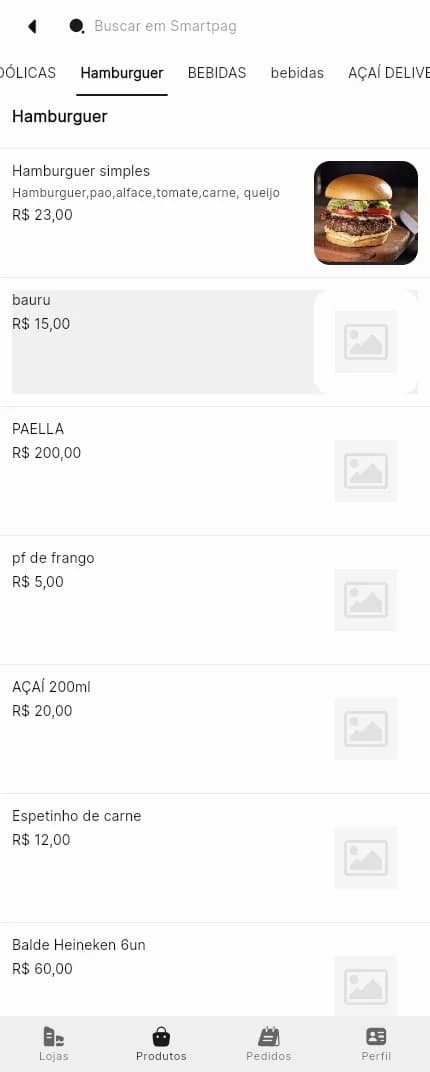
Step 1Open category: Buscar field at the top, category bar and the product list with price and photo.
View a product and add it
The product screen shows the photo, description, price, add-ons and a notes field.
How to
- If the product has add-ons, pick the options. Required groups must be filled in before adding.
- In Alguma observação? (any notes?), write a special request, such as no onions (up to 140 characters).
- Use − and + to choose the quantity.
- Tap Adicionar (add). The product goes to the bag and you return to the menu.
Screens
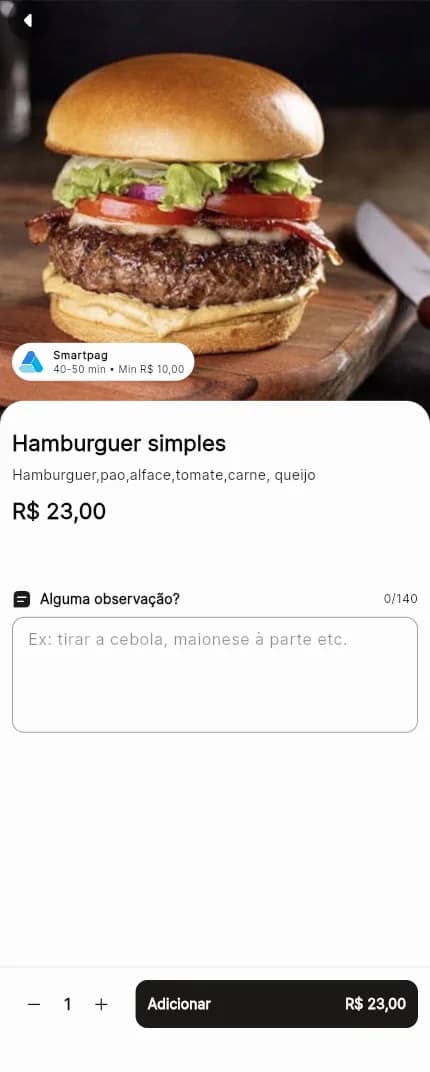
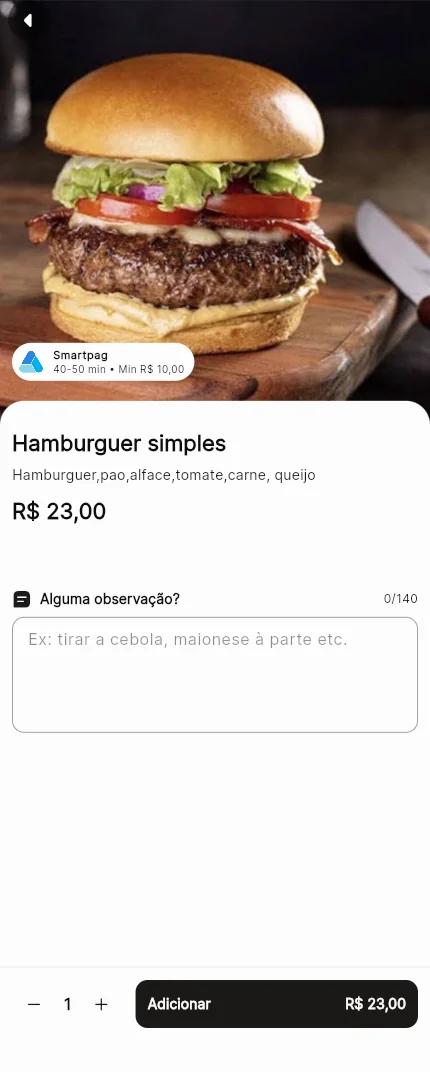
Step 1Product: photo, description, price, Alguma observação?, quantity (− and +) and Adicionar with the total.
Promotions
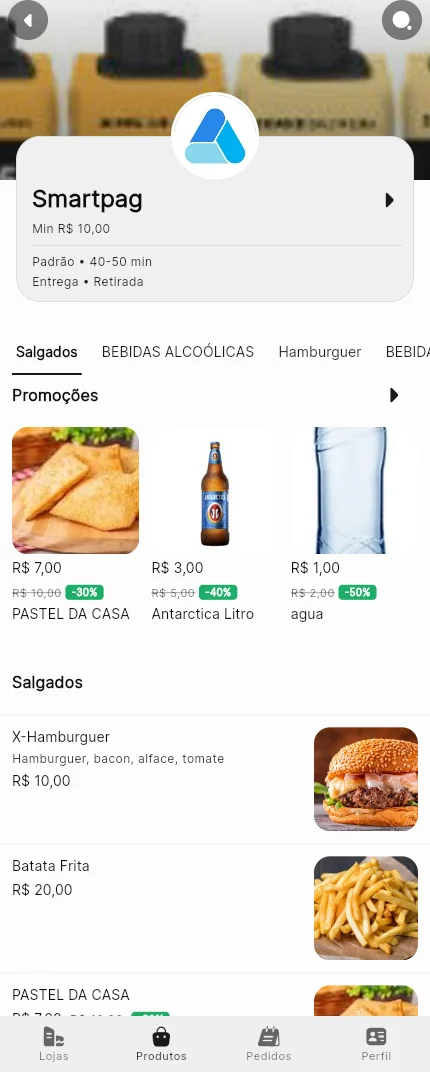
Products on sale show at the top of the menu, with the old price struck through and the discount in green.
How to
- In Produtos, see the Promoções strip right below the categories. Swipe sideways to see more.
- Tap the arrow next to Promoções to open the full list.
- Tap a promotion to open the product and add it to the bag at the sale price.
Screens
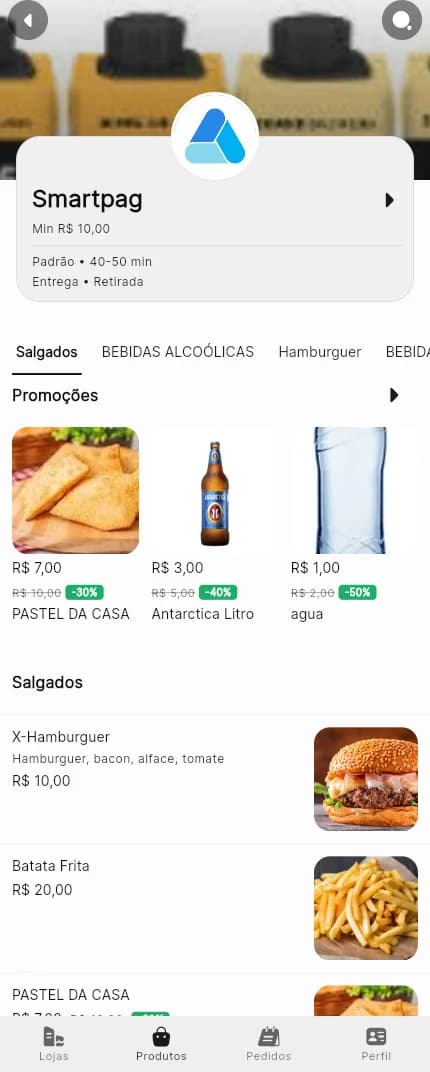
Step 1Menu: store details, categories, Promoções strip with old price and discount, and the product list.
Bag
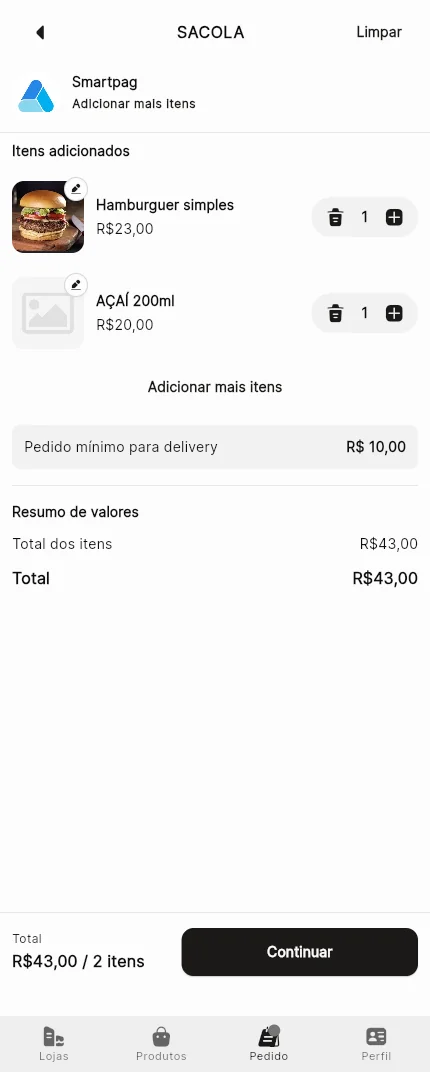
In the bag you check the items, change quantities and see the total before continuing.
How to
- Tap Ver sacola (view bag) on the menu or Pedido in the bottom bar.
- Use + to add more and the trash icon to remove an item. The pencil on the photo edits the item.
- Tap Adicionar mais itens (add more items) to go back to the menu, or Limpar (clear) to empty the bag.
- Check the Pedido mínimo para delivery (delivery minimum) and the Resumo de valores (summary) and tap Continuar.
Screens
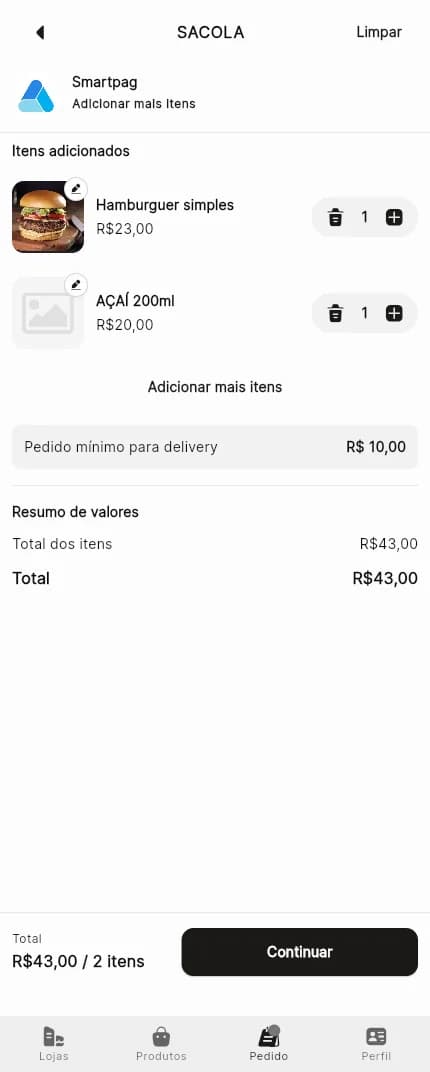
Step 1SACOLA (bag): added items, Limpar, Adicionar mais itens, minimum order, Resumo de valores and Continuar.
Customer details and order type
Before confirming, enter your details and choose how you want to get your order.
How to
- In DADOS DO CLIENTE, fill in Celular (mobile) and Nome completo (full name) and tap Continuar. If you have ordered before, the screen shows Cliente cadastrado.
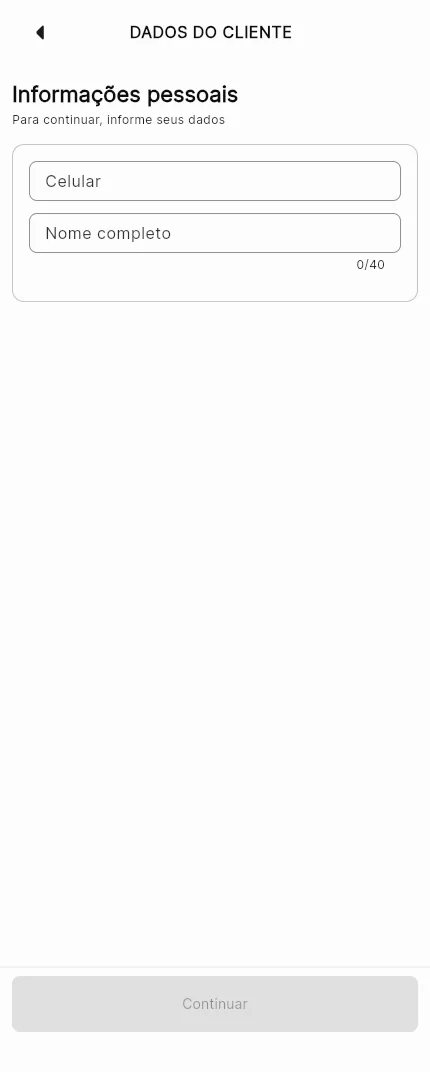
- In FINALIZAÇÃO (checkout), tap Alterar (or Alterar o tipo de entrega) to open Tipo do pedido (order type).
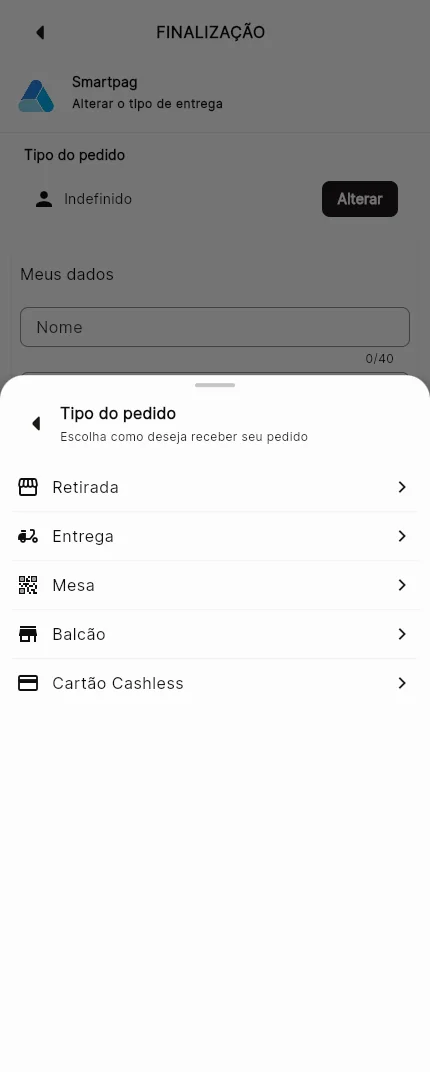
- Choose Retirada to pick up at the store, Entrega for delivery, Mesa to order at the table, Balcão to order at the counter or Cartão Cashless to pay with the event card.
- Mesa and Cartão Cashless ask for the table's QR Code; Balcão asks for the counter's QR Code. Only the options the store turned on are shown.
- Check the items, apply a coupon if you have one and tap Confirmar (confirm).
Screens
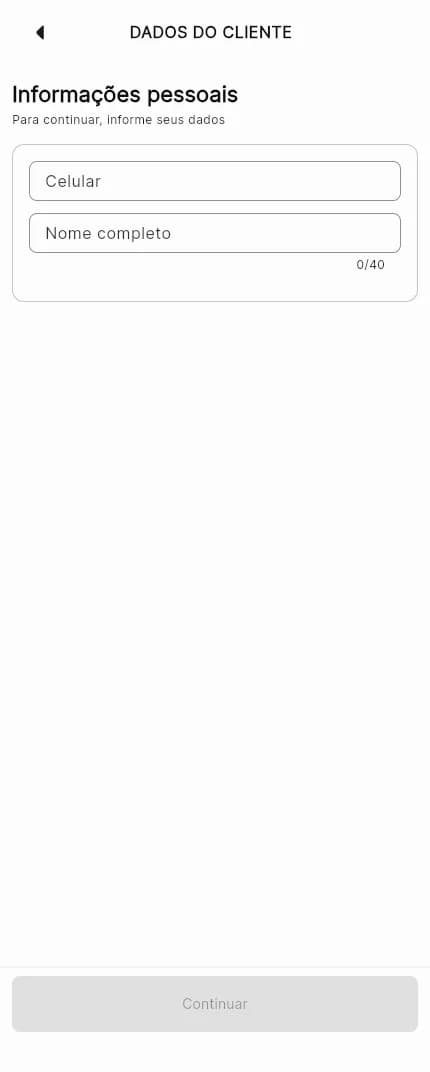
Step 1DADOS DO CLIENTE: Informações pessoais with Celular, Nome completo and Continuar. 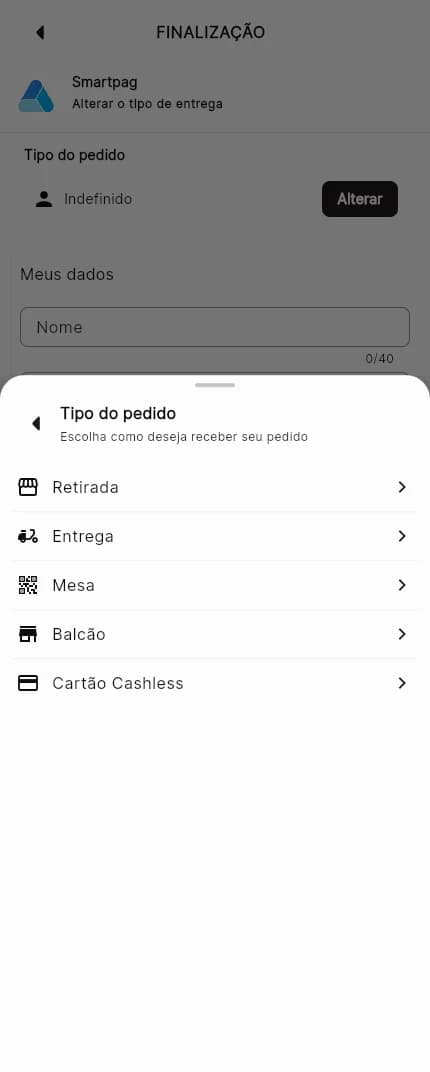
Step 2Tipo do pedido (order type): Retirada, Entrega, Mesa, Balcão and Cartão Cashless.
Address and delivery fee
After choosing Entrega, the customer enters the address and sees the delivery fee in the summary.
How to
- After choosing Entrega, the Novo endereço form opens. If you already have an address, tap Adicionar endereço (or Adicionar Novo Endereço).
- Fill in the CEP: the menu completes Endereço, Bairro, Cidade and UF. Enter the Nº and, if you want, the Ponto de referência.
- Tap Salvar.
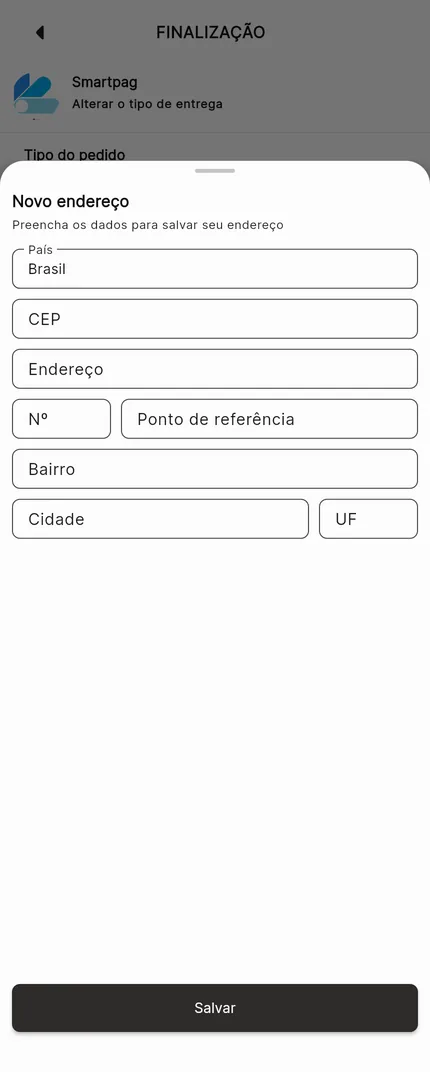
- In FINALIZAÇÃO, check the Endereço de entrega (tap Alterar to change it). Under Resumo de valores, the Entrega line shows the fee. In the footer, Total com a entrega appears.
- If the address is outside the delivery area or the order is below the Pedido mínimo para delivery, the app shows a warning. You can also turn on Agendar pedido and choose a date and time.
- Tap Confirmar to go to payment.
Screens
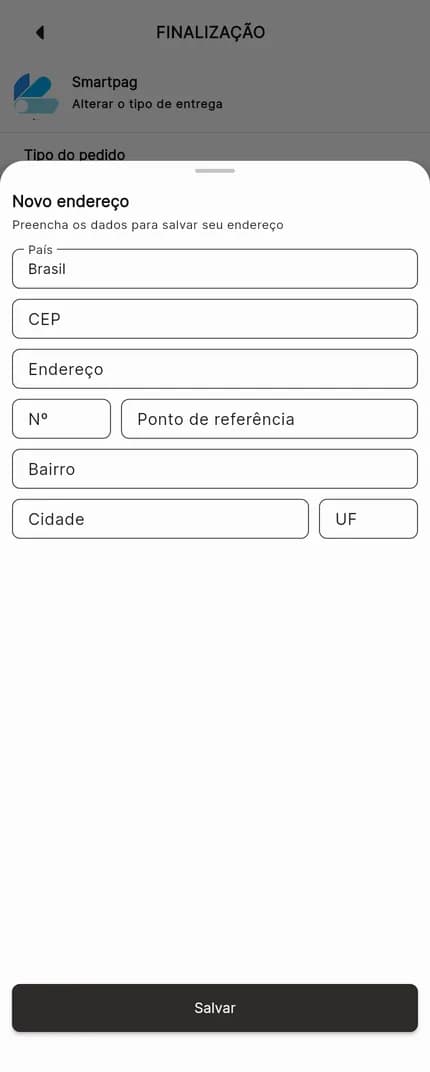
Step 1Novo endereço: País, CEP, Endereço, Nº, Ponto de referência, Bairro, Cidade, UF and Salvar. 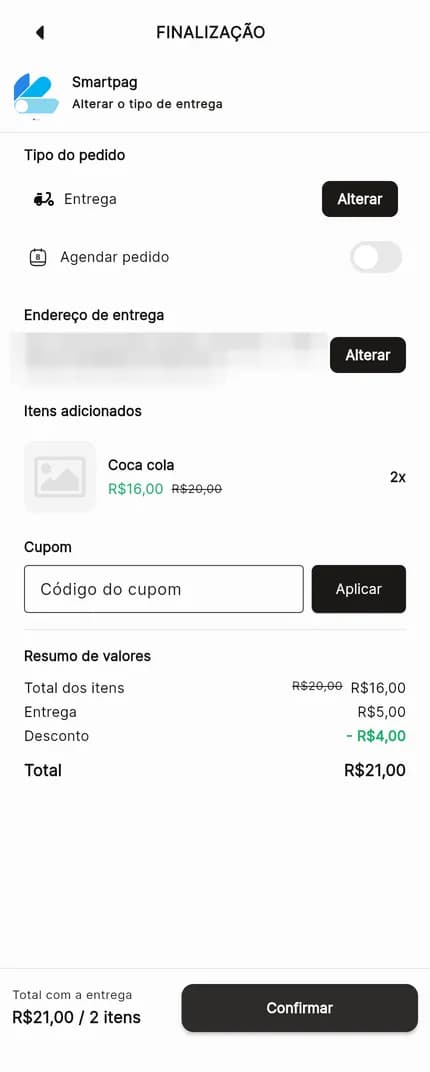
Step 2FINALIZAÇÃO in Entrega mode: Endereço de entrega (blurred), items, Cupom, Resumo de valores with the Entrega fee, Total com a entrega and Confirmar.
Payment
After confirming, the customer chooses how to pay: online (Pix or card) or in person, when the store offers it.
How to
- In FINALIZAÇÃO, tap Confirmar to open Pagamento.
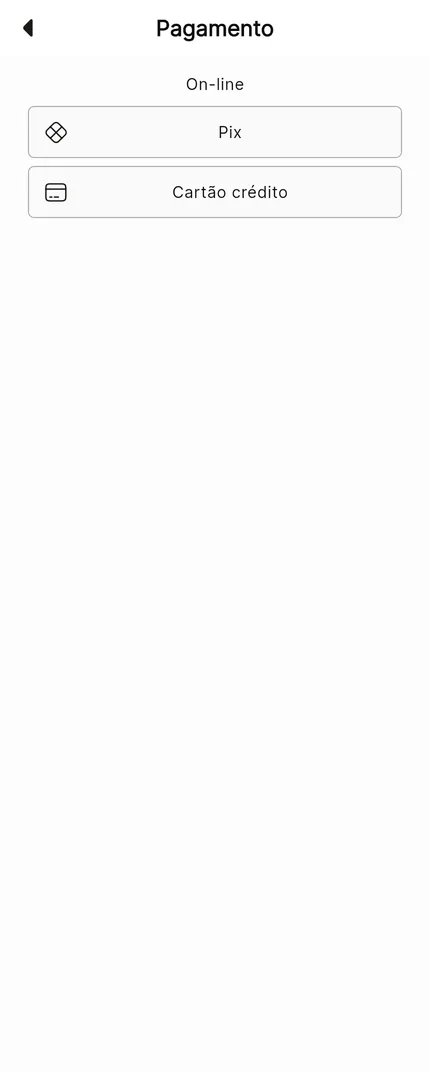
- Under On-line, tap Pix to pay with QR Code, or Cartão crédito to pay by card in the browser.
- In Pix, the screen shows the amount, QR Code, Copiar Link do QR Code and Verificar pagamento. After paying in the bank app, tap Verificar pagamento.
- In Cartão crédito, choose a saved card or add one and tap Confirmar.
- If the store also accepts in-person payment, the options appear in the Presencial group (Pix na maquininha, dinheiro, débito, crédito or PicPay). Only the methods the store enabled are shown.
Screens
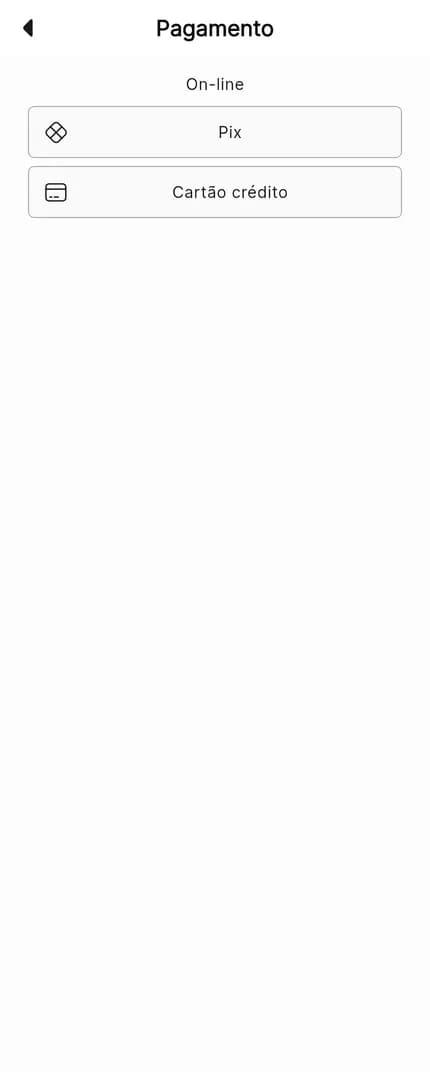
Step 1Payment: On-line group with Pix and Cartão crédito.
Sign in or create an account
With an account you keep your details and follow your orders. It lives in the Perfil tab.
How to
- Tap Perfil (profile) in the bottom bar.
- Already have an account? In Faça seu login, fill in E-mail and Senha (password) and tap Entrar (sign in). The eye shows the password.
- No account yet? Next to Não tenho uma conta, tap Cadastrar (sign up).
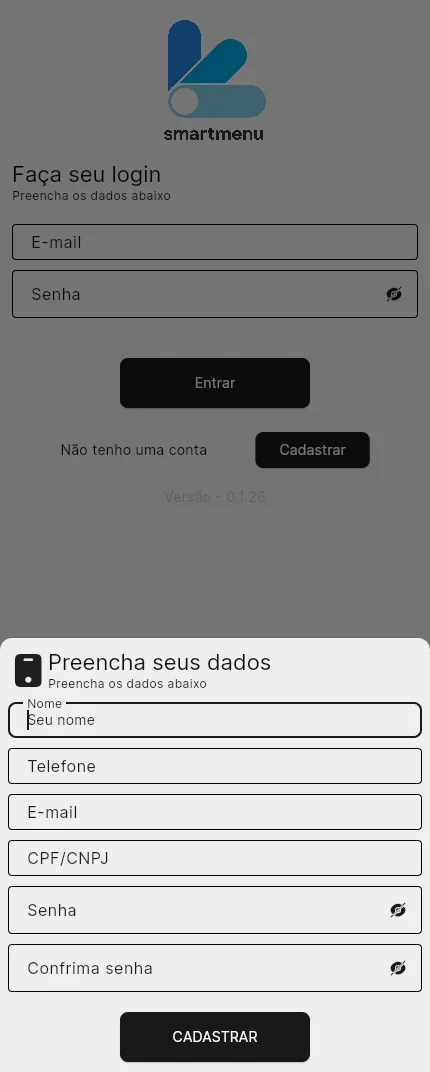
- In Preencha seus dados, enter Nome, Telefone, E-mail, CPF/CNPJ, Senha and Confirma senha and tap CADASTRAR.
Screens
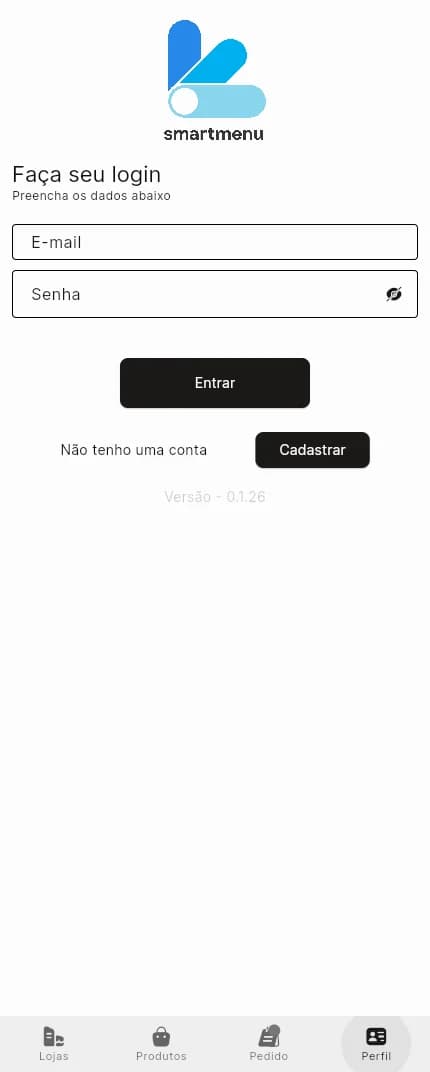
Step 1Profile without an account: Faça seu login with E-mail, Senha, Entrar and Cadastrar. 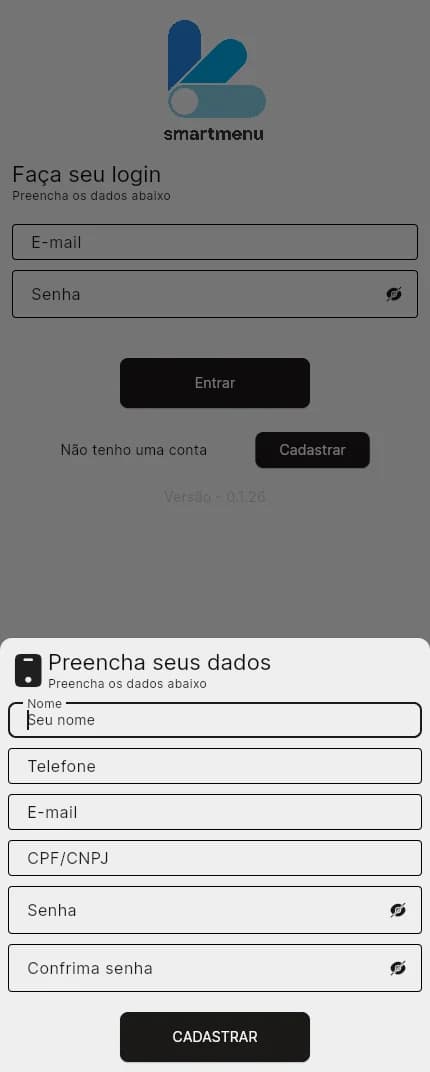
Step 2Preencha seus dados: Nome, Telefone, E-mail, CPF/CNPJ, Senha, Confirma senha and CADASTRAR.

Customer area
In Pedidos and Perfil the customer follows orders and, with an account, manages details, addresses and cards.
How to
- Tap Pedidos in the bottom bar to see this store's orders.
- Use the Todos, Em andamento and Concluídos filters. Tap an order to see details and status.
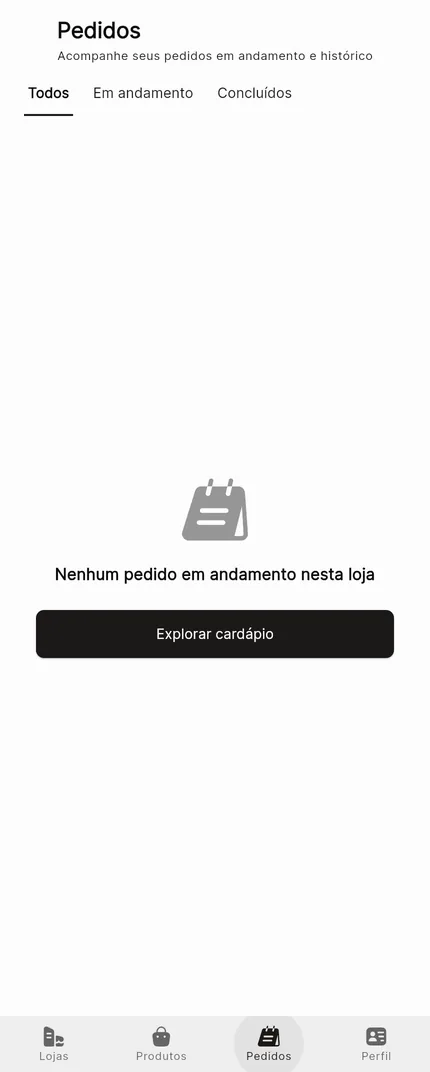
- If there is no order, the screen shows Nenhum pedido em andamento nesta loja. Tap Explorar cardápio to go back to the menu.
- Tap Perfil to sign in or create an account (see the Entrar ou criar conta article).
- After signing in, the profile gives access to edit details, saved addresses, cards and favorites.
Screens
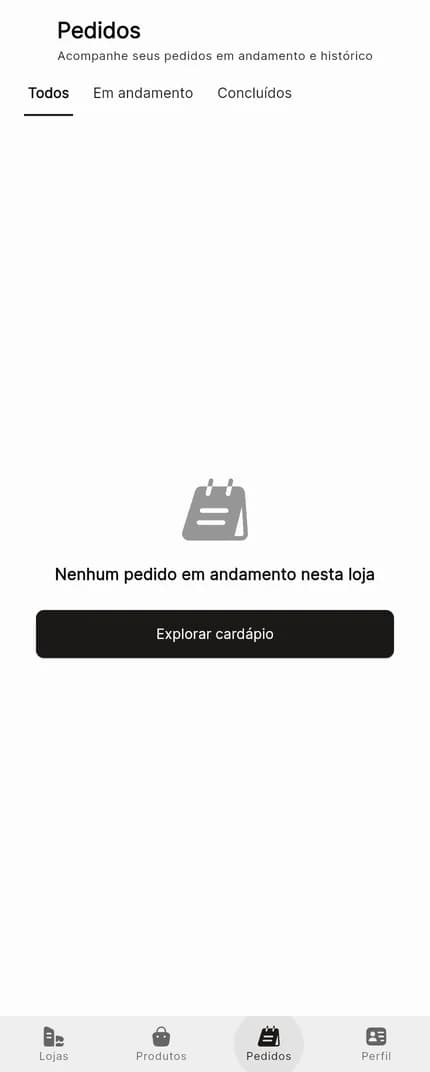
Step 1Pedidos: Todos, Em andamento and Concluídos filters, empty state Nenhum pedido em andamento nesta loja and Explorar cardápio.
Storefront (marketplace) by location
In the storefront the customer finds SmartPag stores nearby and picks where to order.
How to
- In Informe sua localização, tap Pegar a minha localização and allow access, or tap Digitar localização to type the address.
- At the store? Tap Ler QR Code and point the camera at the table or counter QR Code.
- In the storefront, search by name or filter by type of business and tap a store to open its menu.
- The storefront's bottom bar has Inicio, Pedidos and Perfil.
Screens
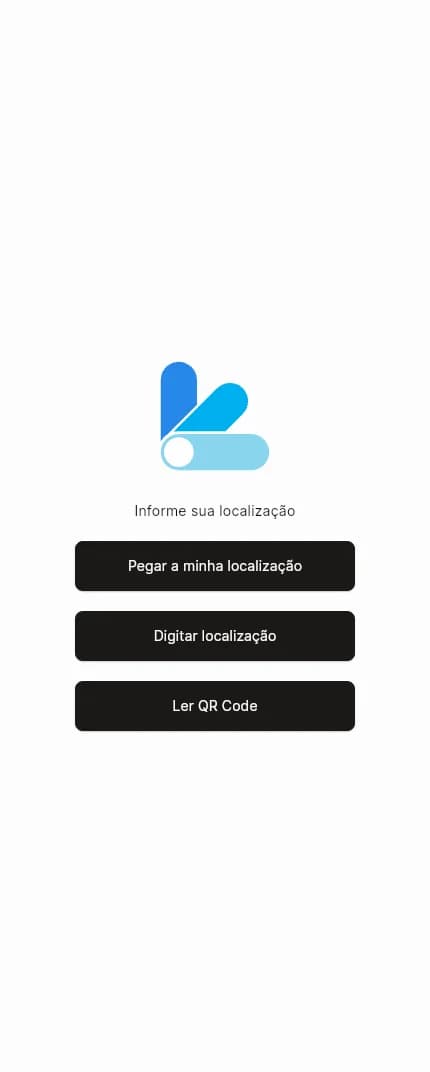
Step 1Informe sua localização: Pegar a minha localização, Digitar localização and Ler QR Code.